What you need to know about Folic Acid, Folate and neural tube defects

I have been aware of this topic for a long time. As a breastfeeding counsellor for decades, I had many breastfeeding moms that were told their baby’s tongue tie was connected to ingesting folic acid — either through food or prenatal supplements –during pregnancy. I’m not sure about that, but one thing was clear, the number of tongue ties increased drastically over the years I volunteered helping moms and babies.

Dr Sam Bailey from New Zealand has done a deep dive into folic acid that I found extremely insightful. Here are some things I learned in this comprehensive detailed video (which I have a link for below) :

The fortification of foods with folic acid was first suggested in 1991 and mandated in the USA in 1998. This would explain the sharp increase I noticed among moms struggling with tongue ties.

In this video you will also receive an in depth investigation into the history of folic acid recommendations as well as many helpful suggestions for how a pregnant mom can insure her baby has the best health possible.

I highly recommend this video for all pregnant women.

How to be our healthiest self? Avoid processed foods as much as possible. Most of them contain folic acid, especially commercially made cereal and bread products. Especially avoid labels that state “enriched” or “fortified”. Buy local fresh foods and cook for yourself! Find local suppliers of stone ground whole organic flours.

Folate, the natural form of folic acid is found in leafy greens, beef liver and lentils, among others.

Folate vs Folic Acid.

You might be aware that you should avoid supplements listing folic acid which a synthetic molecule manufactured in a laboratory. But you may not know that even if you see the word ‘folate’ in the ingredient list on your vitamin tablet, what the tablet may contain is synthesized folic acid. If you see “DFE” which means dietary folate equivalent, you can know that the tablet contains the synthetic version. Eating whole foods will provide higher quality nutrition than a tablet.

Becky Hastings collects information on health and tries her best to discover and share truth. By God’s grace, through Jesus Christ, I was saved, blessed with a husband of over 40 years, and five precious babies all grown up. I now get to delight as eleven grandchildren grow! Together we can help each other discover a healthy path in this crazy upside down world.

Easy Drop Scones

My mother in law was an expert scone maker from Scotland. I tried to learn from her, but the process of cutting the butter into the flour became a roadblock, so I quit trying! Then I found this extremely easy version. It may not be 100% the same authentic result, but it’s so easy and it comes very close! This is my experience and modifications to the recipe found here:

https://www.kingarthurbaking.com/recipes/easy-drop-biscuits-recipe

  • Preheat the oven to 450°F, with a rack in the top third.

The recipe calls for self raising flour. Since I never buy self raising flour, this is the equivalent: For every cup self-rising flour use one cup all-purpose flour, 1 tsp baking powder, 1/2 tsp salt and 1/4 tsp baking soda.

  • This recipe is ridiculously easy to scale up (or down). Simply use equal amounts of flour and heavy cream, by weight; each biscuit uses about 1 ounce of dough. So if you use, say, 4 ounces (113 g) of flour and 4 ounces of cream, you’ll make 8 biscuits. Or 12 ounces (340 g, or 3 cups) of flour, 12 ounces (1 1/2 cups) of cream — 24 biscuits.
  • Mix the flour and cream until smooth and cohesive. I have found that I generally need more moisture than is provided by the 1:1 ratio, so reserve some cream to add as needed. In my experience, 400 g flour needed almost 500 g cream – maybe more to get to a thoroughly mixed dough. Another option is to add dried fruit, like raisins or dates. I cut up one date and mixed into the flour before adding the cream.
  • For standard-sized biscuits, scoop 1-ounce balls of dough onto an ungreased or parchment-lined baking sheet; a tablespoon cookie scoop works well here. Leave a couple of inches between them. Not into scooping? Pat the dough 3/4″ thick and cut biscuits with a cutter instead, if desired. OR gently roll dough into one or two large cylinders. Use dental floss to cut into round discs.
    For larger biscuits, simply scoop the dough into 1 1/2-ounce balls, to make 8 biscuits; or 2-ounce balls, to make 6.
  • Brush the tops of the biscuits with cream, butter, milk, or water; this will help them rise.
  • I haven’t tried this yet, but the alternate recipe below, says put them in the freezer for 30 minutes before baking.
  • Bake the biscuits for 10 minutes, until they’re light golden brown on top. Bake larger biscuits a minute or so longer, or until they’re baked all the way through; break one open to make sure. Internal temperature +/- 200 when done.
  • Remove the biscuits from the oven, and serve warm, or at room temperature. Store leftover Easy Drop Biscuits, well-wrapped, at room temperature for several days; freeze for longer storage.
  • I have baked them directly on a pizza stone. It may cook too quickly and prevent full rising, but the bottom was brown!
  • The FULL SCONE experience includes serving them with butter, your favorite jam (mine is jalapeño blackberry jam from a local supplier!), grated cheese, and whipped cream.
  • Here is a different recipe with tips for YOUR BEST SCONES! Including pop in freezer for 30 minutes prior to baking for a rest for the gluten and increased flakiness:  https://www.kingarthurbaking.com/learn/guides/scone

Hope you ENJOY your experience with these easy scones! My biggest problem with the is the temptation to eat too many!

Becky Hastings collects information on health and tries her best to discover and share truth. By God’s grace, through Jesus Christ, I was saved, blessed with a husband of over 40 years, and five precious babies all grown up. I now get to delight as eleven grandchildren grow! Together we can help each other discover a healthy path in this crazy upside down world.

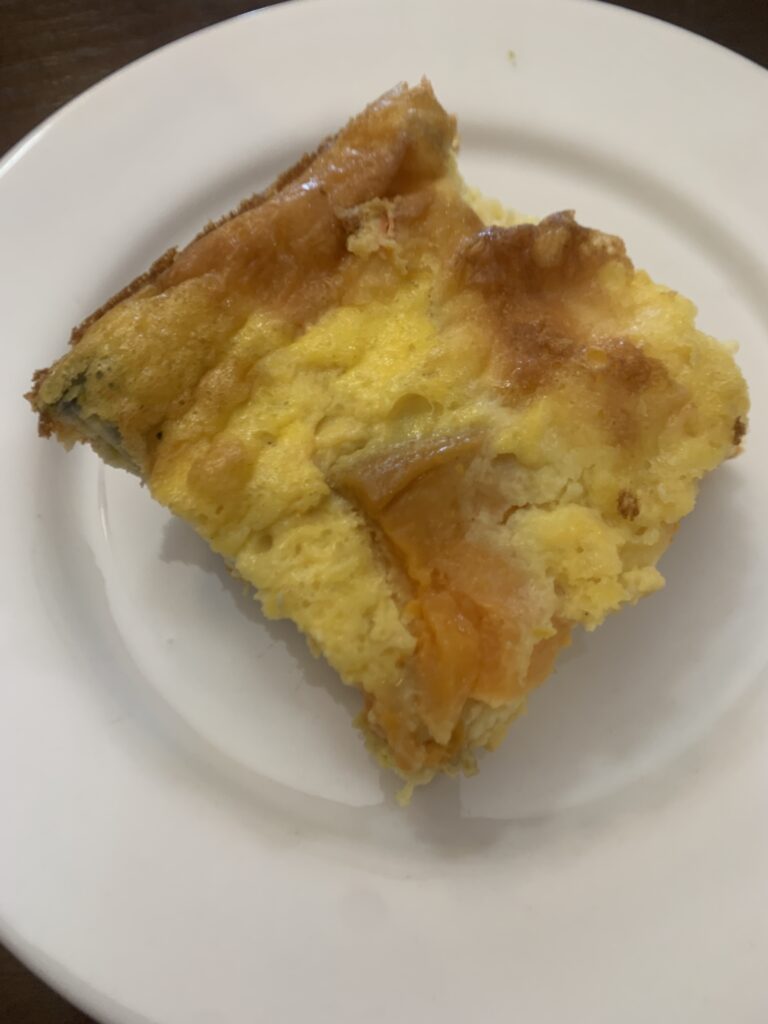
Easy Crustless Quiche

This is my go-to recipe to take to any type of pot-luck gathering. So easy and so delicious. Combine protein and veggies that you have on hand to make a good combination. It’s a very flexible recipe and has never failed me.

  • 6 Eggs (more or less can be used – depending on your supply!)
  • 8 oz of ricotta cheese or heavy cream or cottage cheese
  • salt and pepper

Blend those ingredients in a blender. Add 1 Tbl any type of flour for thickness. Or, you can substitute a few tablespoons of cooked sweet potato and leave out the flour.

Apply butter to your preferred oven proof dish. Layer whatever ingredients you have available in the bottom. Things like:

  • chopped whole onion (can be sautéd, or not)
  • salmon chunks, or other protein
  • cooked sweet potatoes, or chopped broccoli, or zucchini, or any vegetables you have,

Top with 1/2 – 1 cup grated strong cheddar cheese. Amount can depend on your supply, and your budget, but the more the better!

Optional: sprinkle feta cheese around; other herbs or seasoning as desired.

Pour liquid egg mixture over everything. Bake at 400 for about 30 minutes. I like to test doneness with an internal thermometer (I LOVE these things – absolutely changed my life in terms of baking and cooking! No more guesswork. You have a measurable way to determine doneness!). Temperature for quiche is 165 – 185 Fahrenheit.

Allow to cool a bit. Cut into squares. Can be eaten hot, warm or cold! Leftovers are great.

Flourless High Protein Lemon Waffles

  • 1/2 apple
  • 1 Cup oats
  • 6 eggs
  • zest and juice of one lemon
  • 1.5 tsp baking soda
  • 1/2 tsp salt
  • 1 Tbl coconut oil

Combine all ingredients into a high powered blender. Blend until smooth. Pour onto hot waffle iron. This will make about 4 waffles for me. If you need to make a larger quantity, use the whole apple, add more oats, add more eggs or add some milk. The recipe is flexible and forgiving.

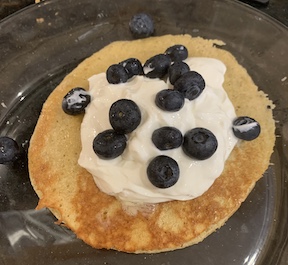
Serve with any or all of these: syrup, plain yogurt, blueberries, cinnamon and a touch of lemon juice! When you use all organic ingredients, you have organic waffles!

Easy peasey! Delicious

Becky Hastings collects information on health and tries her best to discover and share truth. By God’s grace, through Jesus Christ, I was saved, blessed with a husband of over 40 years, and five precious babies all grown up. I now get to delight as ten grandchildren grow! Together we can help each other discover a healthy path in this crazy upside down world.
Plarn How To

Plarn is a term for ‘plastic yarn’ made from grocery shopping bags cut into strips. I’ve been making plarn bags for several years. This short video is a. demonstration of the process of turning your plastic bags into useful ‘plarn.’ I made it in one take a few years ago. It’s quick, but covers all the basics. If you don’t grasp it the first time, just watch iit again! If you don’t yet know how to crochet using some Youtube videos on the basics. I’d suggest starting with cotton yarn and making some simple squares that can be used as dish cloths. Once you get the basics, you are ready for plarn!

i enjoy my plarn bags and use them daily. I get a lot of compliments and most people have no idea what it is made out of at first.

How did I get started? In about 2014 I began crocheting squares. I’d learned to crochet from books in my early twenties, but only took it up again after several decades. I made quite a few baby blankets for gifts and found it very relaxing. I was dreaming up new things to make and wondering about all the money I wanted to spend on yarn! After one huge shopping trip I arrived home and had plastic bags containing groceries all over the kitchen floor. As I glanced at them I wondered – is there any way to turn those bags into yarn??? After I put away all the groceries I did a quick internet search and discovered ‘plarn’. There were MANY people already doing it! I had the feeling that I was very late to this party! I began to make my plarn and my first bag immediately! And I was thrilled with the result. I’ve got more photos of bags and things I’ve made here:

https://www.facebook.com/UpCycledbyBecky/photos

Becky Hastings collects information on health and tries her best to discover and share truth. By God’s grace, through Jesus Christ, I was saved, blessed with a husband of over 40 years, and five precious babies all grown up. I now get to delight as ten grandchildren grow! Together we can help each other discover a healthy path in this crazy upside down world.

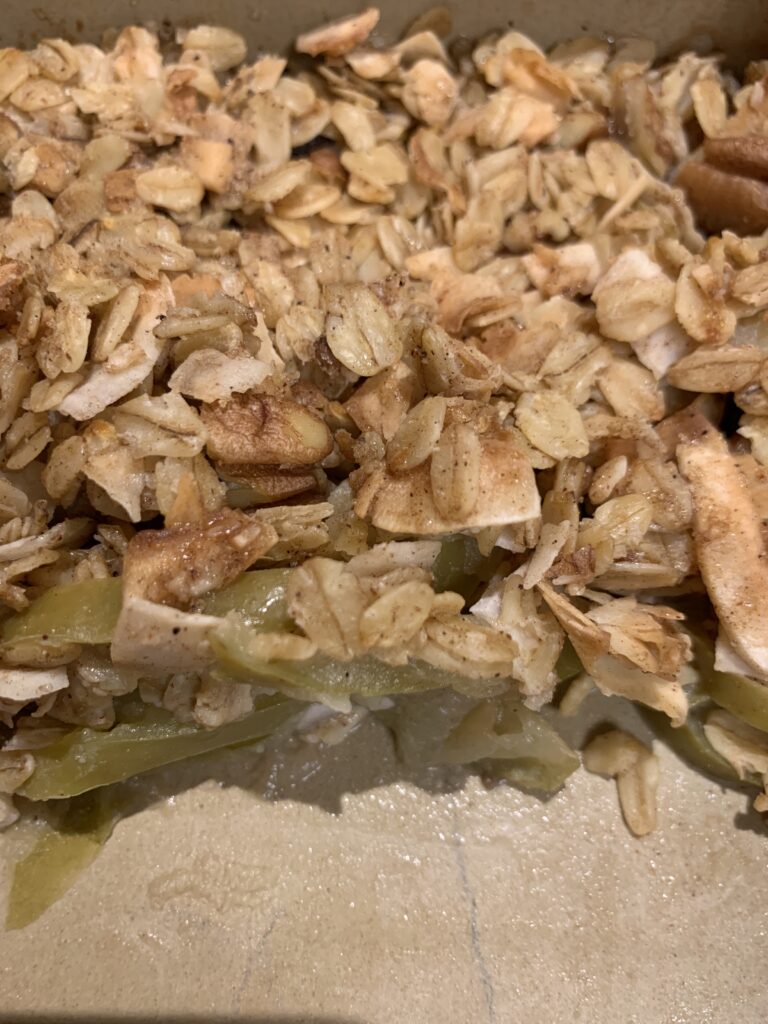
Apple Crumble

Baked apples are a delicious treat. Apples baked with a crumbly oat topping are VERY FREQUENT occurrences in our home. I put together a quick apple crumble on Sunday to take to a Neighborhood Thanksgiving feast and Leah, who decided it was superior in every way to any I had ever made before, demanded a recipe. Now, she knows I don’t follow recipes, but she told me to write out what I had done quickly before I forgot. She didn’t just want quantities, she wanted it with “times and details”.

  • 1/2 cup of raisins

Place raisins in a mug, add boiling water to cover, and allow to sit while you prepare and precook the apples.

  • +/- 8 Organic Granny Smith apples, washed, sliced (no need to peel)

Butter a baking dish, place the sliced apples in, cover with aluminum foil and bake at 350 F for about 15 minutes. I probably baked mine longer, but I think I overdid it, so I’m adjusting the time for an even more ‘perfect’ result!

  • one stick of butter

Use softened butter. I never recommend microwaves. If your butter is not soft, cut it up and put it in a large glass bowl and place it in the oven (while it is heating up, or while the apples are cooking) so that the butter will soften (about 10 minutes). Even if it isn’t fully melted, remove the glass dish from the oven and stir the butter — CAREFULLY — it’s hot. Allow to cool, then add:

  • 2 cups whole organic oats
  • 1 cup organic coconut flakes (Bob’s Red Mill is my favorite)
  • 1 tablespoon cinnamon
  • 3 tablespoons sugar (or as desired)
  • 1/2 cup pecan pieces
  • chopped dates (optional, or to replace the sugar)
  • pinch salt

Stir together. Drain the raisins and add to the apples. Cover with the crumble mixture. Pack it down slightly. Bake about 20 minutes at 350 F.

Be sure to have vanilla ice cream on hand. There are some in my family who will refuse to eat even one bite without vanilla ice cream! There are others who would never combine their deserts and want each one separately! You may also top with fresh cream, whipped cream, milk or yogurt! Enjoy

Becky Hastings collects information on health and tries her best to discover and share truth. By God’s grace, through Jesus Christ, I was saved, blessed with a husband of over 40 years, and five precious babies all grown up. I now get to delight as ten grandchildren grow! Together we can help each other discover a healthy path in this crazy upside down world.
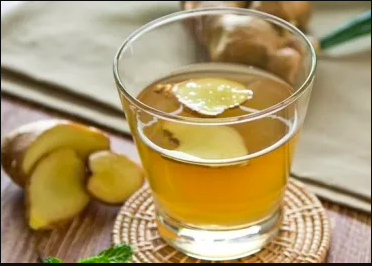
Ginger Ade/ Tiger Water Demonstration

Meet my friend Danielle who started a Youtube channel about her homesteading because she needed another thing to add to her long list of accomplishments on her homestead: Chickens, beekeeping, goats, a greenhouse in the making, fruit orchard, growing veggies… all while providing loving childcare to a friend’s baby everyday, and volunteering at a few different organizations!

Ginger Ade (AKA Tiger Juice)

Ever need a special ‘punch’ or drink for a party? While we might think we need to stop at the grocery store and buy a juice or a jug of something to serve to our guests, here is another option.

Recently our youngest daughter and I hosted a baby shower ‘tea party’ for our older daughter who is expecting her second baby. Since it’s always nice to have a cold drink to offer in addition to the hot tea, I thought about what options I had in my kitchen. Last minute is often when I get my best ideas, and the result was enjoyed so much that I received many requests for the ‘recipe’. I didn’t really follow any recipe but combined ideas I’ve learned over the years*. Here is what I did, with a few suggestions for variations.

Basically, you are making a ‘tea’ with fresh ginger and jalapeño. You can make it strong, sweeten it with honey, and dilute it to taste.

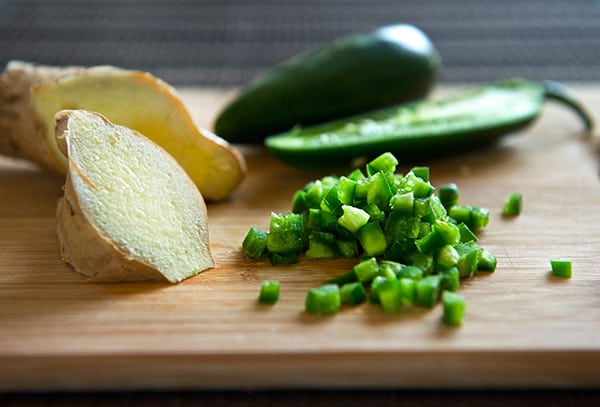
  • 1 inch fresh ginger grated. Vary the amount according to your palate. More ginger will equal more ‘burn’.
  • Several slices of jalapeño or other hot peppers (OPTIONAL, but has great health benefits!). Test your pepper for the hotness level. You can use more slices of a mild jalapeño. Adjust based on how ‘hot’ you or your guests can handle!
  • Filtered water
  • local honey (add as your tea is cooling)
  • fresh squeezed juice of one lemon, lime, or orange (optional, add to cooled tea to give a natural vitamin C boost)

Combine ginger, peppers, and water to nearly fill a sauce pan. Glass is best. Stainless steel next best. You can also use a slow cooker if you have the time. Adjust the quantity of ginger to the size of your pot and the amount you are making.

Bring to a gentle boil, cover, and allow to simmer for at least 1/2 hour (can go for an hour in the saucepan, or use a slow cooker for a few hours, or overnight).

Allow to cool. While cooling, pour through a filter to strain out the ginger pieces. Alternatively, if you aren’t in a hurry, you can blend the mixture, and then pour into the strainer, using a rubber spatula to push the mass through it. I think I prefer blending – it feels like you get more ‘good stuff’ that way.

Add honey to taste. Stir. Add a lot of ice (made with filtered water). The ice will not only cool it, but will also serve to dilute it. Add more water as desired.

Ginger could be the best “flu shot” EVER!

Why Ginger? A quick internet search reveals many fabulous benefits of ginger:

  • powerful antibiotic properties and is able to effectively target some ‘antibiotic resistant strains’
  • calms nausea
  • soothes sore muscles
  • eases arthritis symptoms
  • curbs cancer growth
  • lowers blood sugar and may help with weight loss
  • eases menstrual period pain
  • boosts bone health
  • strengthens the immune system
  • may help lower cholesterol
  • may help improve brain function and protect against Alzheimer’s disease

Gingerol is the main bioactive compound in ginger and is responsible for much of ginger’s medicinal properties. Gingerol has powerful anti-inflammatory and antioxidant effects.

Ginger has long been used as a natural remedy to fight various ailments. Now, new research is showing that ginger may also be effective in fighting harmful bacteria and viruses.

A recent study found that ginger extract was able to kill several types of bacteria, including some that are resistant to antibiotics. The study’s authors believe that the compound responsible for this effect is gingerol, which has potent antibacterial and antiviral properties.

…Modern science is now discovering that this humble root may have powerful anti-cancer properties. One study found that ginger contains over 40 antioxidant and anti-inflammatory compounds. These substances work together to inhibit the growth of cancer cells and stop them from spreading.

https://lungcancertips.com/10-most-amazing-health-benefits-of-ginger/

Note to self: Make Ginger Ade more often!

*This is a simpler, tastier version of Kick ‘Um Juice, a powerful concentrate many have used in their victory over cancer. Another variation I experimented with is Kick ‘Um for Kids a great immune boost to give to children during cold and flu season.

Becky Hastings collects information on health and tries her best to discover and share truth. By God’s grace, through Jesus Christ, I was saved, blessed with a husband of over 40 years, and five precious babies all grown up. I now get to delight as ten grandchildren grow! Together we can help each other discover a healthy path in this crazy upside down world.
Sourdough Scones

(aka biscuits in the Southern USA)

I’ve tried a lot of different scone recipes. My mother-in-law was an expert scone baker and rarely deviated from her standard scone recipe. She would often add raisins – or ‘currants’ and occasionally add cheese. But whenever I tried her recipe I didn’t get the same results. I think it had something to do with the handling of the batter.

Today I made scones with some sourdough starter I had just ‘awakened’ and was so thrilled with the results, I had to document the recipe!

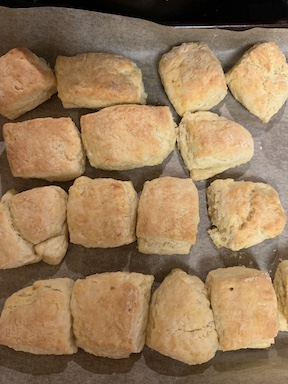
This sourdough scone recipe couldn’t be EASIER! It was so quick and easy to make. With a well floured surface and minimal handling, it was a breeze! After forming the dough into two large squares about an inch high, I used a large knife to cut shapes nearly like squares and slid them on the baking tray. The big puff and delicate flake was amazing! The recipe made about 18 nice size scones, but could easily be cut in half.

There are two specific tools I want to mention. I never had these when attempting my MIL’s scones and perhaps they are one of the reasons for the flakey delicious scones! The pastry cutter was purchased after a lot of pressure from my daughter – and what a difference! The Danish Whisk makes mixing the batter quick, easy, and light. Every kitchen baker needs these two tools!

Feed the starter in the morning, by combining into a jar:

  • 100 g sourdough starter (or discard)
  • 100 g filtered water
  • 100 g organic all purpose flour

Mix well in the jar with a fork until you don’t see clumps of flour. Cover the jar with a paper towel held in place with a rubber band. I like to put it into a measured mason jar, or you can mark the starting level with a rubber band outside the jar. Allow to sit at room temperature for 4 or more hours.

The sourdough mixture should double in bulk until almost 16 ounces (2 cups). This should take 4+ hours.

In a bowl combine 

  • 2 cups organic all purpose flour
  • 1 tsp salt
  • 4 tsp baking powder
  • 225 grams (1 cup butter) (I used room temperature butter, but it can be cold). If the butter is cold, cut up into small pieces.

Mix with a pastry cutter (aka dough blender; or two knives).

(Preheat oven to 425 if you haven’t already)

To the sourdough mixture, add

  • 2 eggs

The liquid should now measure 16 ounces. Add the wet mixture to the flour mixture and mix with a Danish Whisk or wooden spoon until all mixed. 

If the mixture is too dry, add 1 – 2 tablespoons of milk.

Turn out onto well floured surface. Divide into two for easier handling. Using floured hands, and minimal handling, form into a round or square about 1 inch thick. Flour a large French Chef type knife and cut into squares approximately equal size. 

Place onto a large baking tray lines with parchment paper. Place on a rack in the top 1/3 of the oven and bake at 425 degrees F for 15 minutes or until internal temperature reaches 205 degrees F. The scones will be golden brown on top.

Serve with butter, jam, honey, or whatever you like. The fine restaurants we’ve visited in Scotland and South Africa usually serve scones with jam and fresh whipped cream! Scones may be stored in an airtight container or frozen if not eaten immediately.

My friend gave me some sourdough starter quite unexpectedly in 2020. It was the first time I’d ever experimented with it. After a long run of making successful sourdough bread and baked goods, I managed to ‘kill’ my starter due to neglect. After a break lasting several months, I purchased a pack of dehydrated sourdough starter from Cultures for Health and followed their directions. I’m still learning how to care for my starter and how to keep my starter healthy! I made my own dehydrated starter to keep on hand as a back up. I can also share it with friends!

https://www.culturesforhealth.com/learn/sourdough/how-to-obtain-sourdough-starter/

Here is a good overall introduction video on maintainIng your sourdough starter:

I’d love to learn about your experiences with sourdough – and your best sourdough ‘discard’ recipe suggestions!

Becky Hastings collects information on health and tries her best to discover and share truth. By God’s grace, through Jesus Christ, I was saved from the life of a rebel. I’ve been blessed with a husband of 41 years, and five precious babies all grown up. I now get to delight as nine grandchildren grow! Together we can help each other discover a healthy path in this crazy upside down world. Be sure to subscribe to stay in touch!
Easy Healthy Waffles or Pancakes!

In 1982 I met mom who had her 10th baby around the same time as I had our first! She shared with me a wonderfully easy way to turn whole wheat berries into delicious healthy waffles or pancakes. You can make the batter in about 10 minutes and deliver a healthy meal or snack! I’ve been making these for four decades modifying the original recipe in a variety of ways!

Flour is made by grinding wheat berries. White flour is sifted. The nutritional value of the wheat is at its maximum just after milling, and decreases over time. Fresh ground flour has the highest nutritional value. This recipe uses the entire wheat berry, and instantly grinds it into flour in your blender giving you the maximum nutritional benefit. Wheat berries can be found where other whole ‘healthy’ dried grains are sold and come in two varieties: hard (mostly for bread) or soft (better for pastries). You can use either for this recipe, but soft is preferred. You can also use Einkhorn or other ancient grains if you can find them. Organic is best.

  • 1 Cup wheat berries.
  • 1 Cup milk, sour milk or kefir. You can also use water without too much difference in the result. The dairy option will provide more nutrition.

Blend the wheat berries and liquid in a blender. Start on low speed and depending on the power of your blender, blend for about 3 minutes. A Vitamix on high speed can be faster. The goal is to have a smooth non gritty texture!

  • Add 1/4-1/3 more milk to get the mixture extremely smooth.
  • 1/2-1 apple. (optional addition) Cut the apple into pieces and add to the blender as it is running.
  • 1/4-1/2 cup of oats. Add while blender is running.
  • 3 – 6 eggs. The more eggs, the higher protein. Use less if you’re about to run out of eggs! Less eggs may require more liquid.
  • 4 teaspoons of baking powder.
  • 1/2 teaspoon of salt
  • 1/4 teaspoon vanilla (optional)
  • +/- 2 Tablespoons of softened butter or coconut oil

Blend until everything is mixed. If the mixture is too thick to blend, add more milk (or liquid). If the mixture seems too runny, add more oats. Waffle batter may need to be slightly thicker.

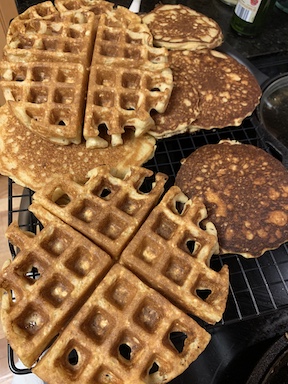
Pour onto hot skillet for pancakes or into hot waffle maker. Serve with butter, syrup, berries, fruit, yogurt, cheese, jam, or anything you like! I always like to add a bit of lemon juice and cinnamon.

The batter can be made in advance and stored in the refrigerator. Waffles or pancakes can be stored in a zip lock bag in the freezer for future quick easy snacks.

Enjoy!

Becky Hastings collects information on health and tries her best to discover and share truth. By God’s grace, through Jesus Christ, I was saved from the life of a rebel. I’ve been blessed with a husband of 41 years, and five precious babies all grown up. I now get to delight as nine grandchildren grow! Together we can help each other discover a healthy path in this crazy upside down world. Please subscribe (below) so you don’t miss any future blogs!