I LOVED this talk with Ari Whitten and Dr Kevin Conners. I literally had tingles while I was listening. Ari explains simply how simple health is. I wish everyone I know would listen to this short wisdom packed conversation. Dr Connors has his own incredible story of helping people find alternative routes to healing cancer of all kinds – including his own. What is health? How do we achieve it? How do we maintain it? This short conversation is packed full of powerful truth that anyone can implement!
Category Archives: Nutrition
Easy Crustless Quiche
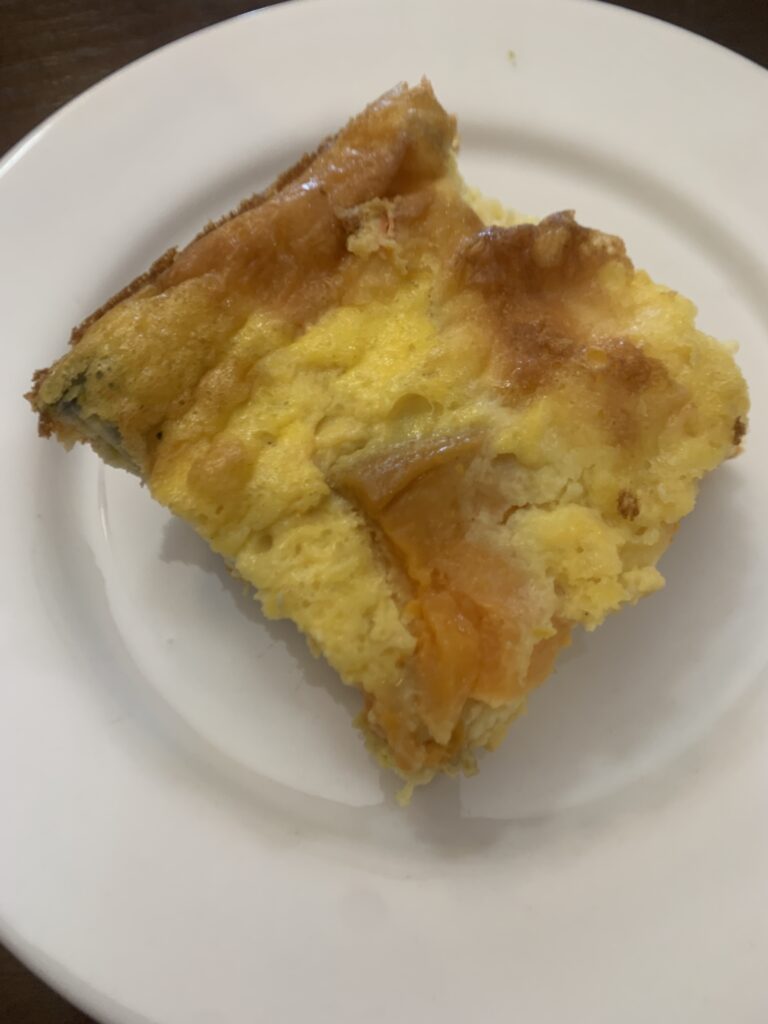
This is my go-to recipe to take to any type of pot-luck gathering. So easy and so delicious. Combine protein and veggies that you have on hand to make a good combination. It’s a very flexible recipe and has never failed me.
- 6 Eggs (more or less can be used – depending on your supply!)
- 8 oz of ricotta cheese or heavy cream or cottage cheese
- salt and pepper
Blend those ingredients in a blender. Add 1 Tbl any type of flour for thickness. Or, you can substitute a few tablespoons of cooked sweet potato and leave out the flour.
Apply butter to your preferred oven proof dish. Layer whatever ingredients you have available in the bottom. Things like:
- chopped whole onion (can be sautéd, or not)
- salmon chunks, or other protein
- cooked sweet potatoes, or chopped broccoli, or zucchini, or any vegetables you have,
Top with 1/2 – 1 cup grated strong cheddar cheese. Amount can depend on your supply, and your budget, but the more the better!
Optional: sprinkle feta cheese around; other herbs or seasoning as desired.
Pour liquid egg mixture over everything. Bake at 400 for about 30 minutes. I like to test doneness with an internal thermometer (I LOVE these things – absolutely changed my life in terms of baking and cooking! No more guesswork. You have a measurable way to determine doneness!). Temperature for quiche is 165 – 185 Fahrenheit.
Allow to cool a bit. Cut into squares. Can be eaten hot, warm or cold! Leftovers are great.
Easy Healthy Waffles or Pancakes!
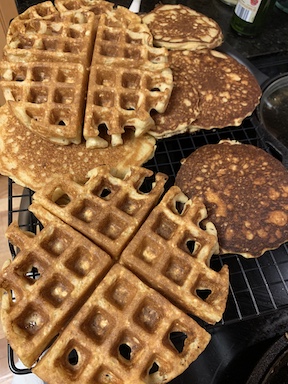
In 1982 I met mom who had her 10th baby around the same time as I had our first! She shared with me a wonderfully easy way to turn whole wheat berries into delicious healthy waffles or pancakes. You can make the batter in about 10 minutes and deliver a healthy meal or snack! I’ve been making these for four decades modifying the original recipe in a variety of ways!
Flour is made by grinding wheat berries. White flour is sifted. The nutritional value of the wheat is at its maximum just after milling, and decreases over time. Fresh ground flour has the highest nutritional value. This recipe uses the entire wheat berry, and instantly grinds it into flour in your blender giving you the maximum nutritional benefit. Wheat berries can be found where other whole ‘healthy’ dried grains are sold and come in two varieties: hard (mostly for bread) or soft (better for pastries). You can use either for this recipe, but soft is preferred. You can also use Einkhorn or other ancient grains if you can find them. Organic is best.
- 1 Cup wheat berries.
- 1 Cup milk, sour milk or kefir. You can also use water without too much difference in the result. The dairy option will provide more nutrition.
Blend the wheat berries and liquid in a blender. Start on low speed and depending on the power of your blender, blend for about 3 minutes. A Vitamix on high speed can be faster. The goal is to have a smooth non gritty texture!
- Add 1/4-1/3 more milk to get the mixture extremely smooth.
- 1/2-1 apple. (optional addition) Cut the apple into pieces and add to the blender as it is running.
- 1/4-1/2 cup of oats. Add while blender is running.
- 3 – 6 eggs. The more eggs, the higher protein. Use less if you’re about to run out of eggs! Less eggs may require more liquid.
- 4 teaspoons of baking powder.
- 1/2 teaspoon of salt
- 1/4 teaspoon vanilla (optional)
- +/- 2 Tablespoons of softened butter or coconut oil
Blend until everything is mixed. If the mixture is too thick to blend, add more milk (or liquid). If the mixture seems too runny, add more oats. Waffle batter may need to be slightly thicker.
Pour onto hot skillet for pancakes or into hot waffle maker. Serve with butter, syrup, berries, fruit, yogurt, cheese, jam, or anything you like! I always like to add a bit of lemon juice and cinnamon.
The batter can be made in advance and stored in the refrigerator. Waffles or pancakes can be stored in a zip lock bag in the freezer for future quick easy snacks.
Enjoy!
Becky Hastings collects information on health and tries her best to discover and share truth. By God’s grace, through Jesus Christ, I was saved from the life of a rebel. I’ve been blessed with a husband of 41 years, and five precious babies all grown up. I now get to delight as nine grandchildren grow! Together we can help each other discover a healthy path in this crazy upside down world. Please subscribe (below) so you don’t miss any future blogs!
Natural Help for Morning Sickness




While natural remedies might not work for everyone, these tips were gleaned from a large number of women eager to share what worked for them. Some of the suggestions are repeated over by many women. I decided to include most of the repetitions… If you feel you have tried everything, maybe you will find a new idea to try. There is conflicting information so you will have to explore and discover for yourself. If you “have tried everything” perhaps skip to the end to TheMomentsAtHome article… I’d love to know what has worked for you. Please share in the comments. Thanks

- Everyone says B6[1], and they’re right except that it takes time to build up enough B6 in your system, so you can’t expect quick results. A person should start taking it as soon as they find out they’re pregnant. The wrist bands work. I also liked a small amount (maybe 2 Tbsp) of lemon juice with salt. This works when nausea begins. Also, eating sweets will make it worse. Eat starch and protein, such as a bean and cheese burrito, right before bed.
- Linum B6 just before bed. It is B6 in a flax based capsule. Works wonders!
- Don’t drink fast. Take very little sips.
- You won’t find many articles on it, but cannabis is very good for morning sickness and mothers that smoke it have babies that are more alert and start socializing sooner … God’s favorite plant.
- If dehydrated, water can make it worse. Make an electrolyte drink with a pinch of salt, honey, lemon, and ginger. Sip that slowly.
- Nux vomica is an amazing homeopathic remedy for nausea, vomiting, and motion sickness. It may also help with heartburn.
- Organic apple cider vinegar with the mother. Ginger. Peppermint. Pickles. Lemon water.
- Sour hard candy like jolly ranchers.
- Magnesium
- Constantly drinking sparkling water with fresh ginger. And popcorn was my staple! But popcorn made on the stove top, not microwaved.
- Sour candy
- Ginger tea
- Sea band motion sickness bracelets.
- Ginger
- Floradix liquid calcium and magnesium.
- An apple helped, usually nothing else I tried did. I had HORRIBLE entire pregnancy long sickness with my second.
- A very weak ginger tea. Sip it, and eat protein, or drink protein shakes.
- Kombucha!
- The organic ginger Moscow mule simple truth Kroger mix! It’s perfect for so many reasons! (yes of course it’s alcohol free, it’s just an awesome thing to sip on!).
- B6 was magic for me. https://www.uofmhealth.org/health-library/tn9126
- I made my daughter a rollerball using doTERRA essential oils for down her spine, back of neck and wrists I personally sucked on hard candy lemon drops, they were sweet on the outside and sour inside.
- CBD oil [I highly recommend finding an organic full spectrum oil. I’ve found a great CBD oil with a 30 day money back guarantee].
- Red jelly beans.
- Hot caramel apple cider.
- Homeopathy.
- I have a friend who swears by apples and it has worked for most people that have tried it.
- Almonds.
- Dyclegis helped me so much this time! I know it is a med but I couldn’t function without it.
- Saltine crackers.
- Lots of good snacks around the clock… Till this fades.
- I swear by Seabands.
- This works: get a bunch of fresh ginger. Scrape off the peel and grind it to a pulp in the blender (very easy). Pack into a jar and add as much honey as you have ginger, half and half. Stir and refrigerate. Put 2 – 4 spoonfuls into hot or cold water and stir. Super yummy, honey is all melted in and mixes easily, the ginger settles the nausea almost immediately, and the ginger is good for you!
- Baking soda water if it’s an emergency. Eat lots of alkaline foods. Nothing greasy for dinner. Take calcium and magnesium at night. And make sure to drink electrolytes at day time.
- Ginger tea.
- I used ginger chews.
- Sleep.
- Smelling peppermint essential oil.
- Magnesium!
- Peppermint.
- Gripe water.
- A lack of B vitamins, especially B6 has been shown in medical studies to be low in women with hyperemesis grad. Also, try a spoonful of activated charcoal or bentonite clay on an empty stomach. Morning sickness may be a sign of toxicity – the body trying to get rid of it – watch the foods you eat.
- Prego pops worked really well for me … and REAL ginger ale.
- Natural didn’t work for me. I tried ginger, B6, wrist sickness pressure bands, peppermint and prig pops, staying hydrated and eating small and often … crackers etc. I did diclegis third pregnancy and it was wonderful, just had my baby 3 weeks ago. Healthy and beautiful. Did Zofran second time and nothing first time. I believe you do the pills to stay out of hospital. I’m sick entire 9 months too. It’s a killer. Try diclegis if you are not totally against the drugs. It’s the less of 2 evils and will keep you functioning very well I might add.
- Ginger tea & ginger candies worked so well for me and I had morning sickness something awful. I’d stay away from the Zofran if you can.
- Ginger, peppermint, digestive enzymes are great, cannabis if it’s legal for medicinal use in your state? I hope you find relief momma! Maybe a tummy tea?
- You can find cannabis tinctures and edibles that work great and have zero negative effects on health.
- Try bitters. I got it on line. You put a few drops of bitters in soda water or a soda drink. Aromatic bitters, brand name is Angostura. A young family member suffers from nausea all the time and this works like a charm. The active ingredient is an herb called gentian.
- Morning sickness, according to my nutrition doctor, is when a body in early pregnancy is trying to detox itself and everything gets tossed in the stomach overnight so you wake up ill in the morning. The best way to eliminate this is to help with the detoxing process by eating live food only for a few days. I personally would eat tons of fruit because fruit is a natural cleanser. I never had morning sickness with either of mine so I did not have to try this myself but it’s worth a shot?
- Find acupuncture point P6 on the inner wrist area. Rub, needle. Wear a wrist band with a small bead attached to stimulate the point.
- Magnesium is essential, obviously tablets won’t stay down, so epson salts baths and magnesium spray on the skin can help.
- Magnesium spray for sure!!
- You can also try natural progesterone cream, sold at natural/health stores [my personal recommendation is Progesterall formulated by Dr John Lee]. Rub a dime-sized amount on a different area of your body twice daily. DoTERRA’s peppermint beadlets and the DigestZen oil blend also work great for some.
- I drank kefir a lot with morning sickness. That was the only thing that really helped.
- Sniffing fresh lemon helped me. And eating boiled rice with a bit of salt and sprinkled with fresh lemon juice.
- Raspberry tea. The morning sickness is due to the rising level of HCG (human choriogonadotropic hormone) in your body. It peaks around three months and then it falls off and you start to feel better again. Out of five children I only had severe morning sickness once. I didn’t do much but want to lay on the couch most of the day. It is just something you have to get through knowing it won’t last.
- A high quality bio-active B complex such as Garden of Life Raw B, as well as magnesium. Hope it helps!
- Magnesium, vitamins B6 and B12.
- Cannabis oil or edibles.
- Chinese medicine.
- Try the Homeopathic nux vomica.
- Try natural calm magnesium and acupuncture works!
- Pedialyte pops.
- Cannabis is safe and works wonders for nausea.
- B6. Raw milk.
- Sounds like hypermesis graviderum. Look into the hypermesis diet. Eat protein, smell fresh lemon for nausea, use the sea bands. I feel your pain. I was in hospital 2 times with my first child. It gets better the further along you are. Hang in there mama!!!!
- Extra B6 helped me. I’m 5 days out from my due date and with number 2 and have had nausea and throwing up all 10 months with both pregnancies. Eating a little piece (like size of chocolate chip) of edible before bed helped me sleep without feeling like I was in a boat on days I was extremely bad. Peppermint oil on a sugar cube works, peppermint oil on wrists or neck, and peppermint tea works. Eating fresh ginger, or grating it and adding it to hot water with lemon and a tad bit of honey and sipping on it. Chewing on ice. And on certain days I will take vitamin water and dilute it with water. This time around I only had 2 IVs from dehydration last time it got to point that I was thankful for paramedic friends I have that would come give me them at home in my own bed.
- Real fruit juice popsicles.
- Go on YouTube and search “nausea pregnancy acupuncture”
- Use SeaBands on your wrists they look like tennis bands but have small weights in them that press on acupuncture points for nausea.
- Acupunture there are 2 points under the tongue when one has morning sickness. It is because the body has not accepted the pregnancy yet. One treatment should help it is in the middle of the 2 thick blue veins under the tongue if you are afraid of acupuncture you can stimulate the 2 points with clear crystal points.
- Ginger in hot water with honey.
- You can find cannabis tinctures and edibles that work great and have zero negative effects on health 🙂
- Coconut water.
- For severe HG you may find this protocol beneficial: How I Ditched Debilitating Morning Sickness (HG): https://www.themomentsathome.com/morning-sickness-relief-hyperemesis/
- These ideas helped: How to Avoid Morning Sickness https://wellnessmama.com/6065/avoid-morning-sickness/
- I found some great ideas here: Natural Morning Sickness Remedies: 10 Things That Really Work https://www.mamanatural.com/natural-morning-sickness-remedies/
[1] “Pyridoxine [vitamin B6} can be used as a single agent or in conjunction with doxylamine. One small study demonstrated that vitamin B6 in a dosage of 25 mg taken orally every eight hours (75 mg per day) was more effective than placebo for controlling nausea and vomiting in pregnant women.” Quinla JD, Hill DA. Nausea and vomiting of pregnancy. Am Fam Physician. 2003;68(1):121-128. https://www.aafp.org/afp/2003/0701/p121.html

Becky Hastings collects information on health and tries her best to discover and share truth. By God’s grace I was saved and blessed to bring five precious babies into the world, and now get to watch nine grandchildren grow! Together we can help each other discover a healthy path in this crazy upside down world.
Choosing a Good CBD Oil
 Now that you are convinced to try CBD Oil derived from hemp because it is legal, safe, and highly effective as a health supplement, how do you decide which product to choose?
Dr. Rachna Patel, a medical marijuana expert, states there are three key questions to help you choose a quality product.
- Is the manufacturer/supplier of the oil accountable to anyone?
- Is the product lab tested?
- What method was used to extract the CBD oil?
I’m confident to report that the company I have been repping passes these tests with flying colors.
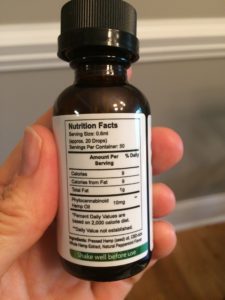 They are accountable to you, the customer, and to their thousands of affiliates. They are so confident of their product, that they offer a 30 money back guarantee.
- Every batch is 3rd party tested for potency and purity. You can find certificates verifying the CBD content on their website.
- The CBD oil is extracted from organically grown hemp in the USA using a CO2 extraction method that does not leave behind any harmful residue.
Additionally, the prices compare very favorably with other quality brands AND there are no ‘fillers’ or unwanted ingredients – only full spectrum CBD and hemp oil.
Please leave your name and email address below if you would like more information on this product, or refer back to the person who shared this blog with you.
 Author: Becky Hastings, wife, mother, grandmother, passionate follower of Jesus and truth. As a life & wellness coach, Becky seeks to inspire and motivate others to find increased energy, joy, and longevity. Navigating information to achieve long-term health goals in every area of life is a passion!
One Cause of All Disease?
In this amazing talk Dr Zach Bush describes his journey as a traditionally trained medical doctor, specialising in treating people with serious chronic illness such as Type 2 Diabetes. His life was forever changed when he began asking questions, and finding answers outside of his training. When we are seeking truth we should be prepared to have some well entrenched paradigms shattered. It can be an unsettling process.
In this video from 2015, “Dr. Bush explains the unifying science behind devastating changes in the food, farming, and medical industries, introducing the breakthrough science of bacteria and their communication with the body’s defense systems. The industrial storm of the last 70 years has left the human gut and immune systems vulnerable to injury. Two synergistic toxins in our food and water systems have exploited this vulnerability, resulting in direct damage to the tight junctions that compose the natural firewalls at the gut/blood and blood/brain barriers. The correlations between diet, gut bacteria, and autism have been long-recognized. This new science reveals the mechanisms behind this relationship. The novel science of bacterial communication is the foundation for a new class of dietary supplements that go beyond what has been available.”
This might be two year old information, but many of us need to “catch up” with the latest knowledge and understanding of how environmental toxins are harming our guts leading to devastating health in all generations.
Becky Hastings, a wife, mom, grandmother, passionate follower of Jesus, health promoter, breastfeeding counsellor helping moms for 22+ years, and someone who seeks to research, understand and share truth so people can make wise choices in our crazy mixed up, deceived world! Sometimes I share recipes and homespun teaching videos.
Help Sickness is Coming
 At the first sign of any type of illness: runny nose, cough, upset stomach, lack of energy, fever, sore throat, sore ears, cold sore (fever blister), headache, etc.
It’s important to take FAST ACTION to offset the duration and extent of the potential illness. For me, fast action does not mean running to a doctor or pharmacy for the typical cold and flu medicines! There are so many cheaper, better alternatives we have available!
As mothers, we need to help our children identify any potential symptoms and come quickly for home remedies. The sooner we start, the more we reduce the symptoms! Our children will also learn to assist their body in the healing process on their own, and be able to bring quick healing to our grandchildren! As a grandmother there isn’t much better than watching your children raise vibrant healthy children!
- Begin vitamin C therapy. The critical thing to remember is that the dose and the frequency are extremely important. Don’t delay. Get started on vitamin C. Have vitamin C on hand. I’ve written extensively about what dose, what brands, etc. in my What Dose of Vitamin C? blog.
- Avoid Tamiflu. It is 1) expensive; 2) ineffective in reducing the duration of flu; and 3) can be potentially dangerous for some individuals.[1]
- Avoid pain/fever reducers, especially for children. Acetaminophen actually depletes the body of glutathione which is an important amino acid that helps our body clean up and remove offending substances. I’ve written about that in this blog, How Safe is Acetaminophen?
- Give elderberry syrup. There are many prepared elderberry products available. For a cheaper option you can purchase your own elderberries and make your own syrup to keep on hand in your refrigerator.
- Keep well hydrated. If the patient is a baby, breastfeed often and don’t worry too much about solids. Coconut water (not coconut milk) is an excellent way to rehydrate for children and adults. Choose the best brand you can find with the no added sugar and least extra ingredients. Avoid sucralose containing products because they are poisonous and immune suppressing.
- REDUCE or REMOVE SUGAR. This is a good thing we can do most of the time to stay healthy, but is essential when we feel any symptoms of illness. At the first sign of any symptoms is the time for the brain to sound a RED ALERT “sugar is poison to me especially right now.”
- NO Pasteurized milk. Butter, eggs, hard cheese and fermented kefir are good.
- Think soup. Or curry. Try to consume bone broth and natural spices, and soup, stew or curry is a great way to achieve this. Give the patient their favorite soup. Most of us have heard that chicken soup is good when you are sick – it is true, but you might want to make your own.
- Avoid flour. Have you chicken soup without the noodles. Don’t have bread sticks. As much as possible avoid ALL processed foods and eat more fresh fruit and vegetables, organic preferred.
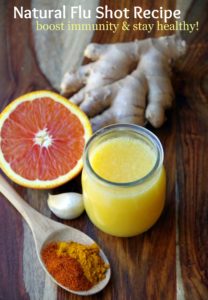 Make your own flu shot. Depending on the age and taste preferences, here are some great ingredients to include in your flu shot: lemon juice, pineapple juice (no sugar), cayenne pepper, jalapeño pepper, ginger, garlic, honey, turmeric, cinnamon, coconut oil. Combine them in whatever way you like. Choose the ones you like most. Food is your best medicine. I’m working on a recipe for a Hot Chai Chocolate drink.
- Honey. For anyone over 12 months, honey is beneficial, especially good for coughs. Don’t buy mass produced honey. Local raw honey is your best option. Find a local bee keeper and talk to him about where his bees harvest. It is important that they don’t have access to fields doused with Roundup. Vitamin C powder can be added to honey to make it more acceptable.
- Drink Herbal teas
- Colloidal Silver. If you feel an antibiotic might be needed, first try colloidal silver.
- Essential oils. I’m not an EO expert, but there are many oils that are beneficial. Lavender is especially good and safe for children. A few drops on the bottom of the feet, behind the ears, on the chest and throat can be beneficial and soothing. Learn about EO safety, ways to dilute, and have a few on hand. Some of my favorites are peppermint, frankincense, and tea tree. You don’t need to break the bank and buy every oil available. Most oils provide a variety of benefits and work with our body to assist in reclaiming health.
- Fresh air, time outdoors is essential, depending on the severity of the current illness, and the weather.
- Good sleep. Sleep requires an entire blog of its own, but getting plenty of rest is extremely beneficial. Symptoms of illness are a signal to prioritize an early bed time and limit exposure to screens – especially prior to bed time to maximize good sleep.
- Movement is critically important to keep our lymph system running. Walk, dance, take the stairs, do a few toe rises or squats – just find some ways to move regularly.
- Vitamin D. In the winter months we are not able to synthesize vitamin D from the sun. I’ve written more about Vitamin D in this blog.
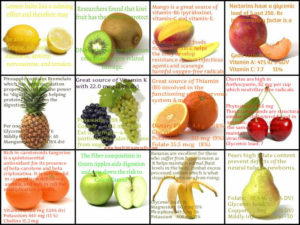 Remember, healthy foods are the best way to stay healthy. Symptoms of illness are a reminder to get back to a healthy eating plan!
Don’t think you have to do every single thing on the list, but do what you can, what works for you and your family! Have a healthy winter!
Oh, and it goes without saying (if you’ve read anything on my blog) that if you want to have super health, and give your children life-long health and wellness, avoid all vaccines. Vaccines artificially stimulate your immune system, insert toxic chemicals into your body, and for some people, end up causing death, serious injury, or life-long auto-immune disorders.
Author: Becky Hastings, wife to John for 37 years, mother of five naturally born breastfed babies, grandmother of six, passionate follower of Jesus, truth, and HEALTH.
[1] Helpful Articles/Links on Tamiflu
-
- The Tamiflu fiasco and lessons learnt https://www.ncbi.nlm.nih.gov/pmc/articles/PMC4375804/
- Just How Dangerous is Tamiflu? https://www.mommypotamus.com/just-how-dangerous-is-tamiflu/
- Why You Should Avoid Tamilflu https://tenpennyimc.com/2013/01/12/why-you-should-avoid-tamiflu/
-
Tamiflu: Doctor Outraged After Recommending This Drug https://articles.mercola.com/sites/articles/archive/2012/02/07/recommended-tamiflu-has-flawed-results.aspx
-
Tamiflu: Millions wasted on flu drug, claims major report http://www.bbc.com/news/health-26954482
-
Hallucinations After Taking Tamiflu: How Much Is Real Versus Not Real? https://www.forbes.com/sites/brucelee/2018/01/15/hallucinations-after-taking-tamiflu-how-much-is-real-versus-not-real/#5ac825f3307b
-
Neuraminidase inhibitors for preventing and treating influenza in adults and children http://onlinelibrary.wiley.com/doi/10.1002/14651858.CD008965.pub4/full
Gluten Free Banana Bread
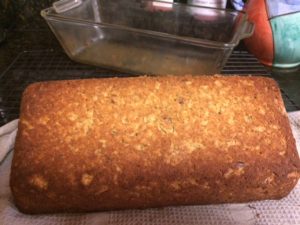 This recipe is gluten free, but does contain eggs and dairy. If you are also dairy free, you can substitute the milk with water (really – it doesn’t make a difference, or coconut or almond milk). If you also avoid eggs, you can substitute chia seeds, but I haven’t experimented with that.
Many people find tremendous health benefits from avoiding gluten. However, even gluten free processed flours should not really be a staple in most of our regular daily eating plans. However, it’s nice to have an occasional treat, or a way to spoil grandchildren when they come to visit!
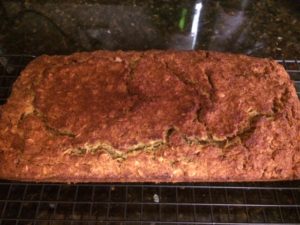 I’ve made this recipe twice and it is really easy, moist, and delicious!
Also, I’ve NEVER had a loaf pop out of a pan more easily in one complete piece. That is saying a lot since I’ve been baking quick loaves for about 40 years! This recipe is based on another gluten free recipe, but I significantly reduced the amount of flour and increased the eggs. Perhaps every loaf I’ve ever made in the past was too dry because I had followed a recipe and put TOO MUCH FLOUR into it! Every day is another opportunity to learn.
Gluten Free Banana Bread
Liquid ingredients: Combine in a bowl (mash the bananas) or blend gently.
3 |
Medium |
bananas (frozen and thawed works well) |
2 |
Eggs |
Organic* of course |
3 |
Tbl** |
Butter, coconut oil or a combination |
½ |
Tsp*** |
Vanilla |
2 |
Tbl |
Maple syrup |
¾ |
Cup |
Milk (or water) |
Combine dry ingredients in a bowl:
1 ¼ |
Cup |
Gluten free flour (½ cup each white rice & coconut, 1/8 cup each tapioca & potato flours) |
1 ¼ |
Cup |
Organic whole gluten free oats |
1/3 |
Cup |
Organic sugar |
3 |
Tsp |
Aluminum free baking powder |
1 |
Tsp |
Salt |
1 |
Tsp |
Cinnamon |
½-1 |
Tsp |
Turmeric (optional, but everything benefits from turmeric!) |
¼ – ½ |
Cup |
Chopped Walnuts |
**Tbl = Tablespoon. ***tsp = teaspoon, approximately 5 ml
Stir dry ingredients, then combine with the liquid ingredients and stir until just mixed (never over mix quick breads). Pour batter into a buttered loaf pan (I used glass). Bake at 350 for 45 minutes, turn down the oven temperature to 325 and bake for 15 more minutes, until toothpick inserted into the center comes out clean. Allow to sit for 10 minutes, then loosen the sides with a knife (or Cutco spatula spreader) and remove from the pan onto a wire rack to cool. ENJOY! With butter or plain.
*I try to purchase and use only organic ingredients as far as I am able. A quick note on organic ingredients. The reason it is important to avoid non-organic foods is because of the glyphosate (which is in Roundup) is generally sprayed on all crops that are not organic. Most of us have a glyphosate burden that can wreak havoc with our longterm health. Eating organic only has been shown to significantly reduce the amount of glyphosate your body has to deal with and leads to robust health – mental and physical. Many people think organic is a fad, is too expensive, and one man I spoke to in the grocery store was repulsed by the idea of organic because he thought it would not be enjoyable to eat! The good news is 1) there is more and more organic options available in local grocery stores with better and better labels; 2) the price is not so much higher than non-organic brands, but when considering the cost we all need to realize that the cost of sickness today is extremely high; 3) organic actually tastes and FEELS better!
 Becky Hastings, wife, mother, grandmother, passionate follower of Jesus, seeker of truth and health. Facing a world quite different from the one in which I grew up, I seek to research and understand the very real dangers threatening the health and freedom of today’s parents, providing information to navigate towards joyful family living! Posted 31 January 2017
Best Wellness Tip EVER!
 Kefir is an amazing living food that provides multiple benefits especially when ingested every day. Kefir is known to play a curative role in diabetes, cancer, autism, gastritis, IBS, arthritis, and many more. In fact regularly ingesting kefir might be the single most beneficial thing you can do to ensure wellness!
Kefir has the benefits of a pro-biotic since it is rich in vitamins, minerals and polysaccharides, with a diversity of bacteria, yeast and mould which are beneficial to the human micro-biome.
Kefir provides over 70 different pro-biotic species which keep harmful bacteria in check, help bring healing to the gut, and enhance immune function. Even people who are lactose intolerant are able to consume kefir because the live organisms consume the lactose leaving it 97% lactose free.
Making kefir is simple – far easier than making yogurt – but you can use it in all the same ways as yogurt, or just drink it straight to make sure you get the daily benefits. Add to soup, stews, waffles, breakfast, salad dressings, etc.
Your kefir grains are often dehydrated for travel and delivery.
- To revitalize your kefir grains, place in a glass jar and pour in milk – leaving about a 1 inch space at the top. Cover with a piece of paper towel held by a rubber band. Choose the size of jar based on the amount of kefir you desire. A bigger jar of milk will take longer than a smaller jar.
- Leave the jar sitting on the kitchen counter. Kefir is ready when you shake the jar and it jiggles. The first batch from dried grains may take slightly longer, but generally kefir is ready in 24 – 36 hours.
- If you leave kefir for too long – several days – it can separate into ‘curds’ and ‘whey’. It is still fine to consume, just mix. Or if you like it thick you can pour off the whey, or use it in soup or baking, and have a thick creamy kefir.
- Once kefir is firm you can remove the grains and begin your next batch.
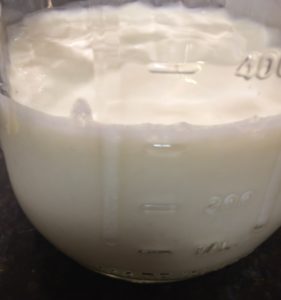 To remove the grains you can try with a plastic fork, simply stir around and see if you find the firm kefir grains. This works if the grains are near the top. Other times it is more difficult to find and you need to work the kefir through a plastic Place a large funnel into a clean glass jar then put the plastic colander on top. Pour in the kefir in batches and use a spatula to push it through the holes. You will know when you find the grains because they will not go through the holes!
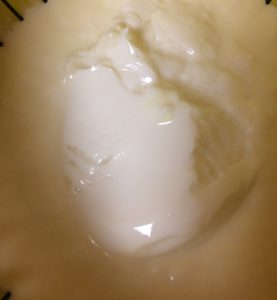 If you don’t have time to strain, but the kefir is firm, place the jar ‘as is’ into the refrigerator. It will be fine for many days like that, until you have a chance to strain it.
- If you know you are going to be away from home for a week or more, or you just want a bit of a break from making kefir, you want to keep your kefir grains alive. Place the kefir grains in a jar, pour milk just to cover, put on a top and keep it in the refrigerator. It will hibernate. When you are ready to make your next batch of kefir, pour out the milk, rinse the grains in spring/filtered water or fresh milk, then place in a glass jar and start at the top. Never expose your kefir to tap water than contains fluoride.
- When kefir grains have multiplied they will work faster in producing the thick kefir. You can divide the grains, share some of your grains with a friend, add them to smoothies, freeze some in milk, or dry them. To share fresh kefir grains simply put them in a jar of milk, or pure water if they won’t be there for too long. The milk provides food to the living organisms.
- To dry them, after straining rinse with pure water or fresh milk, place them on a piece of parchment paper. It will dry in a few days. Dried kefir grains can safely be mailed in an envelope so you can share with family or friends far away!
Historically, kefir grains originate in the Caucasus Mountains between Russian and Georgia where the local people have consumed kefir and experienced remarkable health throughout history. “The census of 1970, revealed that 5,000 centenarians then lived in the Caucasus.”[1] Because of the beneficial probiotics in kefir, regular “consumption reinforces the intestinal flora, helps with digestion, restores the digestive system and strongly stimulates the immune system.” [2]
Kefir grains were considered part of the family’s wealth and the tribe’s wealth and they were passed on from generation to generation. For centuries the people of the northern Caucasus enjoyed this food without sharing it with anyone else. Other peoples occasionally heard strange tales of this unusual beverage, which was said to have magical properties. Marco Polo mentioned kefir in the chronicles of his travels in the East.[1]
The BIG Bonus!
From my reading, it would seem that homemade kefir made using raw cow’s milk provides a good source of GCMAF, which has been used to treat and heal autism and other serious brain disorders. GCMAF is a harmless and naturally occurring glycoprotein with a profound potential to heal. It is produced in human breast milk and plays a significant role in innate immunity. All higher order animals have this glycoprotein which functions to transport Vitamin D to all the cells in our body, including our immune cells. Lack of this protein causes immune suppression.
Becky Hastings, a wife, mom, grandmother, passionate follower of Jesus, health promoter, breastfeeding counsellor helping moms for 22+ years, and someone who seeks to research, understand and share truth so people can make wise choices in our crazy mixed up, deceived world! Sometimes I share recipes and homespun teaching videos.
[1] Sharla. Kefir – The Mystical Side. Web. 11 Aug. 2017. .
[2] Sekkal-Taleb, Nezha. “Chemical and microbiological composition of Kefir and its natural benefits.” Mediterranean Journal of Biosciences1.4 (2016): 174-83. Web. 11 Aug. 2017. .
Straining Milk Kefir Video
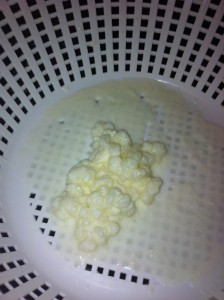 I just made a homespun video to show you how easy it is to strain out your milk kefir grains. This must be done after every batch of kefir so that you can make another batch! The kefir grains will multiply over time so that you will be able to share the joys of kefir making with your friends.
I’ve posted other information on kefir, including some of my favorite recipes:
I prefer to use local jersey raw milk because there are many benefits. Recently I have learned that one of the benefits is that it contains GCMAF. Do some research on the benefits!
Many people who have been diagnosed with CDif or other serious intestinal infections are looking for kefir. You can become a source of kefir grains as you spread the wonder of kefir!
Let me know if you have questions about kefir!
Becky Hastings, a wife, mom, grandmother, passionate follower of Jesus, health promoter, breastfeeding counsellor helping moms for 22+ years, and someone who seeks to research, understand and share truth so people can make wise choices in our crazy mixed up, deceived world! Sometimes I share recipes and homespun teaching videos.

