Guilt Free Gooey Brownies

Trying to eat healthier, but still have a sweet tooth? This is the answer! There is a lot of flexibility with this recipe, and a lot of deliciousness. Guilt free because there is no flour, no sugar and no butter (although I don’t feel guilty about eating butter!)!

Add to a food processor (best option) or a blender (if you don’t have one). I used a Vitamix because that is what I have.

  • 4 eggs
  • 1 ripe avocado
  • 1/4 C cashews or almond butter, or peanut butter
  • 1/3 C cocoa powder
  • 1 banana
  • 4 dates
  • Salt
  • Vanilla
  • 1 tsp baking powder
  • Honey – about a tablespoon, or more if you want a sweeter taste
  • Top with walnuts and chocolate chips (or mix in)
  • Optional (not pictured): Add blobs of cream cheese mixed with honey on top (or mix in)

Spread into a glass baking dish approximately 8 x 8. Top with walnuts.

Bake at 350 15-20 minutes. (I recently acquired an internal thermometer and let the temperature reach 175 F). Allow to cool on a rack and then transfer to the refrigerator. Avoid the temptation to eat now, they are really much better after they get cold!

Enjoy!

Possible additions and/or substitutions: cooked sweet potato instead of banana. Add coconut to the topping. Pecans or other nuts instead of walnuts.

Let me know what substitutions you make!

Becky Hastings collects information on health and tries her best to discover and share truth. By God’s grace, through Jesus Christ, I was saved, blessed with a husband of 40 years, and have five precious babies all grown up. I now get to delight as nine grandchildren grow! Together we can help each other discover a healthy path in this crazy upside down world.

Kick ‘Um Juice

Chopping peppers with gloves on
Chopping up the peppers – don’t forget to wear your gloves! The peppers might be very hot!
Chopped ginger simmering in a pot
Chopped ginger simmering

Urgent Update: I had the opportunity to chat with Enoch and he emphasized to me that it is VERY IMPORTANT to simmer the ingredients in a glass saucepan. My apologies for getting that wrong!

Enoch DeBus defied his cancer diagnosis with a juice he calls Kick ‘Um Juice. His website is https://www.enochdebus.com/kickum-juice/ and he provides videos describing some of the benefits of this juice, as well as his approach to food that helped him cure his cancer.

This is my version of his recipe. The juice really lives up to its name. My son met Enoch DeBus at his church and his vitality and health defy his age and his previous cancer diagnosis. The original recipe can be found here in video and is written in the comments on that page. I read through all of Enoch’s comments, watched his video and compiled it for myself so that I could make it easily. I like to store my best recipes on my website so I won’t lose them! I hope you enjoy it. Let me know if you make some!

Kick ‘Um Juice

The first step is to make a concentrate from which you make a daily drink (instructions below). The concentrate is stored in the refrigerator once cooled.

  • 1 quart good water
  • 1/3-1/2 pound of chopped up ginger
  • Bring water to a boil and simmer in a glass saucepan, covered, for 30 minutes. 
Chopping four different types of peppers - use a glove!
Chop peppers with gloves

After the 30 minute cooking time, add the following chopped peppers to the pot with the ginger (seeds and all). I was not able to find all the peppers locally, so I used what I was able to find.

  • 3 habaneros 
  • 3 jalapeños
  • 3 Serranos 
  • 3 Hot Red Tabasco (optional?)

cook for another 10 minutes at a light boil.

Remove from heat. Add the following chopped ingredients to the hot mixture, but do not cook. Allow to cool.

  • 4 turmeric roots, chopped
  • more chopped ginger
  • 3 garlic cloves (optional)
  • 2 teaspoons of black pepper pellets (ground up in magic bullet)
Fresh turmeric root can be purchased in many grocery stores. Organic fresh garlic.
Fresh turmeric; fresh garlic

Once cool, blend everything in a powerful blender twice, like a Vitamix or Ninja blender. You now have your concentrate. Do not filter. Enoch says he can store it for up to 7 months in the refrigerator. Mine was used up much quicker than that. Shake before using.

Daily Juice Recipe:

To make a daily juice, combine in a quart glass container:  

  • 1oz. from your concentrate blend
  • 1.5 – 2 fresh squeezed limes or lemons, 
  • 1 – 2 Tablespoons of organic maple syrup or to taste
  • clean filtered water to fill up the quart glass jar

Shake. Ready to drink. Store in refrigerator and drink throughout the day. If it’s too strong just add more water, if too weak, add more of the concentrate blend. This potent juice provides a boost and support for your immune system and has been used by many to reclaim health.

Blend half, blend the other half, combine and blend
Concentrate in glass jars. This is the quantity I made with this recipe
Concentrate plus fresh squeezed lemon juice & maple syrup

Compiled by Becky Hastings who collects information on health and tries her best to discover and share truth. By God’s grace, through Jesus Christ, I was saved, blessed with a husband of 40 years, and five precious babies all grown up. I now get to delight as nine grandchildren grow! Together we can help each other discover a healthy path in this crazy upside down world.

Cookie Bars

Quantities are approximations. Organic ingredients preferred.

  • 1/2 cup each brown & white sugar
  • 1 stick butter softened 
  • 2 eggs
  • Vanilla
  • 3/4-1 cup flour
  • Salt
  • 1 tap baking powder 
  • 2 cups oats
  • 3/4 chocolate chips
  • 1/2- 3/4 raisins soaked in boiling water, then drain
  • chopped Walnuts
  • chopped Pecans

Cream together the sugar and butter. Add eggs and vanilla, and cream well. Add the flour, salt and baking powder, mix well. Add remaining ingredients and mix.

Press into cookie sheet lined with parchment paper. If you wet your hands with water the dough doesn’t stick as much. Bake 400 for 10-12 minutes. Score when warm by pressing with a large sharp knife. 

Enjoy!

Becky Hastings. Sometimes we need diversions. When you make your own healthy tempting snacks you know what it is in them! Creating treats is satisfying in so many ways. For this original recipe I had some helpers!

More Waffles

As I said in my previous waffle recipe, all recipes are a work in progress.

My latest version (below) has an additional egg and less butter. They were easy to make and devoured by the grandchildren.

I’ve added an easy reference so you can make a double or 1.5 batch. The Belgium flip style waffle maker can be turned upside down as soon as you pour in the batter. It makes THE BEST WAFFLES EVER! I found one made by Hamilton Beach for only $19.99. Truly the lightest waffles because the batter is forced down! My waffle pictures present imperfect waffles because I found pouring less batter causes more expansion. The result may look imperfect, but is most delicious!

I started writing my recipes in chart form, with multiple batch sizes, as an easy way to make the recipe clear and consistent for my children during our homeschooling years (1997-2017). I hope you understand what I’m saying! Quick and easy, is my goal.

I had 2 assistant cooks this morning, my nearly 4 and nearly 2 year old grandchildren, yet we still managed to stick to the recipe AND record it for posterity! The waffles were devoured by all!


These two pictures were taken from another batch of waffles that I made later, since we forgot to take pictures! For this batch I used 1 1/2 cups Bobs gluten free flour. It worked well.

Waffles are great with fruit, yogurt, butter, and syrup – or any combination of those that you like! Waffles are also great with Nancy’s organic pro-biotic cream cheese and organic fruit spread!

Becky Hastings, wife, mother, grandmother, passionate follower of Jesus and truth. As a breastfeeding counselor for over 25 years, Becky is devoted to helping parents make wise decisions for the long-term health and wellbeing of their babies, including which vaccines to choose. Becky loves mountain biking and appreciates donations, which mainly encourage her.

Easy Immune Boost

This is a recipe for a simple, economic, tasty way to combat nearly any type of illness in the initial stages. It is far more effective than a flu shot or most common over-the-counter medications. While pharmaceutical medications may reduce some symptoms, they generally do not assist and support the body towards wellness. Each ingredient in this Immune Boost has properties that support the body’s ability to mount a response to offending pathogens.

  • local raw organic honey (not for babies under 12 months), preferably produced by bees who do not have access to pesticide laden fields!
  • coconut oil (raw, organic)
  • powdered vitamin C either sodium ascorbate or ascorbate acid
  • cayenne pepper
  • turmeric powder
  • cinnamon
  • ginger powder

Mix equal parts of honey and coconut oil in a jar. You can either mix a Tablespoon of each, or 1/4 cup, or more. You might want to start with a smaller amount to try it!

Add all the other powdered ingredients in as large a quantity as you think you (or your child) will be able to tolerate. You can always start small, and add more. Usually you can put quite a large amount of vitamin C (remember you will only be giving a small amount of this mixture at a time) without it being too noticeable. Start with just a sprinkle of the spices. The honey and coconut oil are a great aid to masking the flavors of the vitamin C and spices.

Give a 1/4 – 1/2 teaspoon at a time. Give frequently until symptoms disappear!

What is it good for? Allergies, sore throat, cold sores (at the first sign), upset tummy, cold or flu, headaches, etc. Try to allow the mixture to sit in your mouth, under your tongue for as long as possible so it can be absorbed quickly sublingually.

Try it – you may be astounded!

Why? All of these spices have amazing properties of antibacterial, anti-inflammatory, and provide immune stimulation/activation. It really works. And it tastes great – even for children. Elderberry syrup is another great immune booster to have on hand, but can be a little more work to prepare from the dried berries, or expensive to purchase.

CBD Oil is another natural supplement that provides excellent immune boosting benefits. Make sure your CBD Oil is organic, tested for purity and potency, and safely extracted. I have found a great product and am happy to answer any questions you may have about it. You can learn more and order CBD at http://healingplant.org.

Author: Becky Hastings, wife, mother, grandmother, passionate follower of Jesus and truth. As a life & wellness coach, Becky seeks to inspire and motivate others to find increased energy, joy, and longevity. Navigating information to achieve long-term health goals in every area of life is a passion!

Help Sickness is Coming

At the first sign of any type of illness: runny nose, cough, upset stomach, lack of energy, fever, sore throat, sore ears, cold sore (fever blister), headache, etc.

It’s important to take FAST ACTION to offset the duration and extent of the potential illness. For me, fast action does not mean running to a doctor or pharmacy for the typical cold and flu medicines! There are so many cheaper, better alternatives we have available!

As mothers, we need to help our children identify any potential symptoms and come quickly for home remedies. The sooner we start, the more we reduce the symptoms! Our children will also learn to assist their body in the healing process on their own, and be able to bring quick healing to our grandchildren! As a grandmother there isn’t much better than watching your children raise vibrant healthy children!

  1. Begin vitamin C therapy. The critical thing to remember is that the dose and the frequency are extremely important. Don’t delay. Get started on vitamin C. Have vitamin C on hand. I’ve written extensively about what dose, what brands, etc. in my What Dose of Vitamin C? blog.
  2. Avoid Tamiflu. It is 1) expensive; 2) ineffective in reducing the duration of flu; and 3) can be potentially dangerous for some individuals.[1]
  3. Avoid pain/fever reducers, especially for children. Acetaminophen actually depletes the body of glutathione which is an important amino acid that helps our body clean up and remove offending substances. I’ve written about that in this blog, How Safe is Acetaminophen?
  4. Give elderberry syrup. There are many prepared elderberry products available. For a cheaper option you can purchase your own elderberries and make your own syrup to keep on hand in your refrigerator.
  5. Keep well hydrated. If the patient is a baby, breastfeed often and don’t worry too much about solids. Coconut water (not coconut milk) is an excellent way to rehydrate for children and adults. Choose the best brand you can find with the no added sugar and least extra ingredients. Avoid sucralose containing products because they are poisonous and immune suppressing.
  6. REDUCE or REMOVE SUGAR. This is a good thing we can do most of the time to stay healthy, but is essential when we feel any symptoms of illness. At the first sign of any symptoms is the time for the brain to sound a RED ALERT “sugar is poison to me especially right now.”
  7. NO Pasteurized milk. Butter, eggs, hard cheese and fermented kefir are good.
  8. Think soup. Or curry. Try to consume bone broth and natural spices, and soup, stew or curry is a great way to achieve this. Give the patient their favorite soup. Most of us have heard that chicken soup is good when you are sick – it is true, but you might want to make your own.
  9. Avoid flour. Have you chicken soup without the noodles. Don’t have bread sticks. As much as possible avoid ALL processed foods and eat more fresh fruit and vegetables, organic preferred.
  10. Make your own flu shot. Depending on the age and taste preferences, here are some great ingredients to include in your flu shot: lemon juice, pineapple juice (no sugar), cayenne pepper, jalapeño pepper, ginger, garlic, honey, turmeric, cinnamon, coconut oil. Combine them in whatever way you like. Choose the ones you like most. Food is your best medicine. I’m working on a recipe for a Hot Chai Chocolate drink.
  11. Honey. For anyone over 12 months, honey is beneficial, especially good for coughs. Don’t buy mass produced honey. Local raw honey is your best option. Find a local bee keeper and talk to him about where his bees harvest. It is important that they don’t have access to fields doused with Roundup. Vitamin C powder can be added to honey to make it more acceptable.
  12. Drink Herbal teas
  13. Colloidal Silver. If you feel an antibiotic might be needed, first try colloidal silver.
  14. Essential oils. I’m not an EO expert, but there are many oils that are beneficial. Lavender is especially good and safe for children. A few drops on the bottom of the feet, behind the ears, on the chest and throat can be beneficial and soothing. Learn about EO safety, ways to dilute, and have a few on hand. Some of my favorites are peppermint, frankincense, and tea tree. You don’t need to break the bank and buy every oil available. Most oils provide a variety of benefits and work with our body to assist in reclaiming health.
  15. Fresh air, time outdoors is essential, depending on the severity of the current illness, and the weather.
  16. Good sleep. Sleep requires an entire blog of its own, but getting plenty of rest is extremely beneficial. Symptoms of illness are a signal to prioritize an early bed time and limit exposure to screens – especially prior to bed time to maximize good sleep.
  17. Movement is critically important to keep our lymph system running. Walk, dance, take the stairs, do a few toe rises or squats – just find some ways to move regularly.
  18. Vitamin D. In the winter months we are not able to synthesize vitamin D from the sun. I’ve written more about Vitamin D in this blog.

Remember, healthy foods are the best way to stay healthy. Symptoms of illness are a reminder to get back to a healthy eating plan!

Don’t think you have to do every single thing on the list, but do what you can, what works for you and your family! Have a healthy winter!


Oh, and it goes without saying (if you’ve read anything on my blog) that if you want to have super health, and give your children life-long health and wellness, avoid all vaccines. Vaccines artificially stimulate your immune system, insert toxic chemicals into your body, and for some people, end up causing death, serious injury, or life-long auto-immune disorders.


Author: Becky Hastings, wife to John for 37 years, mother of five naturally born breastfed babies, grandmother of six, passionate follower of Jesus, truth, and HEALTH. 


[1] Helpful Articles/Links on Tamiflu

Gluten Free Banana Bread

This recipe is gluten free, but does contain eggs and dairy. If you are also dairy free, you can substitute the milk with water (really – it doesn’t make a difference, or coconut or almond milk). If you also avoid eggs, you can substitute chia seeds, but I haven’t experimented with that.

Many people find tremendous health benefits from avoiding gluten. However, even gluten free processed flours should not really be a staple in most of our regular daily eating plans. However, it’s nice to have an occasional treat, or a way to spoil grandchildren when they come to visit!

I’ve made this recipe twice and it is really easy, moist, and delicious!

Also, I’ve NEVER had a loaf pop out of a pan more easily in one complete piece. That is saying a lot since I’ve been baking quick loaves for about 40 years! This recipe is based on another gluten free recipe, but I significantly reduced the amount of flour and increased the eggs. Perhaps every loaf I’ve ever made in the past was too dry because I had followed a recipe and put TOO MUCH FLOUR into it! Every day is another opportunity to learn.


Gluten Free Banana Bread

Liquid ingredients: Combine in a bowl (mash the bananas) or blend gently.

3
Medium
bananas (frozen and thawed works well)
2
Eggs
Organic* of course
3
Tbl**
Butter, coconut oil or a combination
½
Tsp***
Vanilla
2
Tbl
Maple syrup
¾
Cup
Milk (or water)

Combine dry ingredients in a bowl:

1 ¼
Cup
Gluten free flour (½ cup each white rice & coconut, 1/8 cup each tapioca & potato flours)
1 ¼
Cup
Organic whole gluten free oats
1/3
Cup
Organic sugar
3
Tsp
Aluminum free baking powder
1
Tsp
Salt
1
Tsp
Cinnamon
½-1
Tsp
Turmeric (optional, but everything benefits from turmeric!)
¼ – ½
Cup
Chopped Walnuts
 **Tbl = Tablespoon. ***tsp = teaspoon, approximately 5 ml


Stir dry ingredients, then combine with the liquid ingredients and stir until just mixed (never over mix quick breads). Pour batter into a buttered loaf pan (I used glass). Bake at 350 for 45 minutes, turn down the oven temperature to 325 and bake for 15 more minutes, until toothpick inserted into the center comes out clean. Allow to sit for 10 minutes, then loosen the sides with a knife (or Cutco spatula spreader) and remove from the pan onto a wire rack to cool. ENJOY! With butter or plain.

*I try to purchase and use only organic ingredients as far as I am able. A quick note on organic ingredients. The reason it is important to avoid non-organic foods is because of the glyphosate (which is in Roundup) is generally sprayed on all crops that are not organic. Most of us have a glyphosate burden that can wreak havoc with our longterm health. Eating organic only has been shown to significantly reduce the amount of glyphosate your body has to deal with and leads to robust health – mental and physical. Many people think organic is a fad, is too expensive, and one man I spoke to in the grocery store was repulsed by the idea of organic because he thought it would not be enjoyable to eat! The good news is 1) there is more and more organic options available in local grocery stores with better and better labels; 2) the price is not so much higher than non-organic brands, but when considering the cost we all need to realize that the cost of sickness today is extremely high; 3) organic actually tastes and FEELS better!

DSC_0062Becky Hastings, wife, mother, grandmother, passionate follower of Jesus, seeker of truth and health. Facing a world quite different from the one in which I grew up, I seek to research and understand the very real dangers threatening the health and freedom of today’s parents, providing information to navigate towards joyful family living!  Posted 31 January 2017

Best Wellness Tip EVER!

Kefir is an amazing living food that provides multiple benefits especially when ingested every day. Kefir is known to play a curative role in diabetes, cancer, autism, gastritis, IBS, arthritis, and many more. In fact regularly ingesting kefir might be the single most beneficial thing you can do to ensure wellness!

Kefir has the benefits of a pro-biotic since it is rich in vitamins, minerals and polysaccharides, with a diversity of bacteria, yeast and mould which are beneficial to the human micro-biome.

Kefir provides over 70 different pro-biotic species which keep harmful bacteria in check, help bring healing to the gut, and enhance immune function. Even people who are lactose intolerant are able to consume kefir because the live organisms consume the lactose leaving it 97% lactose free.

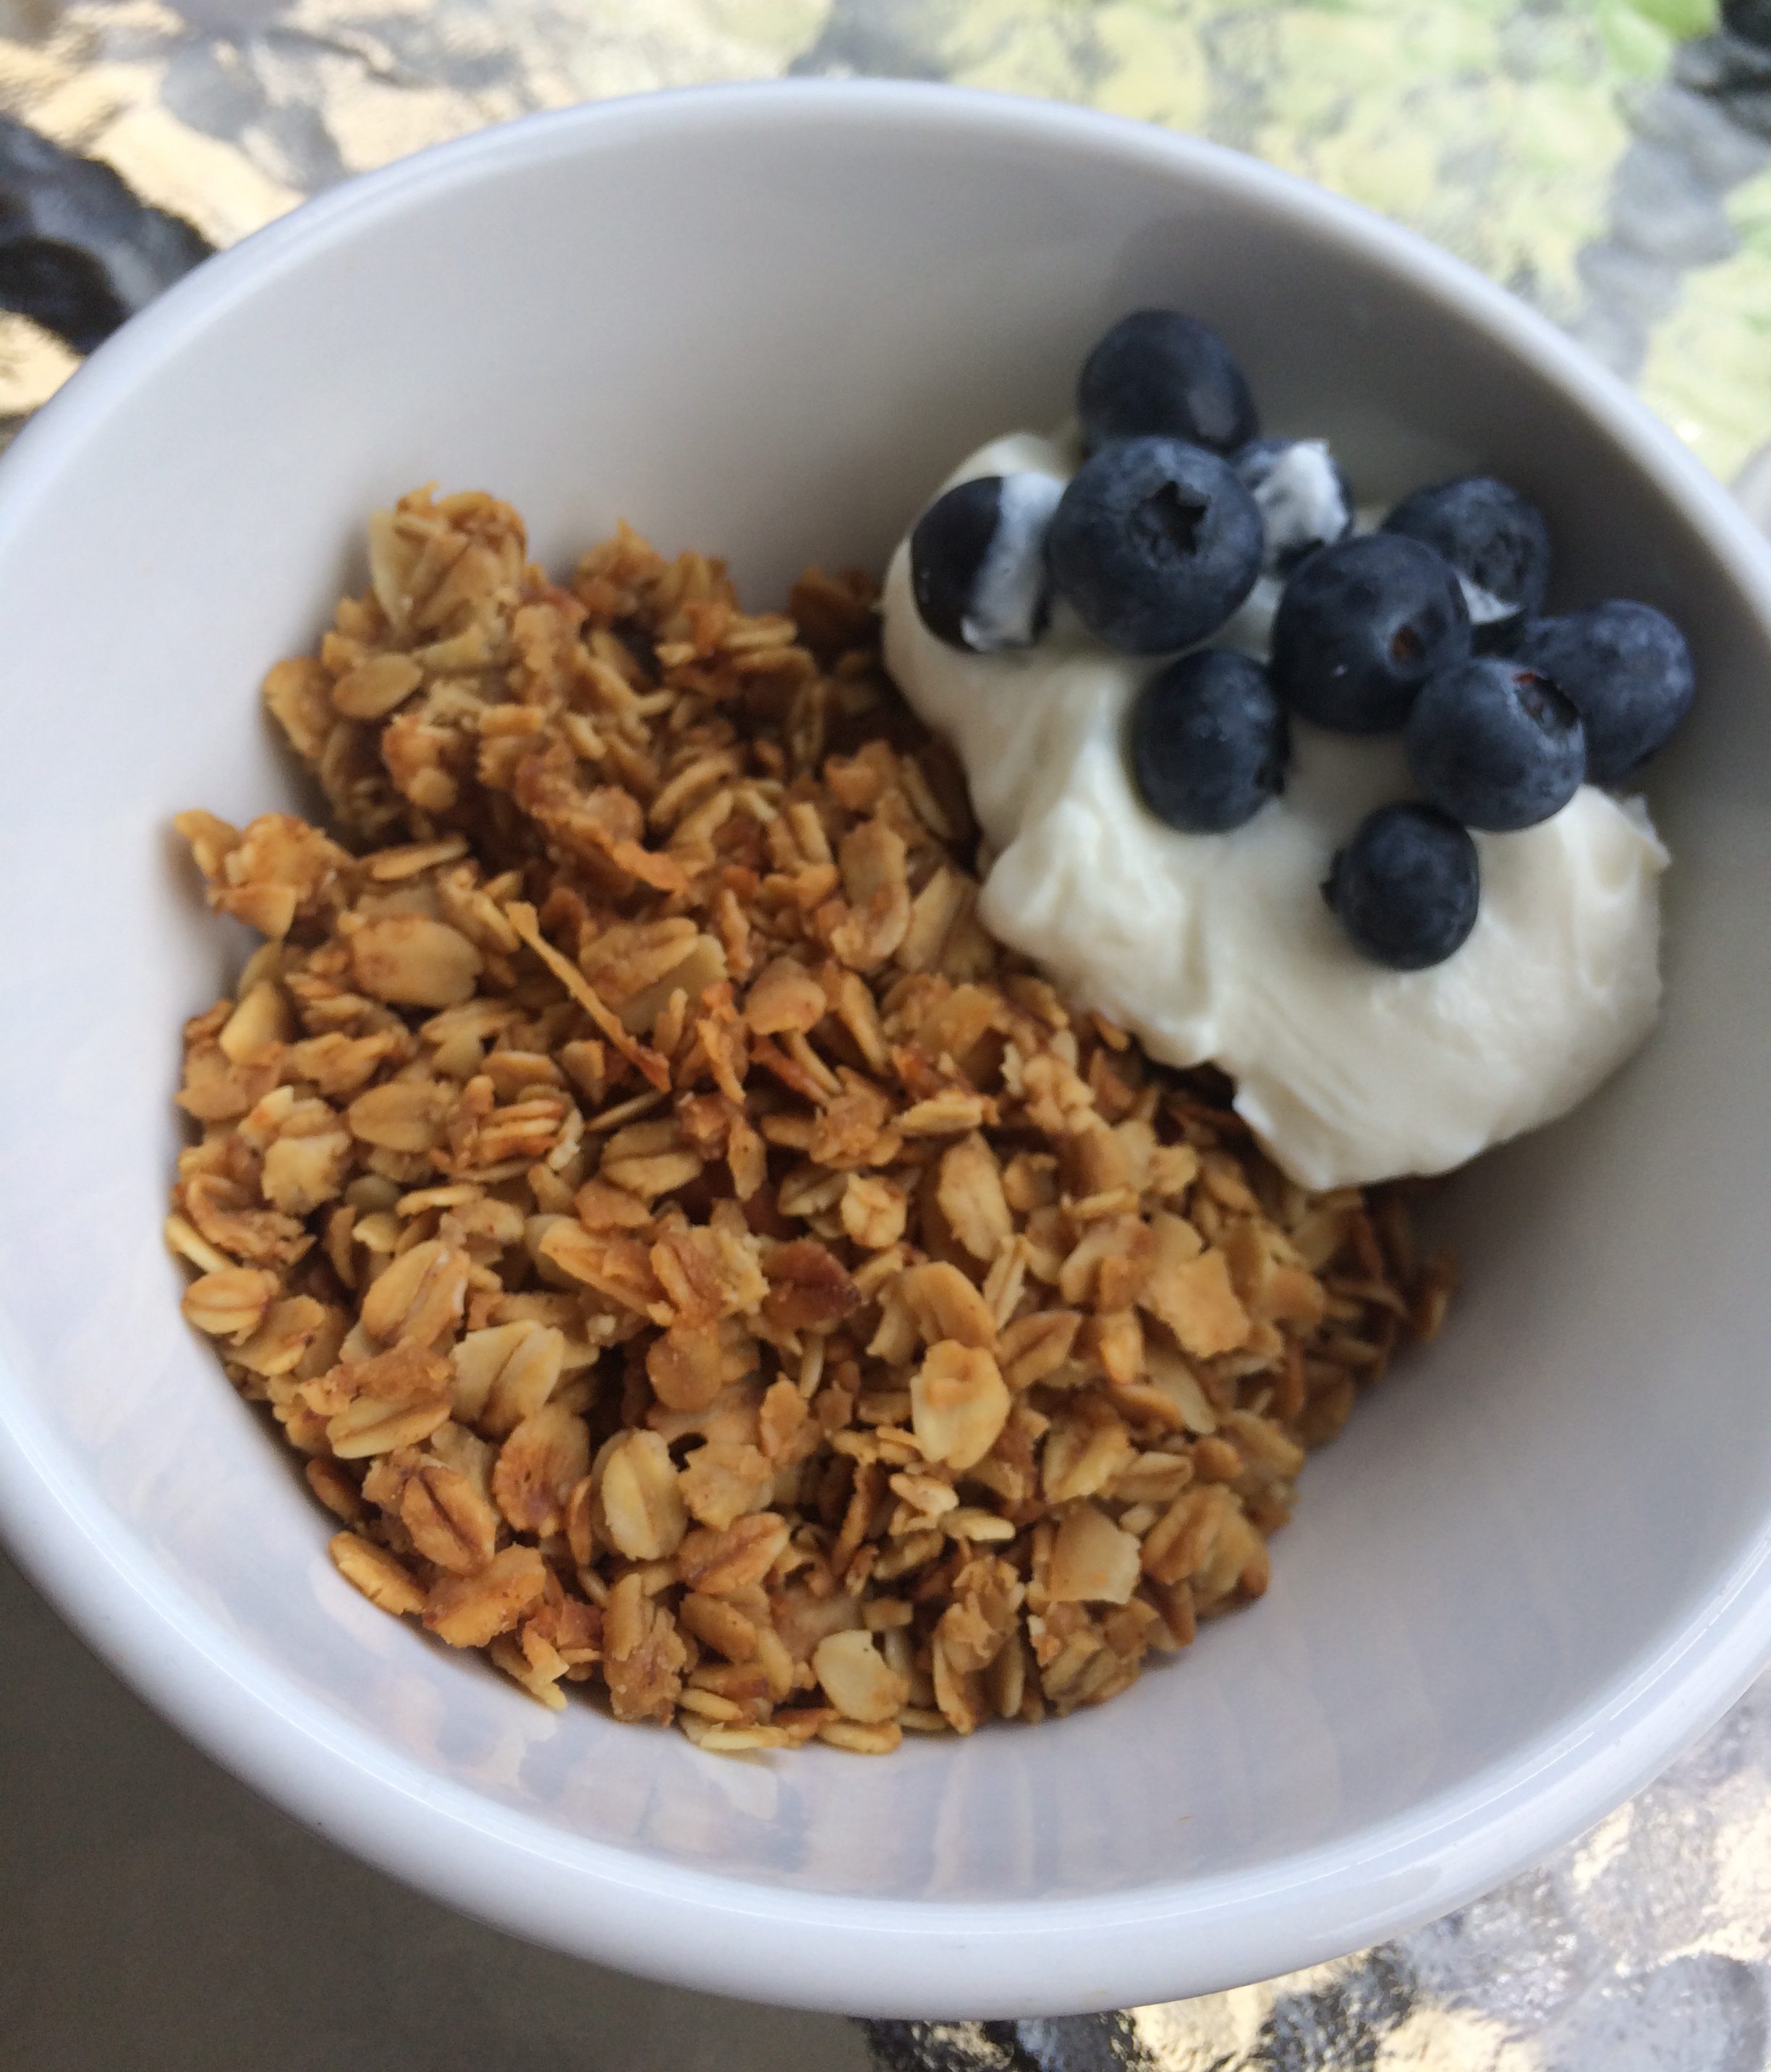
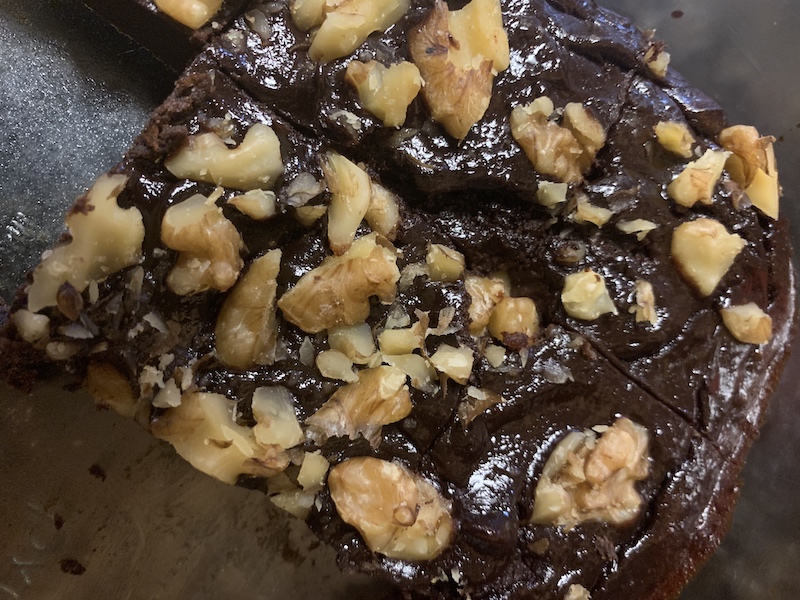
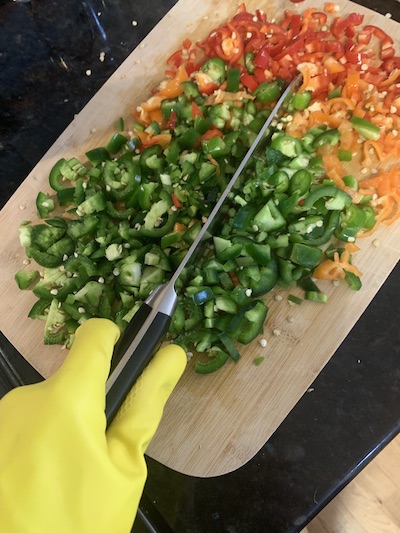
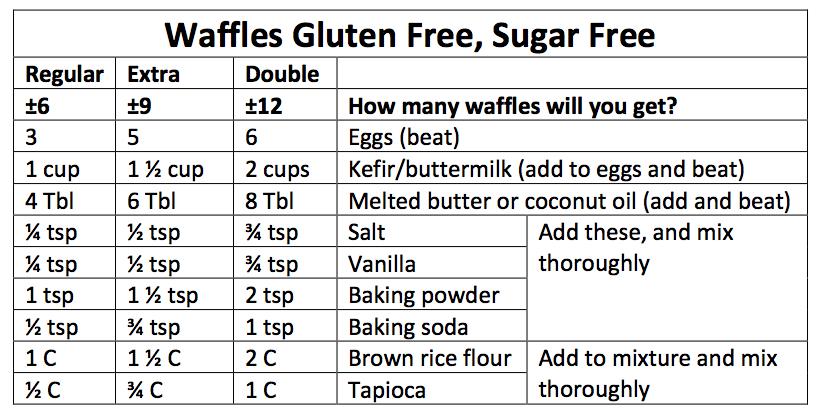
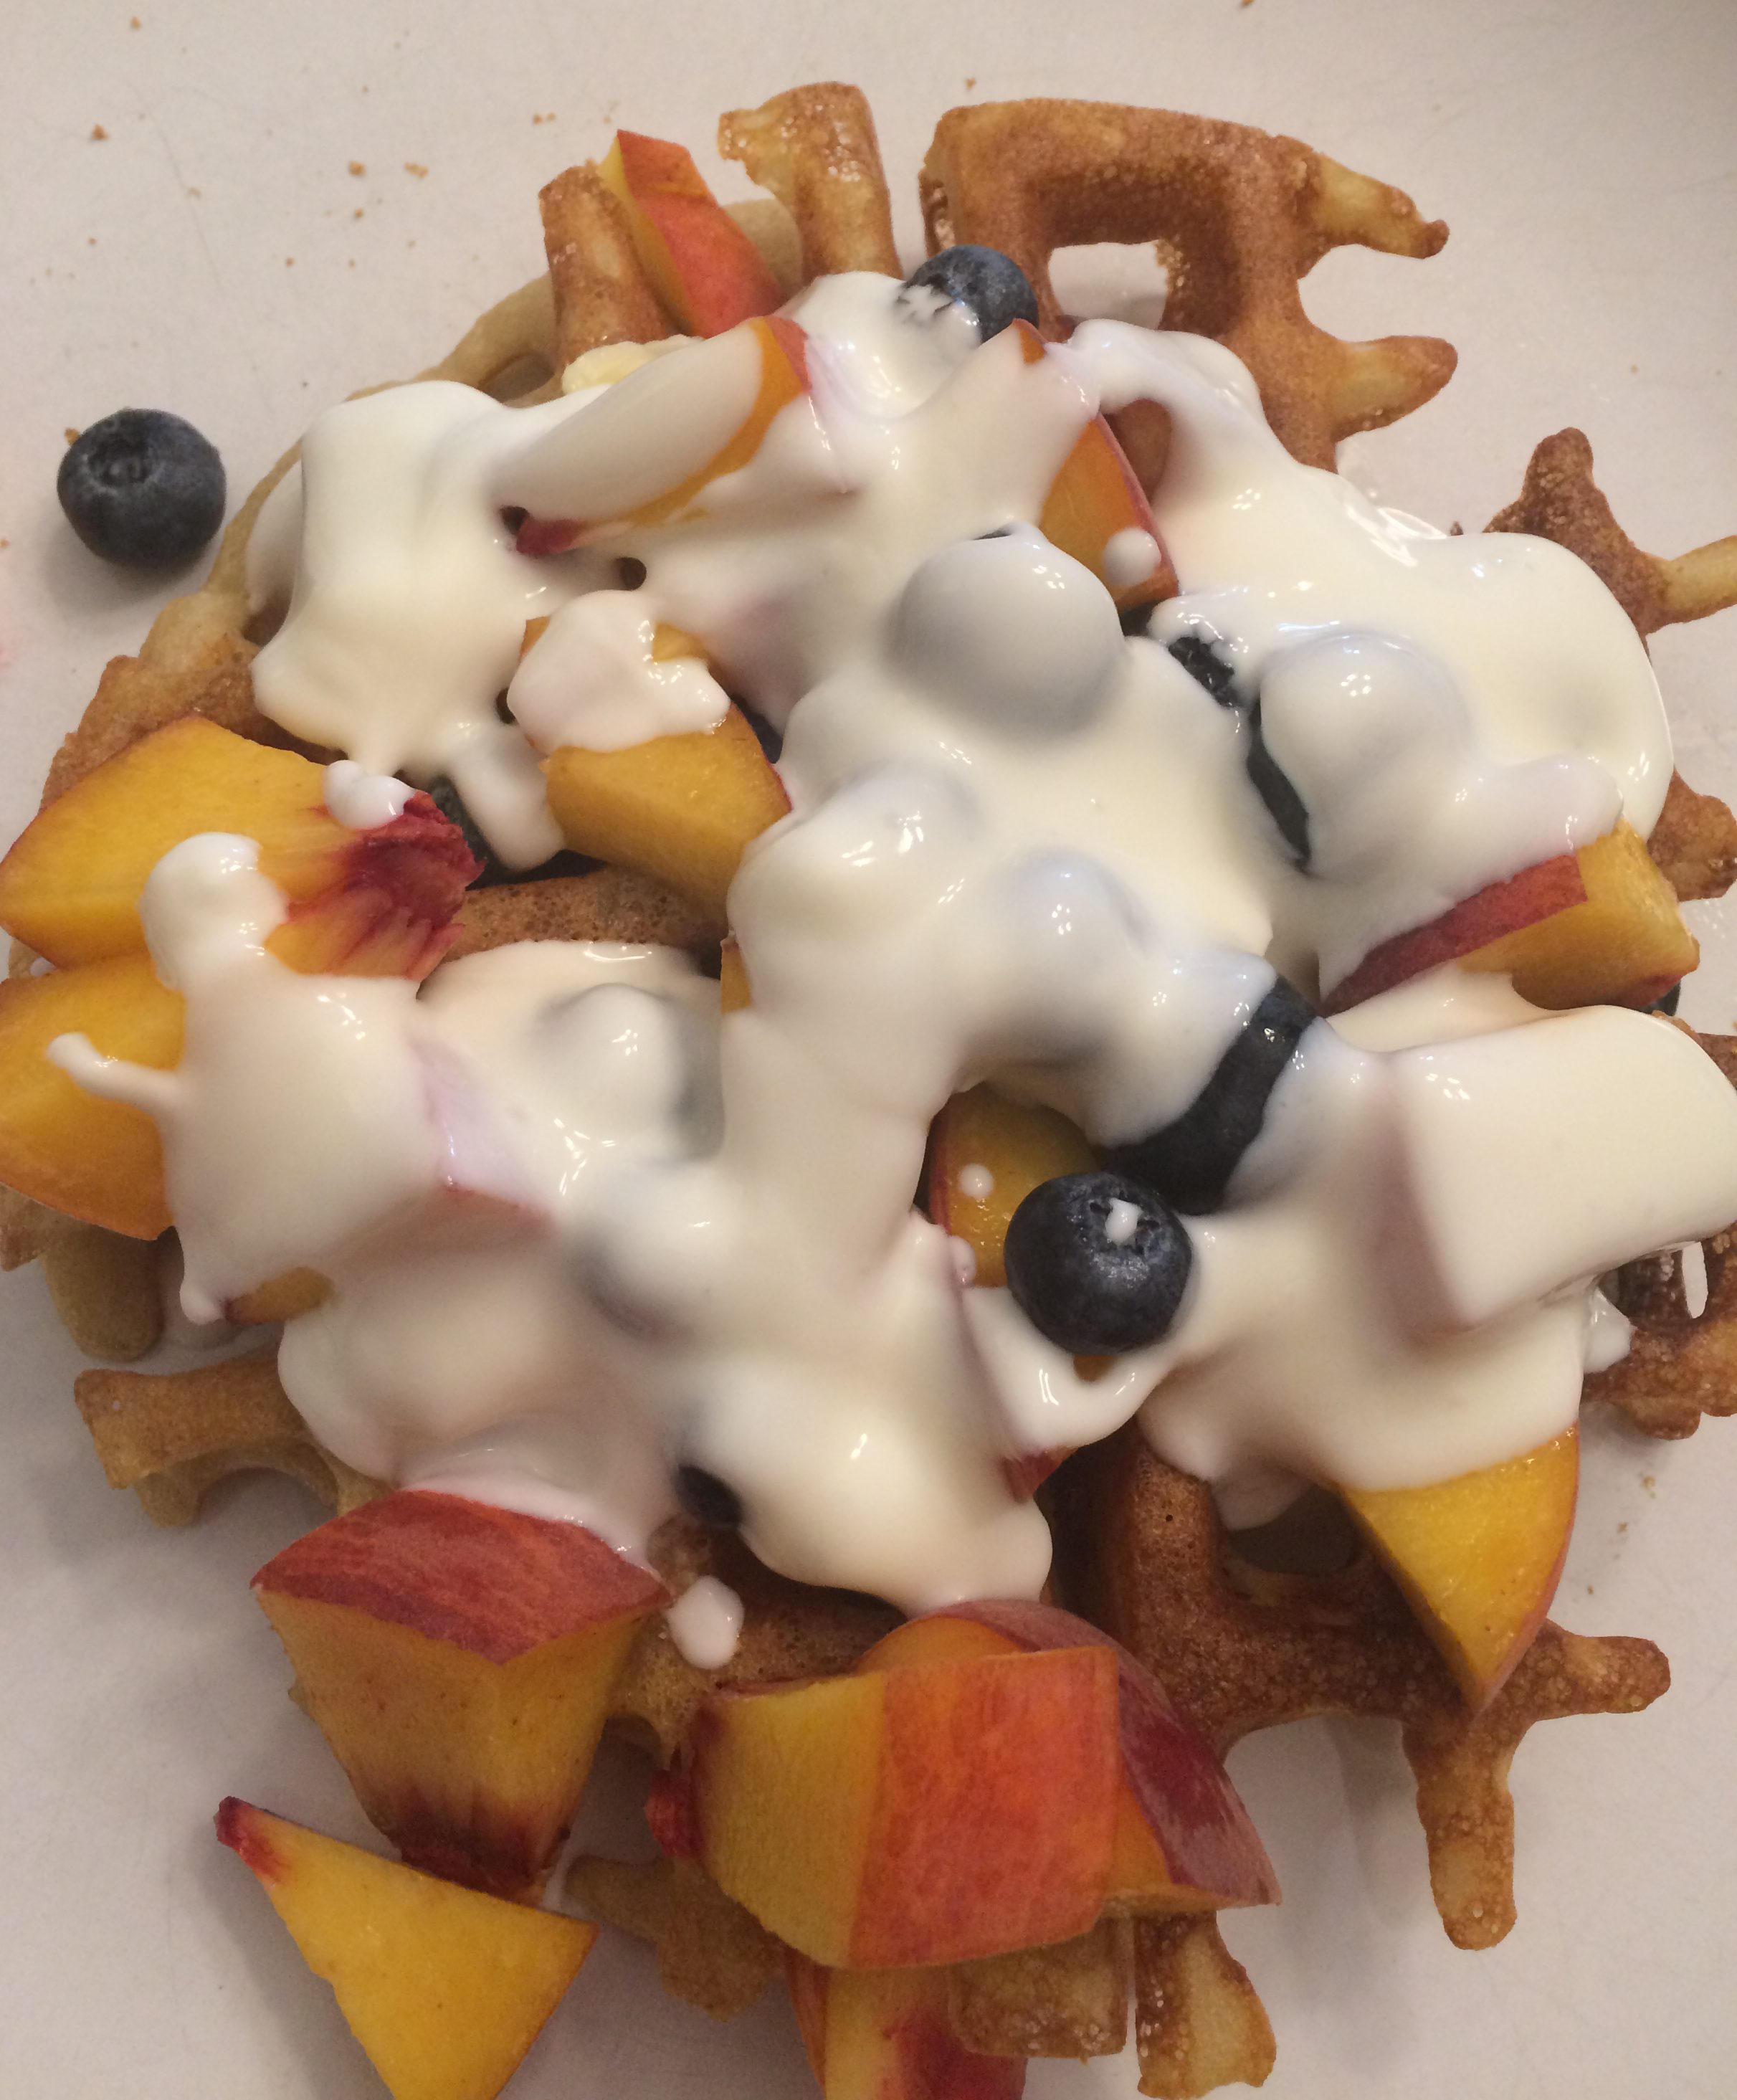
Making kefir is simple – far easier than making yogurt – but you can use it in all the same ways as yogurt, or just drink it straight to make sure you get the daily benefits. Add to soup, stews, waffles, breakfast, salad dressings, etc.

Your kefir grains are often dehydrated for travel and delivery.

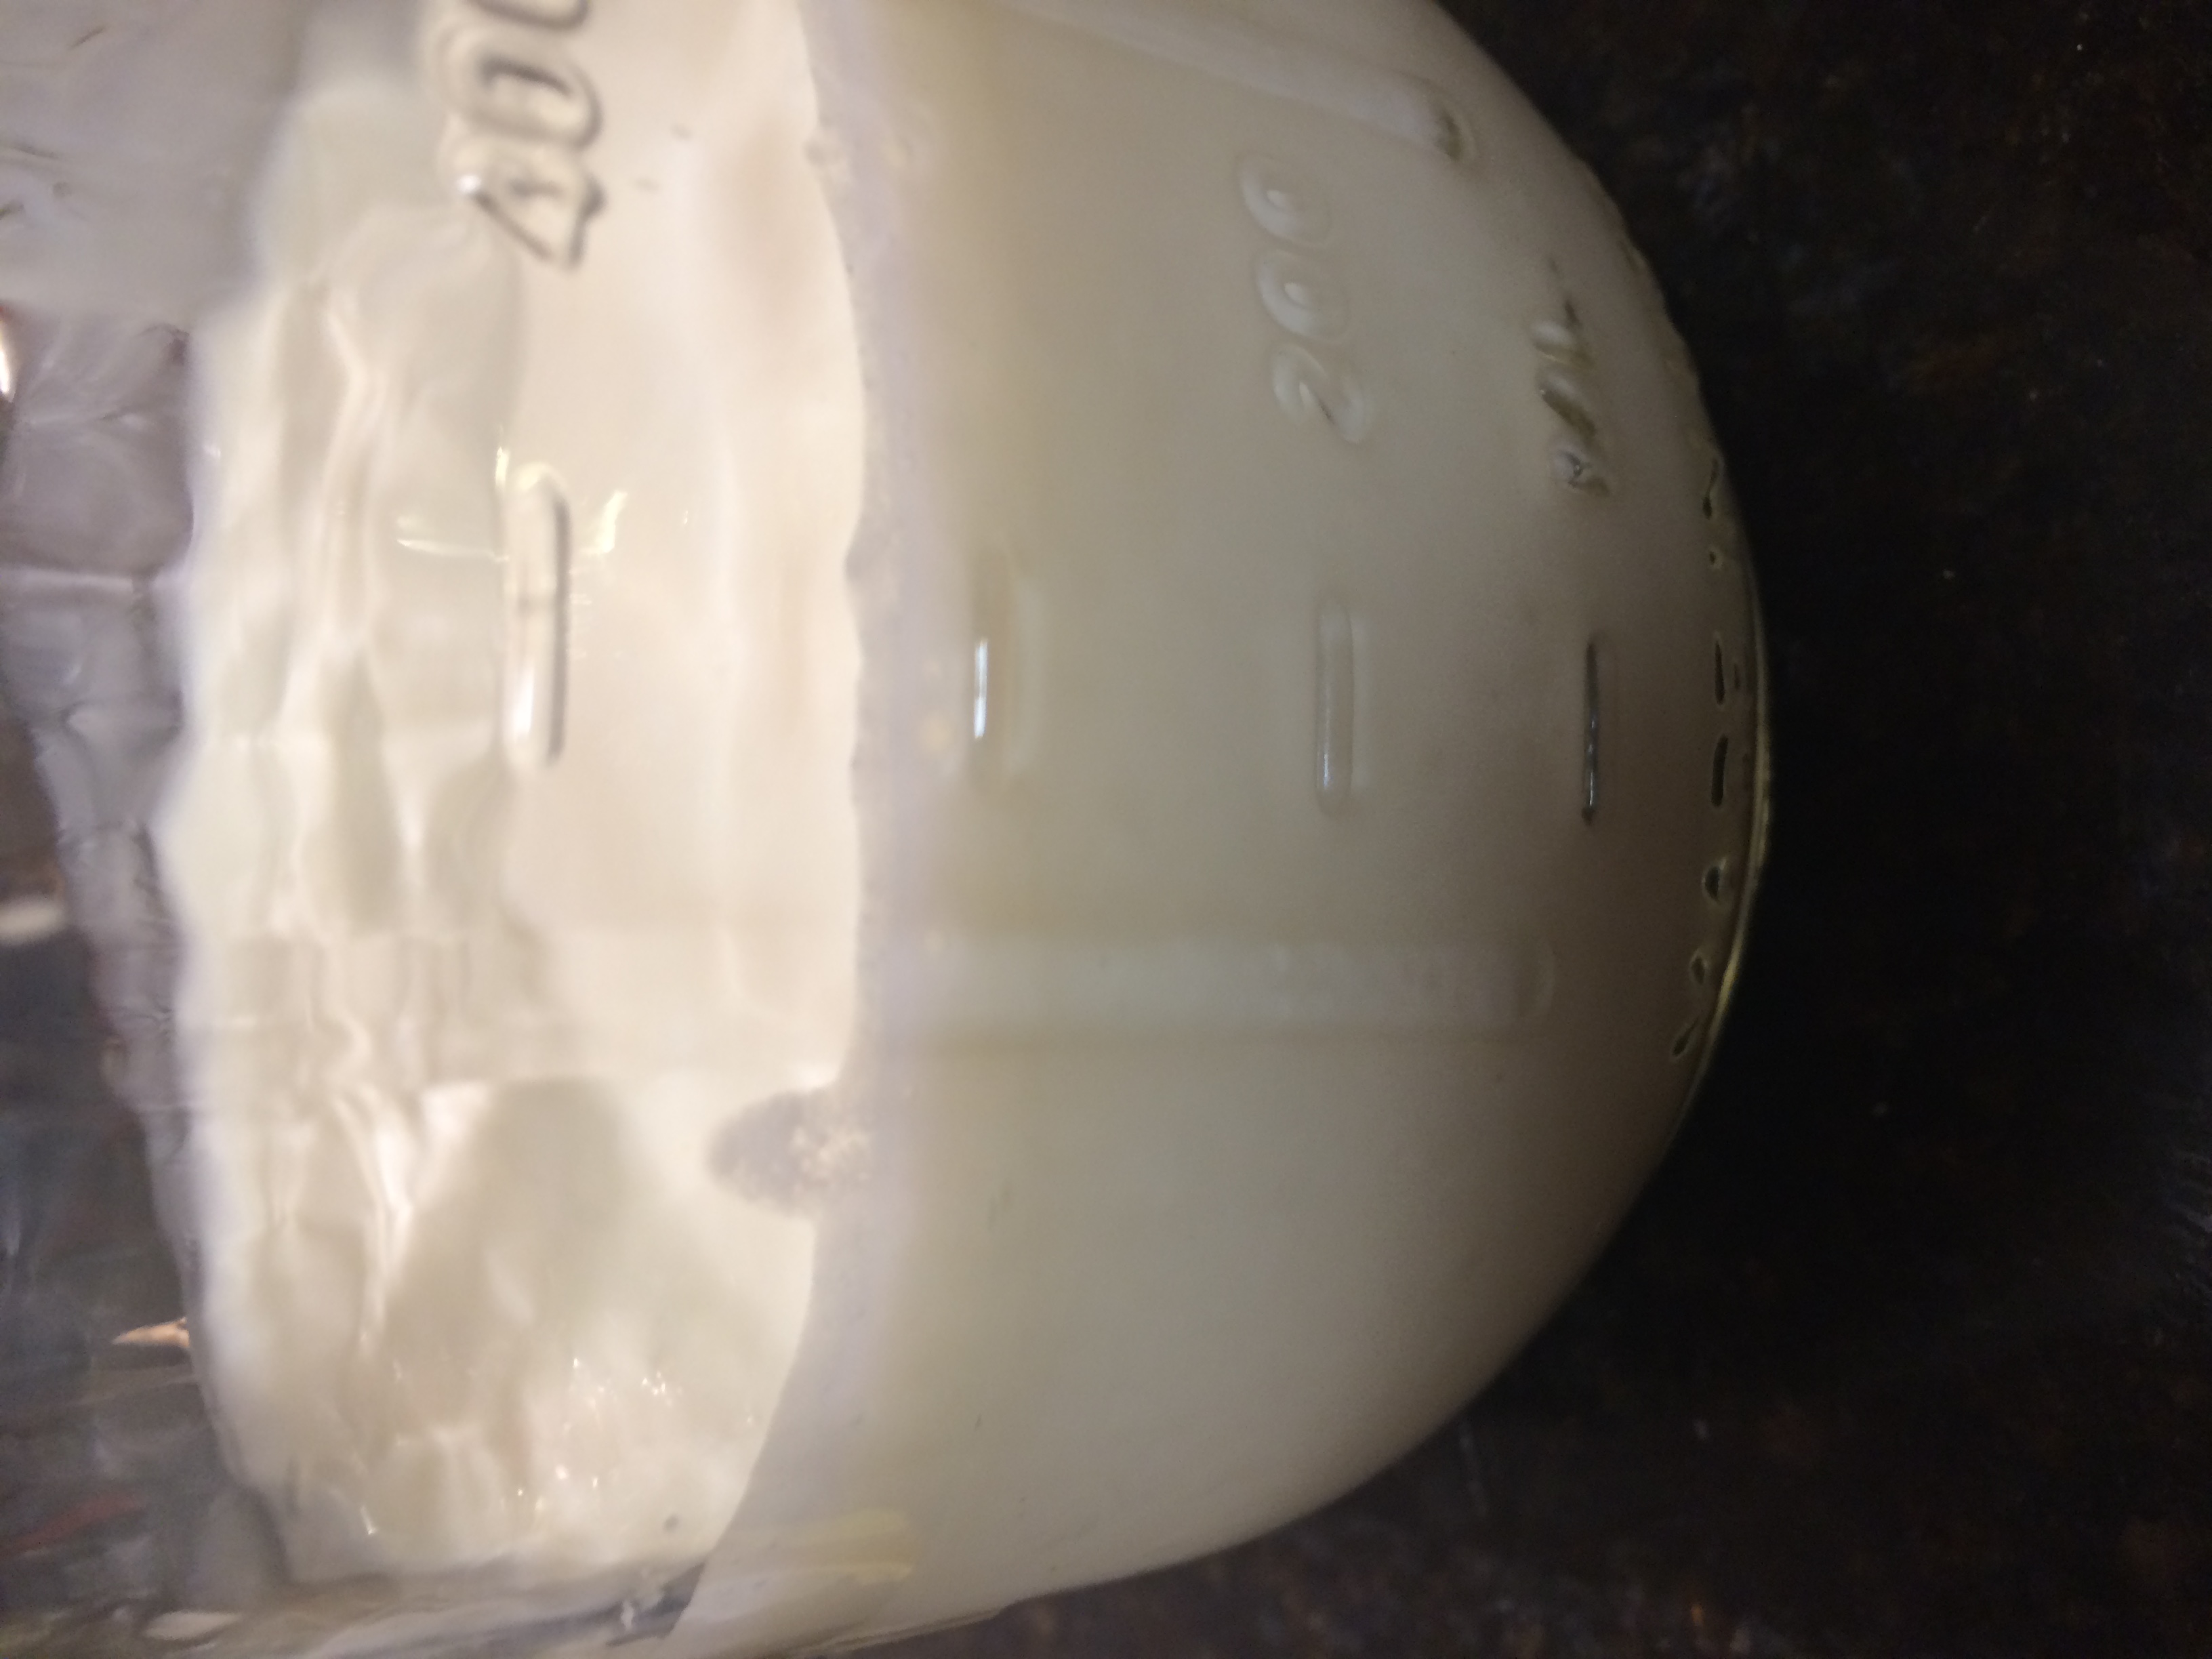
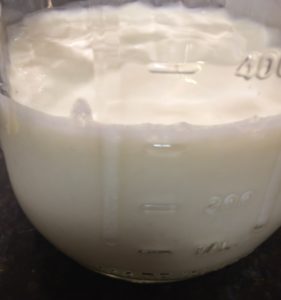
  • To revitalize your kefir grains, place in a glass jar and pour in milk – leaving about a 1 inch space at the top. Cover with a piece of paper towel held by a rubber band. Choose the size of jar based on the amount of kefir you desire. A bigger jar of milk will take longer than a smaller jar.
  • Leave the jar sitting on the kitchen counter. Kefir is ready when you shake the jar and it jiggles. The first batch from dried grains may take slightly longer, but generally kefir is ready in 24 – 36 hours.
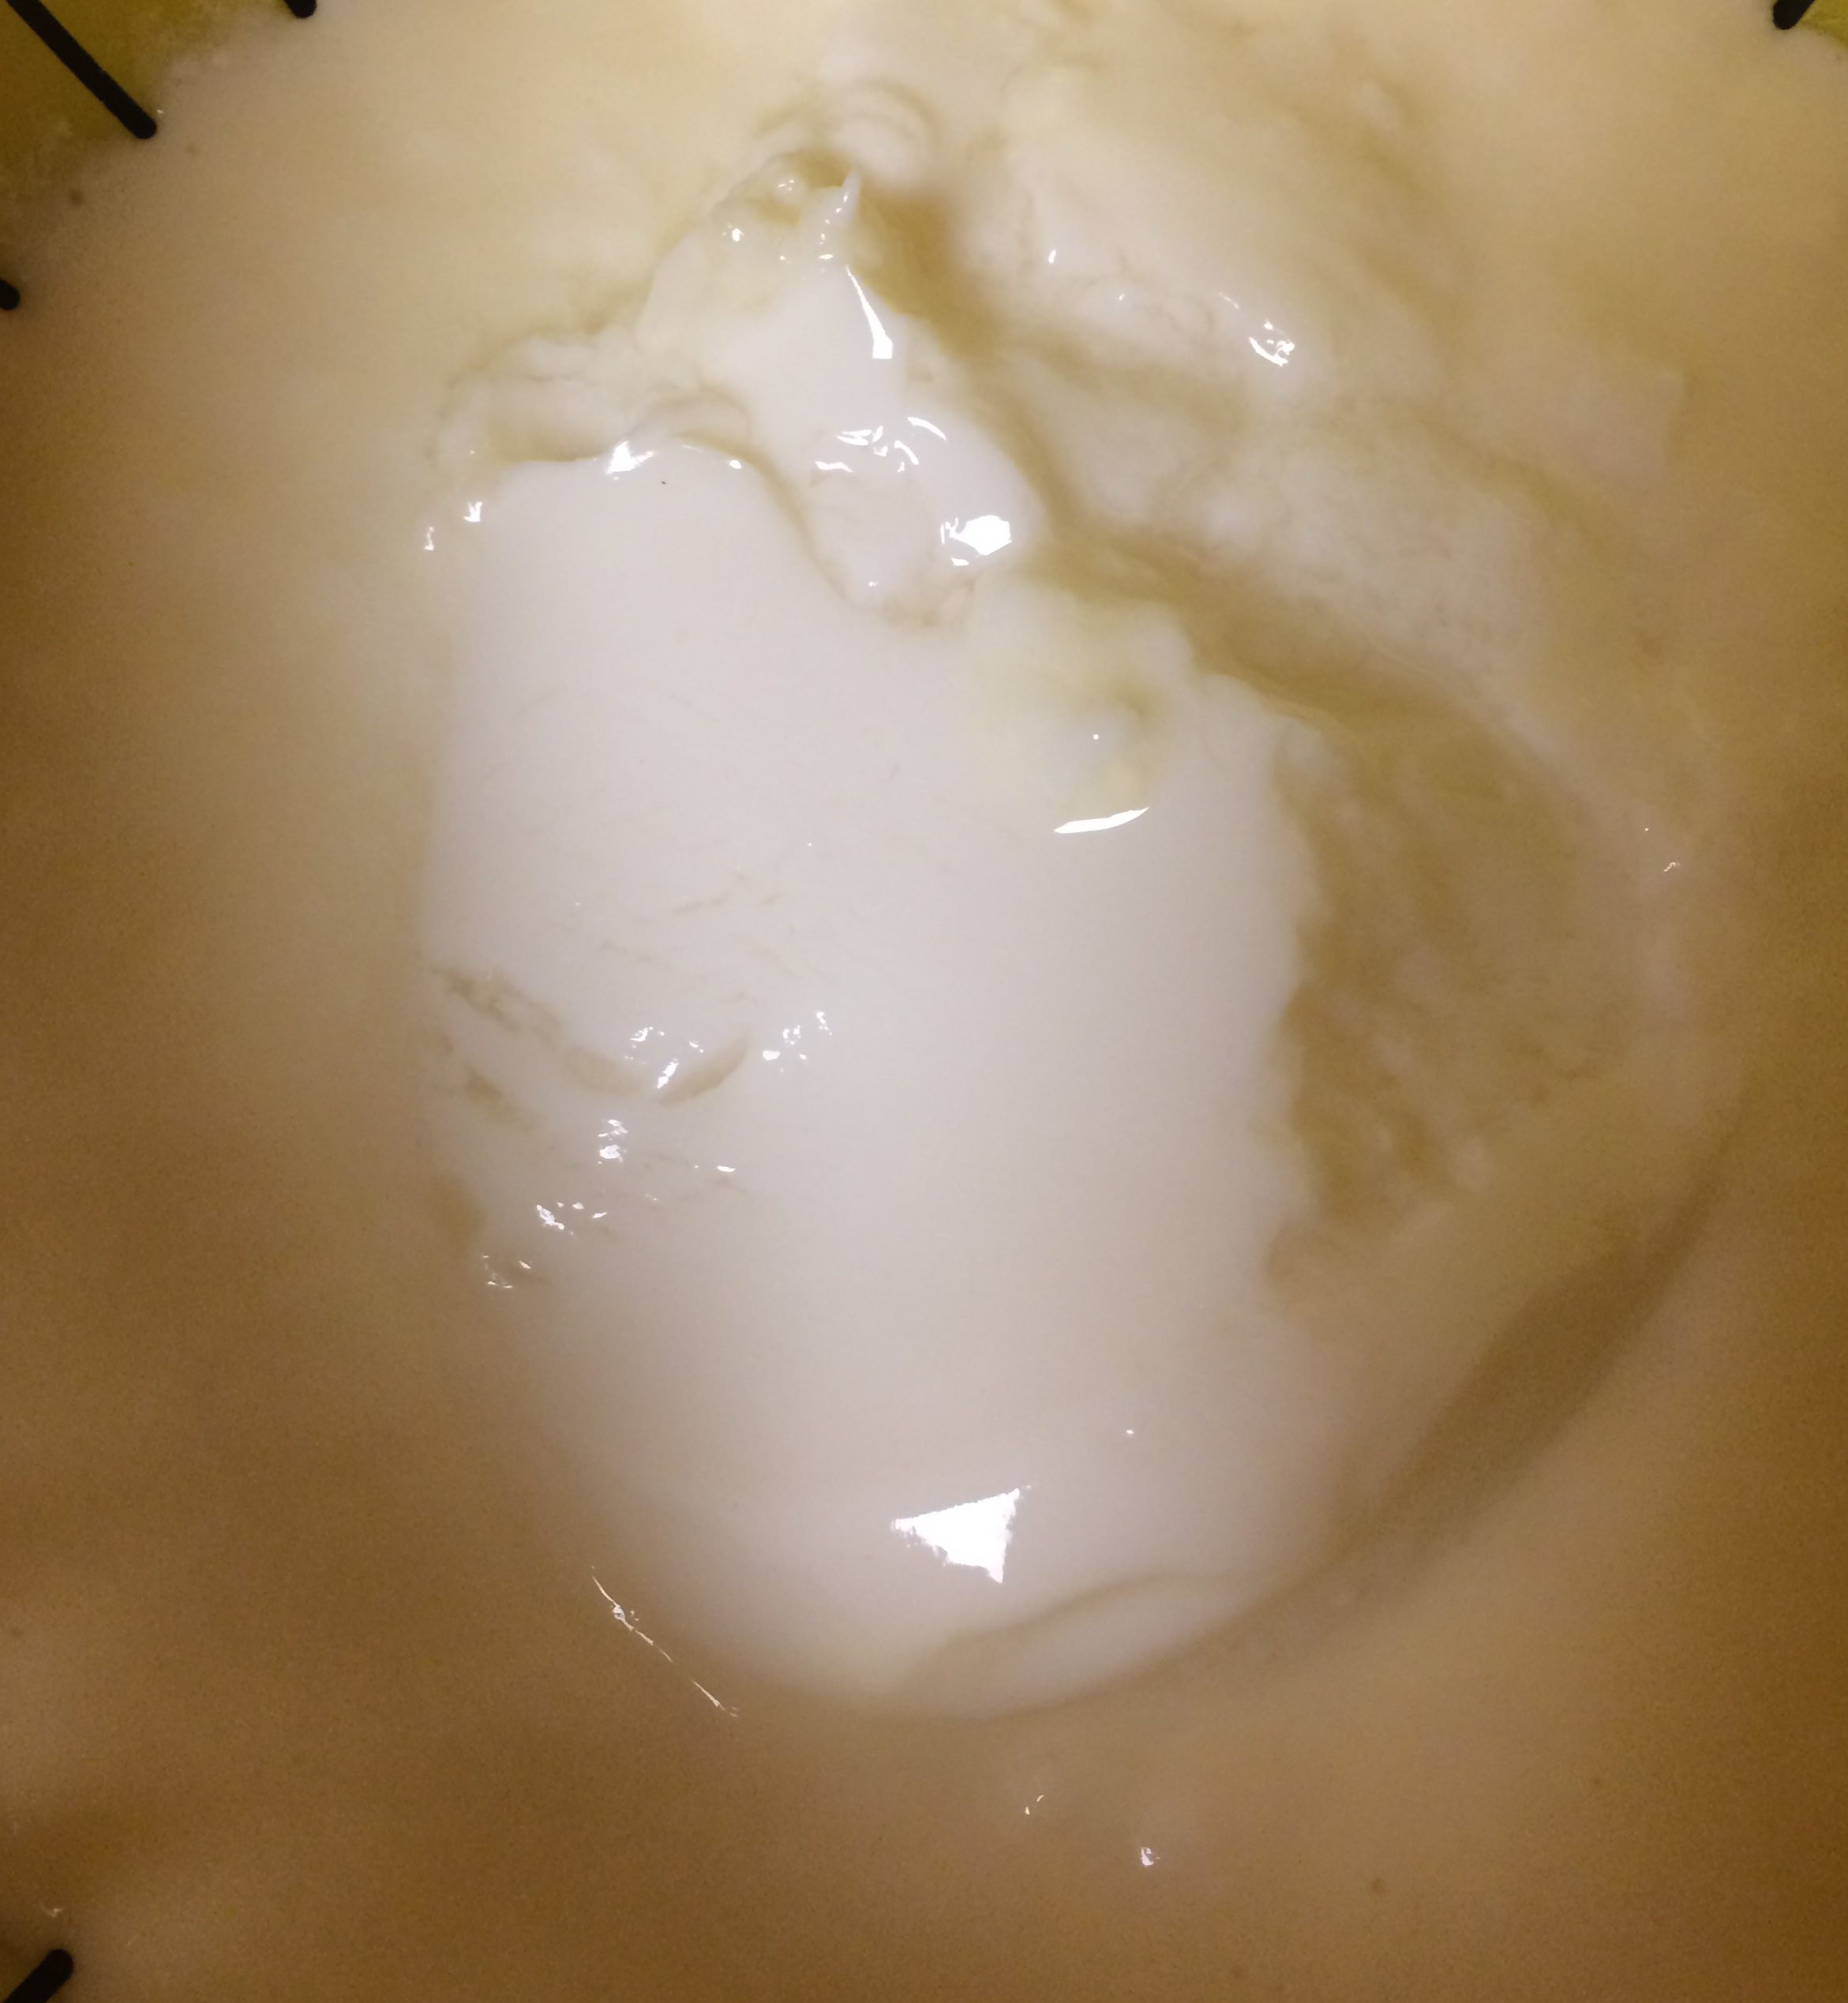
  • If you leave kefir for too long – several days – it can separate into ‘curds’ and ‘whey’. It is still fine to consume, just mix. Or if you like it thick you can pour off the whey, or use it in soup or baking, and have a thick creamy kefir.
  • Once kefir is firm you can remove the grains and begin your next batch.
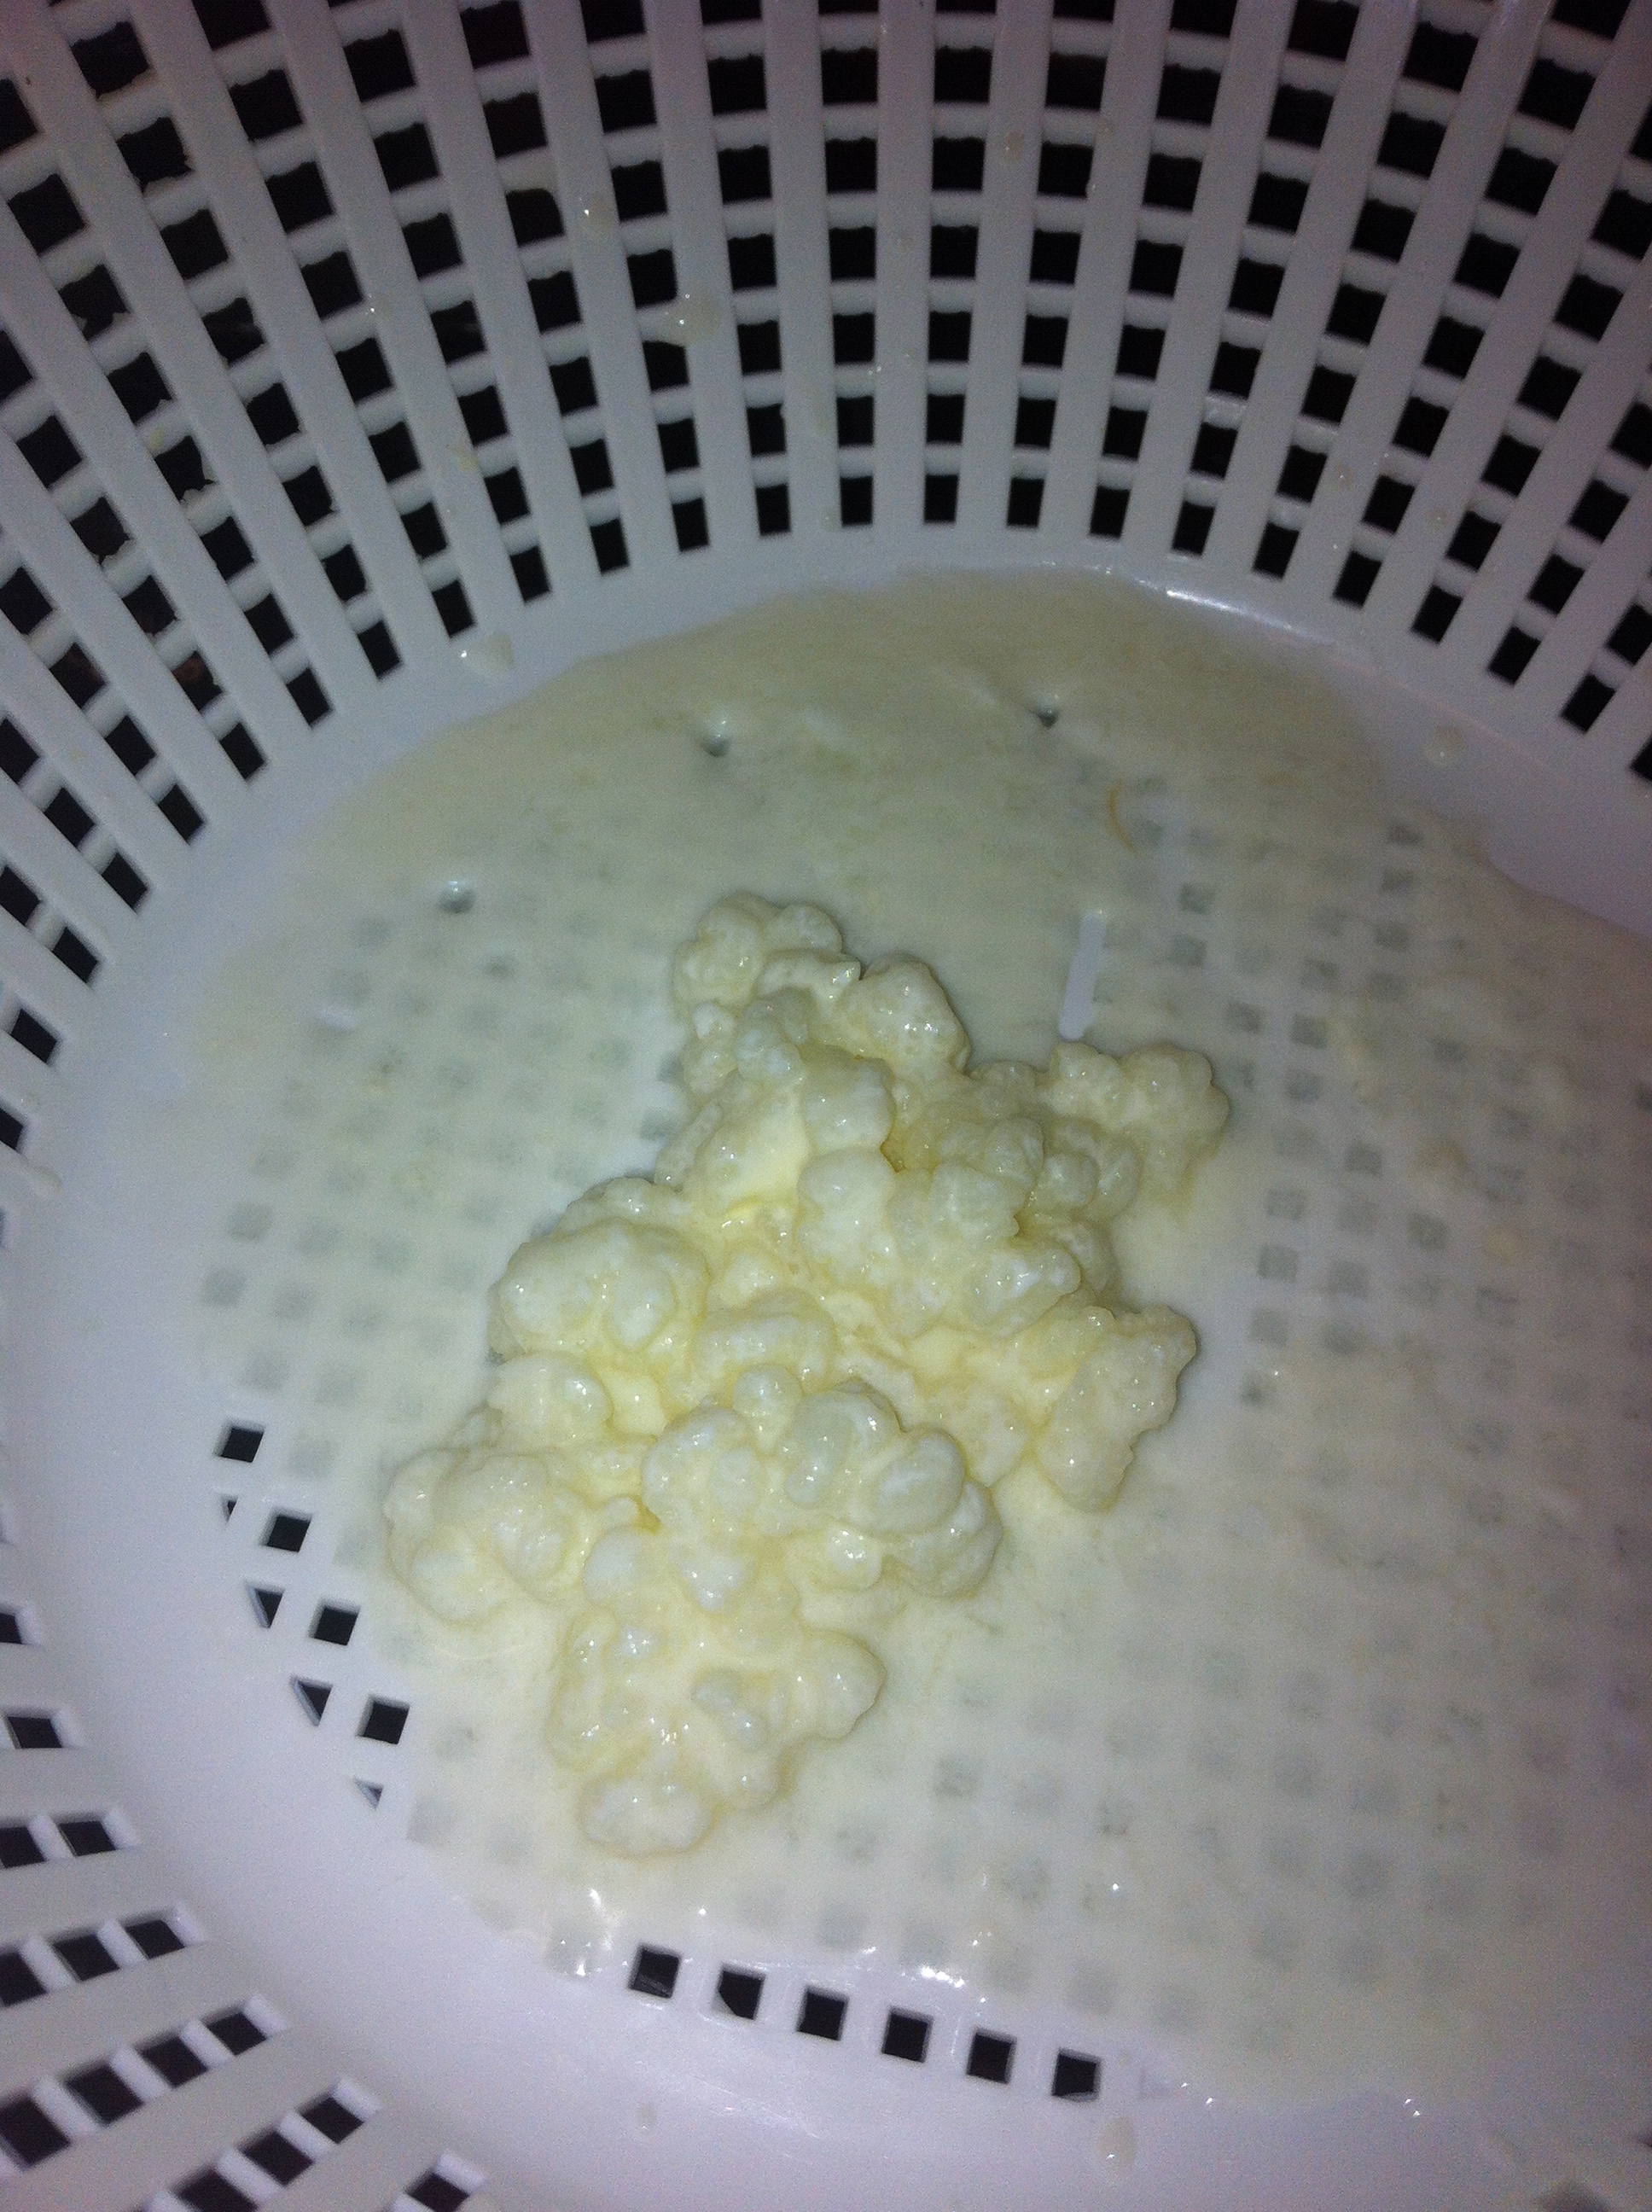
  • To remove the grains you can try with a plastic fork, simply stir around and see if you find the firm kefir grains. This works if the grains are near the top. Other times it is more difficult to find and you need to work the kefir through a plastic Place a large funnel into a clean glass jar then put the plastic colander on top. Pour in the kefir in batches and use a spatula to push it through the holes. You will know when you find the grains because they will not go through the holes!
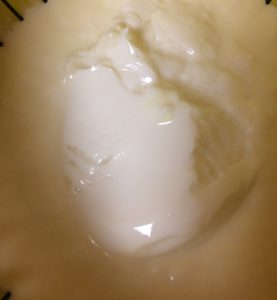
  • If you don’t have time to strain, but the kefir is firm, place the jar ‘as is’ into the refrigerator. It will be fine for many days like that, until you have a chance to strain it.
  • If you know you are going to be away from home for a week or more, or you just want a bit of a break from making kefir, you want to keep your kefir grains alive. Place the kefir grains in a jar, pour milk just to cover, put on a top and keep it in the refrigerator. It will hibernate. When you are ready to make your next batch of kefir, pour out the milk, rinse the grains in spring/filtered water or fresh milk, then place in a glass jar and start at the top. Never expose your kefir to tap water than contains fluoride.
  • When kefir grains have multiplied they will work faster in producing the thick kefir. You can divide the grains, share some of your grains with a friend, add them to smoothies, freeze some in milk, or dry them. To share fresh kefir grains simply put them in a jar of milk, or pure water if they won’t be there for too long. The milk provides food to the living organisms.
  • To dry them, after straining rinse with pure water or fresh milk, place them on a piece of parchment paper. It will dry in a few days. Dried kefir grains can safely be mailed in an envelope so you can share with family or friends far away!

Historically, kefir grains originate in the Caucasus Mountains between Russian and Georgia where the local people have consumed kefir and experienced remarkable health throughout history. “The census of 1970, revealed that 5,000 centenarians then lived in the Caucasus.”[1] Because of the beneficial probiotics in kefir, regular “consumption reinforces the intestinal flora, helps with digestion, restores the digestive system and strongly stimulates the immune system.” [2]

Kefir grains were considered part of the family’s wealth and the tribe’s wealth and they were passed on from generation to generation. For centuries the people of the northern Caucasus enjoyed this food without sharing it with anyone else. Other peoples occasionally heard strange tales of this unusual beverage, which was said to have magical properties. Marco Polo mentioned kefir in the chronicles of his travels in the East.[1]

The BIG Bonus!

From my reading, it would seem that homemade kefir made using raw cow’s milk provides a good source of GCMAF, which has been used to treat and heal autism and other serious brain disorders. GCMAF is a harmless and naturally occurring glycoprotein with a profound potential to heal. It is produced in human breast milk and plays a significant role in innate immunity. All higher order animals have this glycoprotein which functions to transport Vitamin D to all the cells in our body, including our immune cells. Lack of this protein causes immune suppression.

Becky Hastings, a wife, mom, grandmother, passionate follower of Jesus, health promoter, breastfeeding counsellor helping moms for 22+ years, and someone who seeks to research, understand and share truth so people can make wise choices in our crazy mixed up, deceived world! Sometimes I share recipes and homespun teaching videos.

[1] Sharla. Kefir – The Mystical Side. Web. 11 Aug. 2017. .

[2] Sekkal-Taleb, Nezha. “Chemical and microbiological composition of Kefir and its natural benefits.” Mediterranean Journal of Biosciences1.4 (2016): 174-83. Web. 11 Aug. 2017. .

Straining Milk Kefir Video

I just made a homespun video to show you how easy it is to strain out your milk kefir grains. This must be done after every batch of kefir so that you can make another batch! The kefir grains will multiply over time so that you will be able to share the joys of kefir making with your friends.

I’ve posted other information on kefir, including some of my favorite recipes:

I prefer to use local jersey raw milk because there are many benefits. Recently I have learned that one of the benefits is that it contains GCMAF. Do some research on the benefits!

Many people who have been diagnosed with CDif or other serious intestinal infections are looking for kefir. You can become a source of kefir grains as you spread the wonder of kefir!

Let me know if you have questions about kefir!

Becky Hastings, a wife, mom, grandmother, passionate follower of Jesus, health promoter, breastfeeding counsellor helping moms for 22+ years, and someone who seeks to research, understand and share truth so people can make wise choices in our crazy mixed up, deceived world! Sometimes I share recipes and homespun teaching videos.


Granola – How to Make Your Own

Standing in the cereal aisle of any major food store can be an overwhelming perplexing experience, especially for those of us who aim to choose healthy non-chemical laden food for our families. There are many ‘natural’ cereals to choose from, so we begin reading the labels. What do we find?

soy, canola oil, other unhealthy oils, non-pronounceable ingredients, lots of sugar, preservatives.

Finding healthy granola seems easy – until you start reading the labels. What is the answer? Is there a brand I can trust?  If you finally find a mostly natural granola with a short list of mostly acceptable ingredients, when you look at the price, and work out how many servings it will give your family, you find another long pause as you consider the economics and your budget. Such is the stress of grocery shopping with health and economy in mind.

Making your own ‘fast foods’ for breakfast can be extremely easy, very satisfying, and by far your healthiest option. If you have children, you are BUSY, but one of your best time-saving resources will one day be your children! Teach your children to make this recipe for the whole family.

I’ve written the following recipe in three versions: small, medium and large to make it easy to double or triple the recipe depending on your need.

Some notes about the ingredients:

  • In order to ensure that we are not consuming large amounts of glyphosate (from Roundup) I HIGHLY RECOMMEND choosing organic options for all ingredients. Buying organic also sends a message to retailers, suppliers, growers, etc. that we want healthy food without harmful chemicals. Eventually, if enough people vote with their wallets, price reductions and increased availability will follow.
  • Local, raw honey is the healthiest sweetener, but if you have a large family and a small budget, you may opt to choose organic sugar. Honey is generally considered to be sweeter, so you may need slightly more sugar to reach your desired sweetness.
  • The addition of water (of course non-fluoridated, pure water is the ONLY option you would ingest, how to find it is the topic of another blog) to the liquid ingredients stretches the recipe to make it go further, but you can reduce the amount of water and increase the healthy oils and sweetener for a more indulgent granola.
GRANOLA from the Hastings Family Kitchen
SMALL MEDIUM LARGE
½ – ¾ cup 1 – 1 ½ cup 1 ½ – 2 ¼ cup Honey (or slightly more organic brown sugar)
2/3 cup 1 1/3 cup 2 cups Coconut oil, butter or a combination
2/3 cup 1 1/3 cup 2 cups Water
1 Tablespoon 1 ½ T 2 T Molasses
½ teaspoon 1 tsp 1 ½ tsp Vanilla
Combine these ingredients in a saucepan. Heat over low heat until the sugar dissolves fully. Remove from heat. Add 1 tsp vanilla.
In a huge bowl combine:
1 box (500 g) 2 boxes (1 kg) 3 boxes (1.5 kg) Oats
1 tsp 1 ½ tsp 2 tsp Cinnamon
Pinch Pinch + Pinch ++ Salt
½ cup 1 cup 1 ½ cup Unsweetened Coconut such as Bob’s Red Mill
Optional:

Seeds: hemp hearts, sunflower, pumpkin, and/or sesame. You can also add dried fruit like raisins, and/or any nuts you like. You can add them either before or after cooking, but raisins are usually nicer to add after. I don’t add any raisins or nuts because of different individual preferences (ie some family members complain!). Add nuts and raisins to individual servings, as desired.

METHOD:

In a large bowl mix dry ingredients well. Pour the liquid mixture over and stir thoroughly. Distribute into deep baking trays – 1, 2 or 3 depending on the recipe size you have used. Bake at 350 F for 20 – 30 minutes, but stir thoroughly every 10 minutes and check for even browning. After approximately 30 minutes, stir and turn the oven off, but leave the pans in the oven to cool and for the granola to dry (as long as it looks like it is not burning).

Once the granola is cool and thoroughly dry, break apart and store in airtight containers.   If you make more than you can use in a couple of weeks, store part of it in the freezer.

Enjoy!

Let me know about your experiments in making your own granola! I have written about other breakfast ideas such as Chia Breakfast and Waffles.

Author: Becky Hastings, wife, mother, grandmother, passionate seeker of Jesus, truth and health. Most of my writing is aimed at helping young families find health and joy through making wise choices. Sometimes I share recipes!