When is Kefir ready?

When first starting to make kefir from milk there is a learning curve to know what ‘ready’ looks like. I made this video to show a perfect batch of kefir and what it looks like. The quality of the video is what could be produced by my phone, but hopefully it will help!

Becky Hastings, passionate about Jesus, health, family, truth and healing foods.

More Waffles

As I said in my previous waffle recipe, all recipes are a work in progress.

My latest version (below) has an additional egg and less butter. They were easy to make and devoured by the grandchildren.

I’ve added an easy reference so you can make a double or 1.5 batch. The Belgium flip style waffle maker can be turned upside down as soon as you pour in the batter. It makes THE BEST WAFFLES EVER! I found one made by Hamilton Beach for only $19.99. Truly the lightest waffles because the batter is forced down! My waffle pictures present imperfect waffles because I found pouring less batter causes more expansion. The result may look imperfect, but is most delicious!

I started writing my recipes in chart form, with multiple batch sizes, as an easy way to make the recipe clear and consistent for my children during our homeschooling years (1997-2017). I hope you understand what I’m saying! Quick and easy, is my goal.

I had 2 assistant cooks this morning, my nearly 4 and nearly 2 year old grandchildren, yet we still managed to stick to the recipe AND record it for posterity! The waffles were devoured by all!


These two pictures were taken from another batch of waffles that I made later, since we forgot to take pictures! For this batch I used 1 1/2 cups Bobs gluten free flour. It worked well.

Waffles are great with fruit, yogurt, butter, and syrup – or any combination of those that you like! Waffles are also great with Nancy’s organic pro-biotic cream cheese and organic fruit spread!

Becky Hastings, wife, mother, grandmother, passionate follower of Jesus and truth. As a breastfeeding counselor for over 25 years, Becky is devoted to helping parents make wise decisions for the long-term health and wellbeing of their babies, including which vaccines to choose. Becky loves mountain biking and appreciates donations, which mainly encourage her.

Gluten Free Banana Bread

This recipe is gluten free, but does contain eggs and dairy. If you are also dairy free, you can substitute the milk with water (really – it doesn’t make a difference, or coconut or almond milk). If you also avoid eggs, you can substitute chia seeds, but I haven’t experimented with that.

Many people find tremendous health benefits from avoiding gluten. However, even gluten free processed flours should not really be a staple in most of our regular daily eating plans. However, it’s nice to have an occasional treat, or a way to spoil grandchildren when they come to visit!

I’ve made this recipe twice and it is really easy, moist, and delicious!

Also, I’ve NEVER had a loaf pop out of a pan more easily in one complete piece. That is saying a lot since I’ve been baking quick loaves for about 40 years! This recipe is based on another gluten free recipe, but I significantly reduced the amount of flour and increased the eggs. Perhaps every loaf I’ve ever made in the past was too dry because I had followed a recipe and put TOO MUCH FLOUR into it! Every day is another opportunity to learn.


Gluten Free Banana Bread

Liquid ingredients: Combine in a bowl (mash the bananas) or blend gently.

3
Medium
bananas (frozen and thawed works well)
2
Eggs
Organic* of course
3
Tbl**
Butter, coconut oil or a combination
½
Tsp***
Vanilla
2
Tbl
Maple syrup
¾
Cup
Milk (or water)

Combine dry ingredients in a bowl:

1 ¼
Cup
Gluten free flour (½ cup each white rice & coconut, 1/8 cup each tapioca & potato flours)
1 ¼
Cup
Organic whole gluten free oats
1/3
Cup
Organic sugar
3
Tsp
Aluminum free baking powder
1
Tsp
Salt
1
Tsp
Cinnamon
½-1
Tsp
Turmeric (optional, but everything benefits from turmeric!)
¼ – ½
Cup
Chopped Walnuts
 **Tbl = Tablespoon. ***tsp = teaspoon, approximately 5 ml


Stir dry ingredients, then combine with the liquid ingredients and stir until just mixed (never over mix quick breads). Pour batter into a buttered loaf pan (I used glass). Bake at 350 for 45 minutes, turn down the oven temperature to 325 and bake for 15 more minutes, until toothpick inserted into the center comes out clean. Allow to sit for 10 minutes, then loosen the sides with a knife (or Cutco spatula spreader) and remove from the pan onto a wire rack to cool. ENJOY! With butter or plain.

*I try to purchase and use only organic ingredients as far as I am able. A quick note on organic ingredients. The reason it is important to avoid non-organic foods is because of the glyphosate (which is in Roundup) is generally sprayed on all crops that are not organic. Most of us have a glyphosate burden that can wreak havoc with our longterm health. Eating organic only has been shown to significantly reduce the amount of glyphosate your body has to deal with and leads to robust health – mental and physical. Many people think organic is a fad, is too expensive, and one man I spoke to in the grocery store was repulsed by the idea of organic because he thought it would not be enjoyable to eat! The good news is 1) there is more and more organic options available in local grocery stores with better and better labels; 2) the price is not so much higher than non-organic brands, but when considering the cost we all need to realize that the cost of sickness today is extremely high; 3) organic actually tastes and FEELS better!

DSC_0062Becky Hastings, wife, mother, grandmother, passionate follower of Jesus, seeker of truth and health. Facing a world quite different from the one in which I grew up, I seek to research and understand the very real dangers threatening the health and freedom of today’s parents, providing information to navigate towards joyful family living!  Posted 31 January 2017

Straining Milk Kefir Video

I just made a homespun video to show you how easy it is to strain out your milk kefir grains. This must be done after every batch of kefir so that you can make another batch! The kefir grains will multiply over time so that you will be able to share the joys of kefir making with your friends.

I’ve posted other information on kefir, including some of my favorite recipes:

I prefer to use local jersey raw milk because there are many benefits. Recently I have learned that one of the benefits is that it contains GCMAF. Do some research on the benefits!

Many people who have been diagnosed with CDif or other serious intestinal infections are looking for kefir. You can become a source of kefir grains as you spread the wonder of kefir!

Let me know if you have questions about kefir!

Becky Hastings, a wife, mom, grandmother, passionate follower of Jesus, health promoter, breastfeeding counsellor helping moms for 22+ years, and someone who seeks to research, understand and share truth so people can make wise choices in our crazy mixed up, deceived world! Sometimes I share recipes and homespun teaching videos.


Granola – How to Make Your Own

Standing in the cereal aisle of any major food store can be an overwhelming perplexing experience, especially for those of us who aim to choose healthy non-chemical laden food for our families. There are many ‘natural’ cereals to choose from, so we begin reading the labels. What do we find?

soy, canola oil, other unhealthy oils, non-pronounceable ingredients, lots of sugar, preservatives.

Finding healthy granola seems easy – until you start reading the labels. What is the answer? Is there a brand I can trust?  If you finally find a mostly natural granola with a short list of mostly acceptable ingredients, when you look at the price, and work out how many servings it will give your family, you find another long pause as you consider the economics and your budget. Such is the stress of grocery shopping with health and economy in mind.

Making your own ‘fast foods’ for breakfast can be extremely easy, very satisfying, and by far your healthiest option. If you have children, you are BUSY, but one of your best time-saving resources will one day be your children! Teach your children to make this recipe for the whole family.

I’ve written the following recipe in three versions: small, medium and large to make it easy to double or triple the recipe depending on your need.

Some notes about the ingredients:

  • In order to ensure that we are not consuming large amounts of glyphosate (from Roundup) I HIGHLY RECOMMEND choosing organic options for all ingredients. Buying organic also sends a message to retailers, suppliers, growers, etc. that we want healthy food without harmful chemicals. Eventually, if enough people vote with their wallets, price reductions and increased availability will follow.
  • Local, raw honey is the healthiest sweetener, but if you have a large family and a small budget, you may opt to choose organic sugar. Honey is generally considered to be sweeter, so you may need slightly more sugar to reach your desired sweetness.
  • The addition of water (of course non-fluoridated, pure water is the ONLY option you would ingest, how to find it is the topic of another blog) to the liquid ingredients stretches the recipe to make it go further, but you can reduce the amount of water and increase the healthy oils and sweetener for a more indulgent granola.
GRANOLA from the Hastings Family Kitchen
SMALL MEDIUM LARGE
½ – ¾ cup 1 – 1 ½ cup 1 ½ – 2 ¼ cup Honey (or slightly more organic brown sugar)
2/3 cup 1 1/3 cup 2 cups Coconut oil, butter or a combination
2/3 cup 1 1/3 cup 2 cups Water
1 Tablespoon 1 ½ T 2 T Molasses
½ teaspoon 1 tsp 1 ½ tsp Vanilla
Combine these ingredients in a saucepan. Heat over low heat until the sugar dissolves fully. Remove from heat. Add 1 tsp vanilla.
In a huge bowl combine:
1 box (500 g) 2 boxes (1 kg) 3 boxes (1.5 kg) Oats
1 tsp 1 ½ tsp 2 tsp Cinnamon
Pinch Pinch + Pinch ++ Salt
½ cup 1 cup 1 ½ cup Unsweetened Coconut such as Bob’s Red Mill
Optional:

Seeds: hemp hearts, sunflower, pumpkin, and/or sesame. You can also add dried fruit like raisins, and/or any nuts you like. You can add them either before or after cooking, but raisins are usually nicer to add after. I don’t add any raisins or nuts because of different individual preferences (ie some family members complain!). Add nuts and raisins to individual servings, as desired.

METHOD:

In a large bowl mix dry ingredients well. Pour the liquid mixture over and stir thoroughly. Distribute into deep baking trays – 1, 2 or 3 depending on the recipe size you have used. Bake at 350 F for 20 – 30 minutes, but stir thoroughly every 10 minutes and check for even browning. After approximately 30 minutes, stir and turn the oven off, but leave the pans in the oven to cool and for the granola to dry (as long as it looks like it is not burning).

Once the granola is cool and thoroughly dry, break apart and store in airtight containers.   If you make more than you can use in a couple of weeks, store part of it in the freezer.

Enjoy!

Let me know about your experiments in making your own granola! I have written about other breakfast ideas such as Chia Breakfast and Waffles.

Author: Becky Hastings, wife, mother, grandmother, passionate seeker of Jesus, truth and health. Most of my writing is aimed at helping young families find health and joy through making wise choices. Sometimes I share recipes!

Toasted Coconut Chocolate Gooey Treats

There are so many wonderful things about making and eating your own raw chocolate creations. NO GUILT about eating your creations might top the list. Because the ingredients are good – and good for you, there is no need to feel guilty! You can also tailor any recipe to exactly the taste you love.

Feel free to modify the recipe I created after seeing something similar.
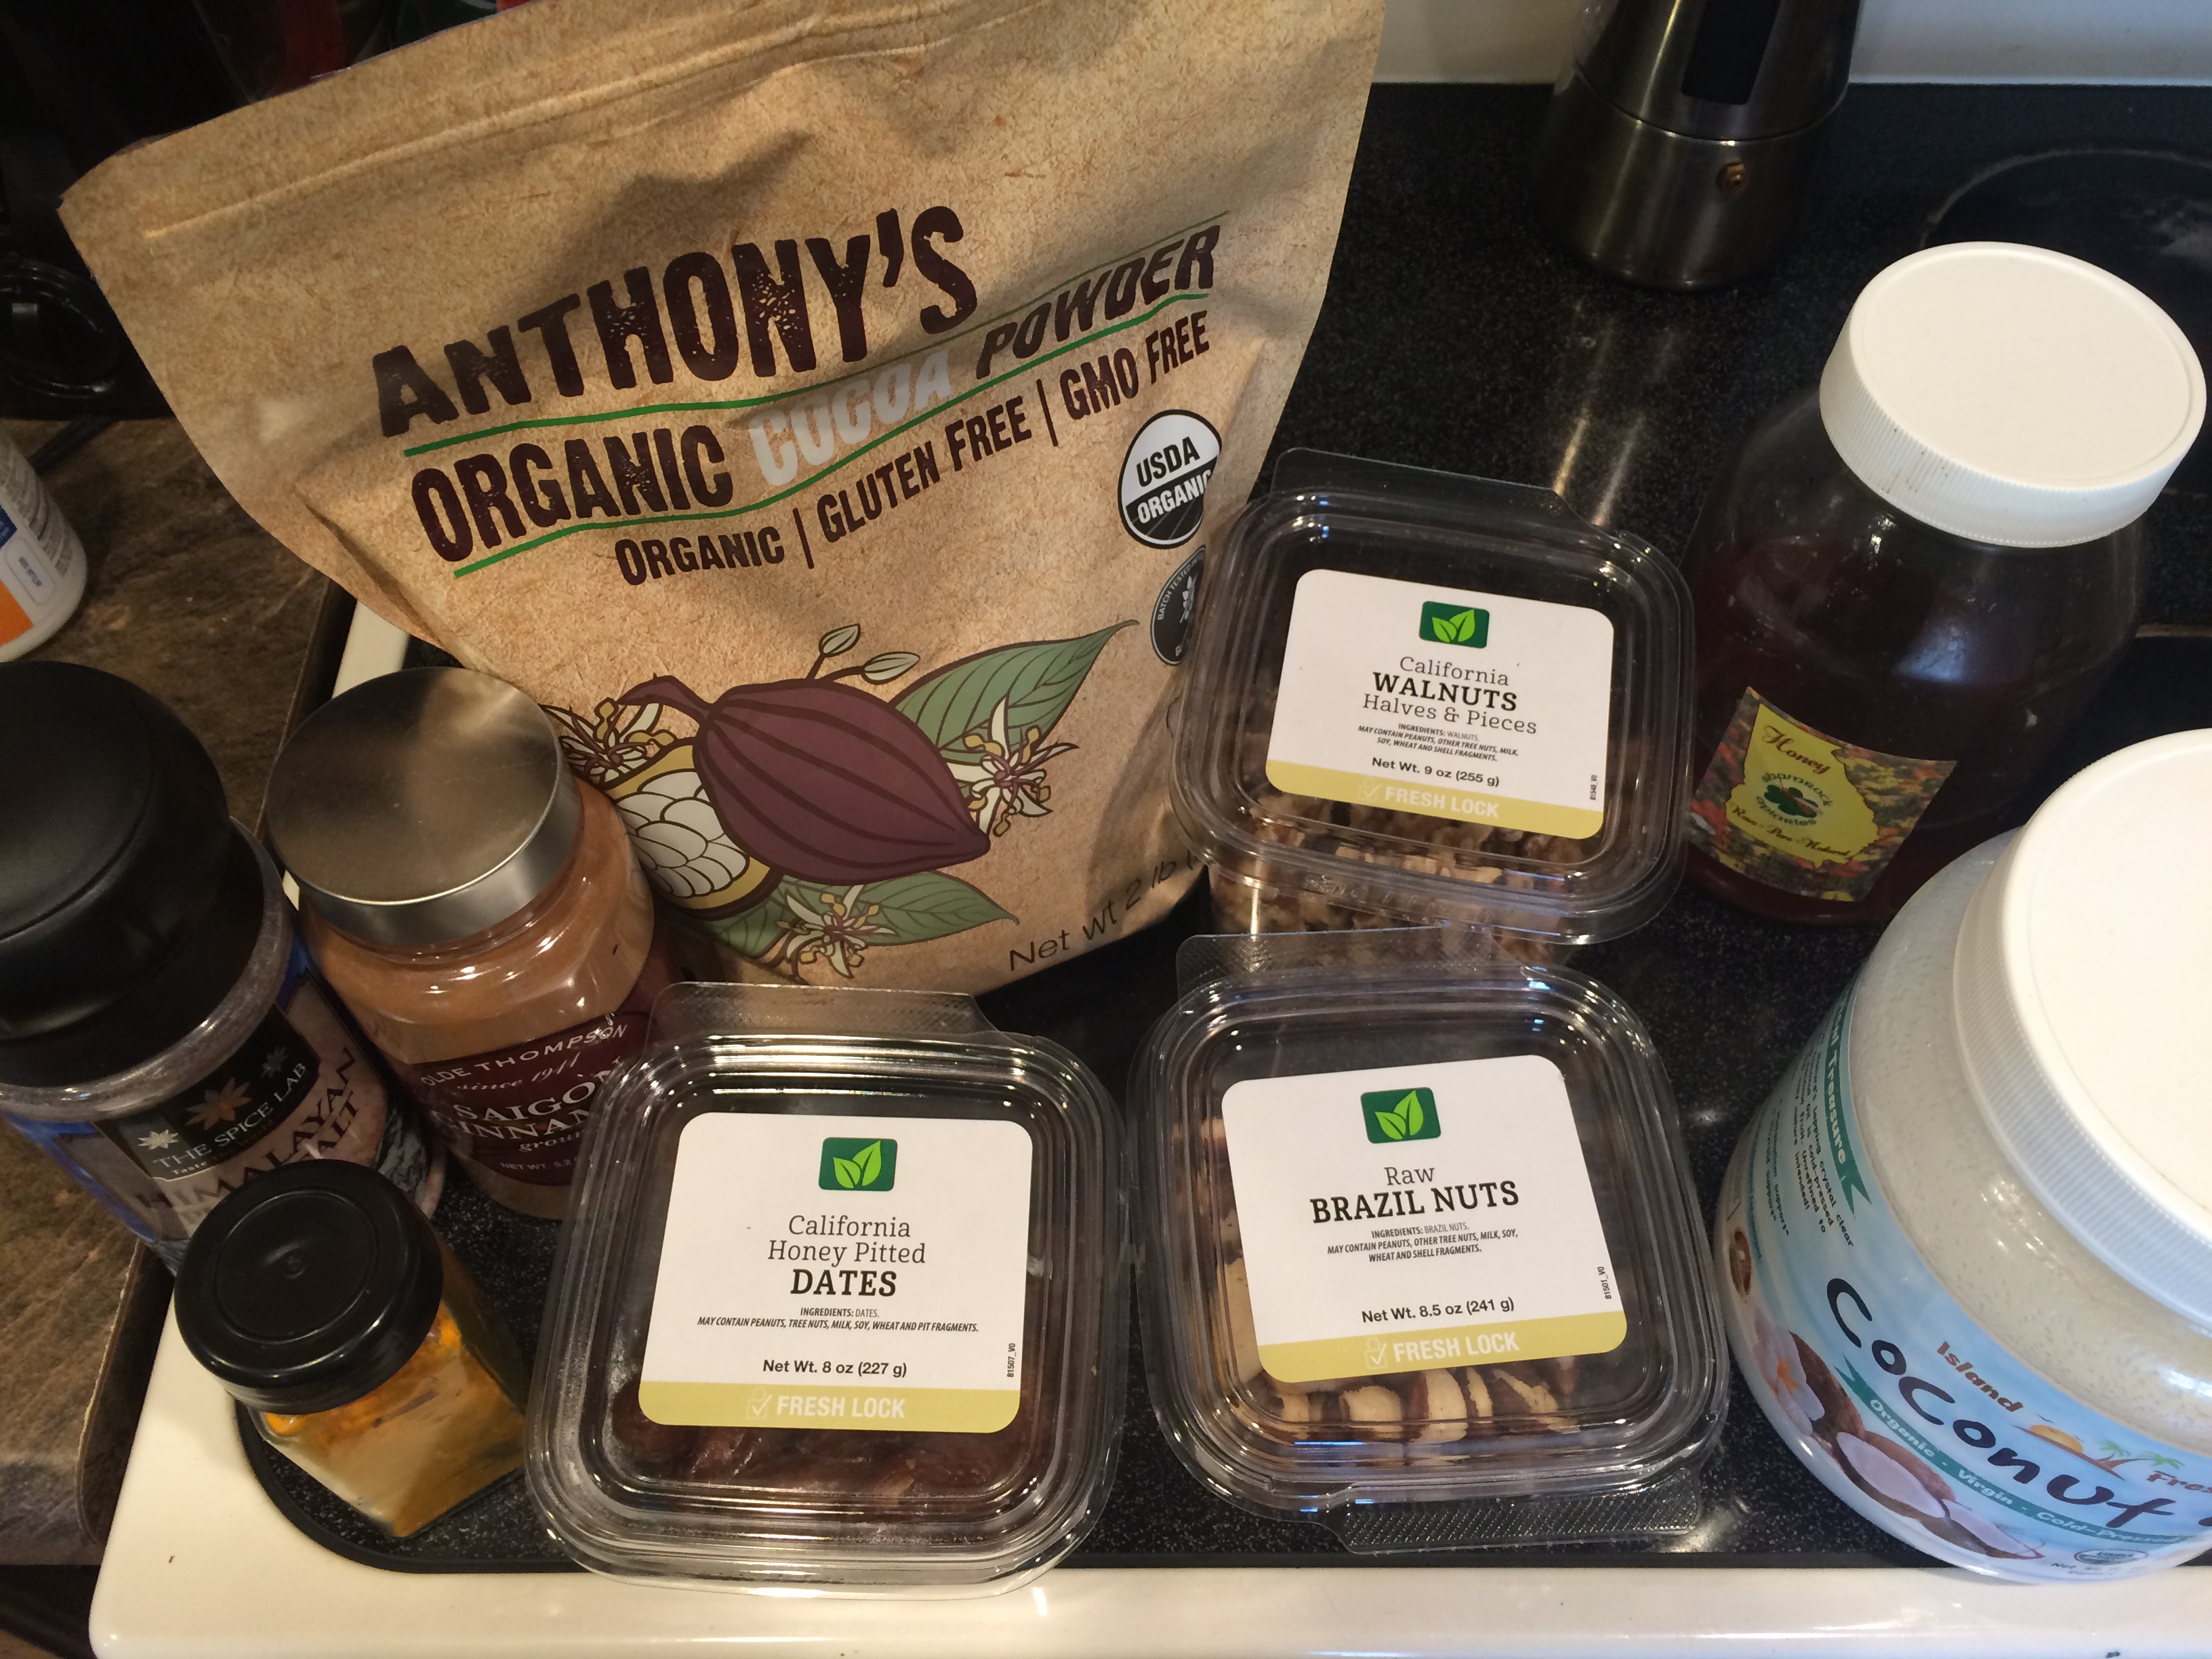
The ingredients.

I use local raw honey because it is good in so many ways and makes the top 10 Superfood list by David Wolfe. You can adjust the amount if you prefer it more or less sweet. I avoid sugar as much as possible and I don’t like to substitute with sugar substitutes, even the ‘natural’ ones.

I use fresh ground ‘peanut only’ peanut butter, avoiding the processed brands which add other ingredients like sugar or oils.

Salt always means Himalayan salt because it comes with other minerals.

I soak the walnuts (when I remember) for a few minutes – up to 24 hours – because it gives them a nice texture, and reduces phytates making them even more beneficial. Walnuts provide nutrients to improve brain function and are a good choice to add to your snacks.

Toasting your raw coconut is easy and adds a boost to the taste. I make sure my coconut has no added sugar. I enjoy buying Bob’s Red Mill coconut flakes because Bob’s is employee owned and I want them to succeed! To toast your coconut, simply place it in a large skillet and cook over medium-low heat, stirring constantly until it gets a beautiful golden brown color. Be sure to transfer it to a new bowl immediately since it can scorch quickly!

I use raw milk (the creamy top layer is best!) because that is what I have, but any milk will work.

Coconut oil (extra virgin organic) is also excellent for your brain and most of us need to eat more good fats. Contrary to the popular philosophy that dominated US culture for years, fats make you feel satisfied and you end up eating less.

Raw cacao powder has so many benefits with the mineral content and off the charts ORAC scores. Do some research – eating raw chocolate is a good daily habit! Making your own ensures you know exactly what you are eating.

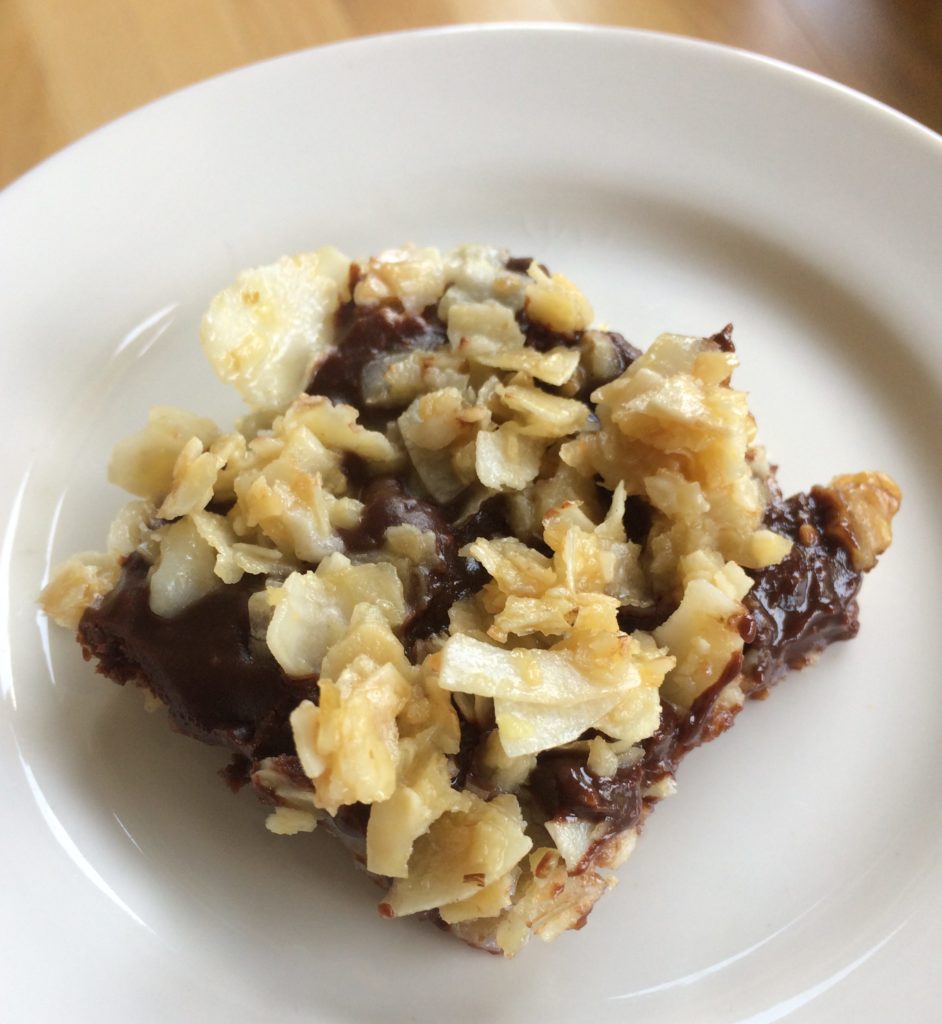
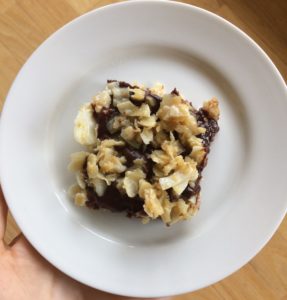
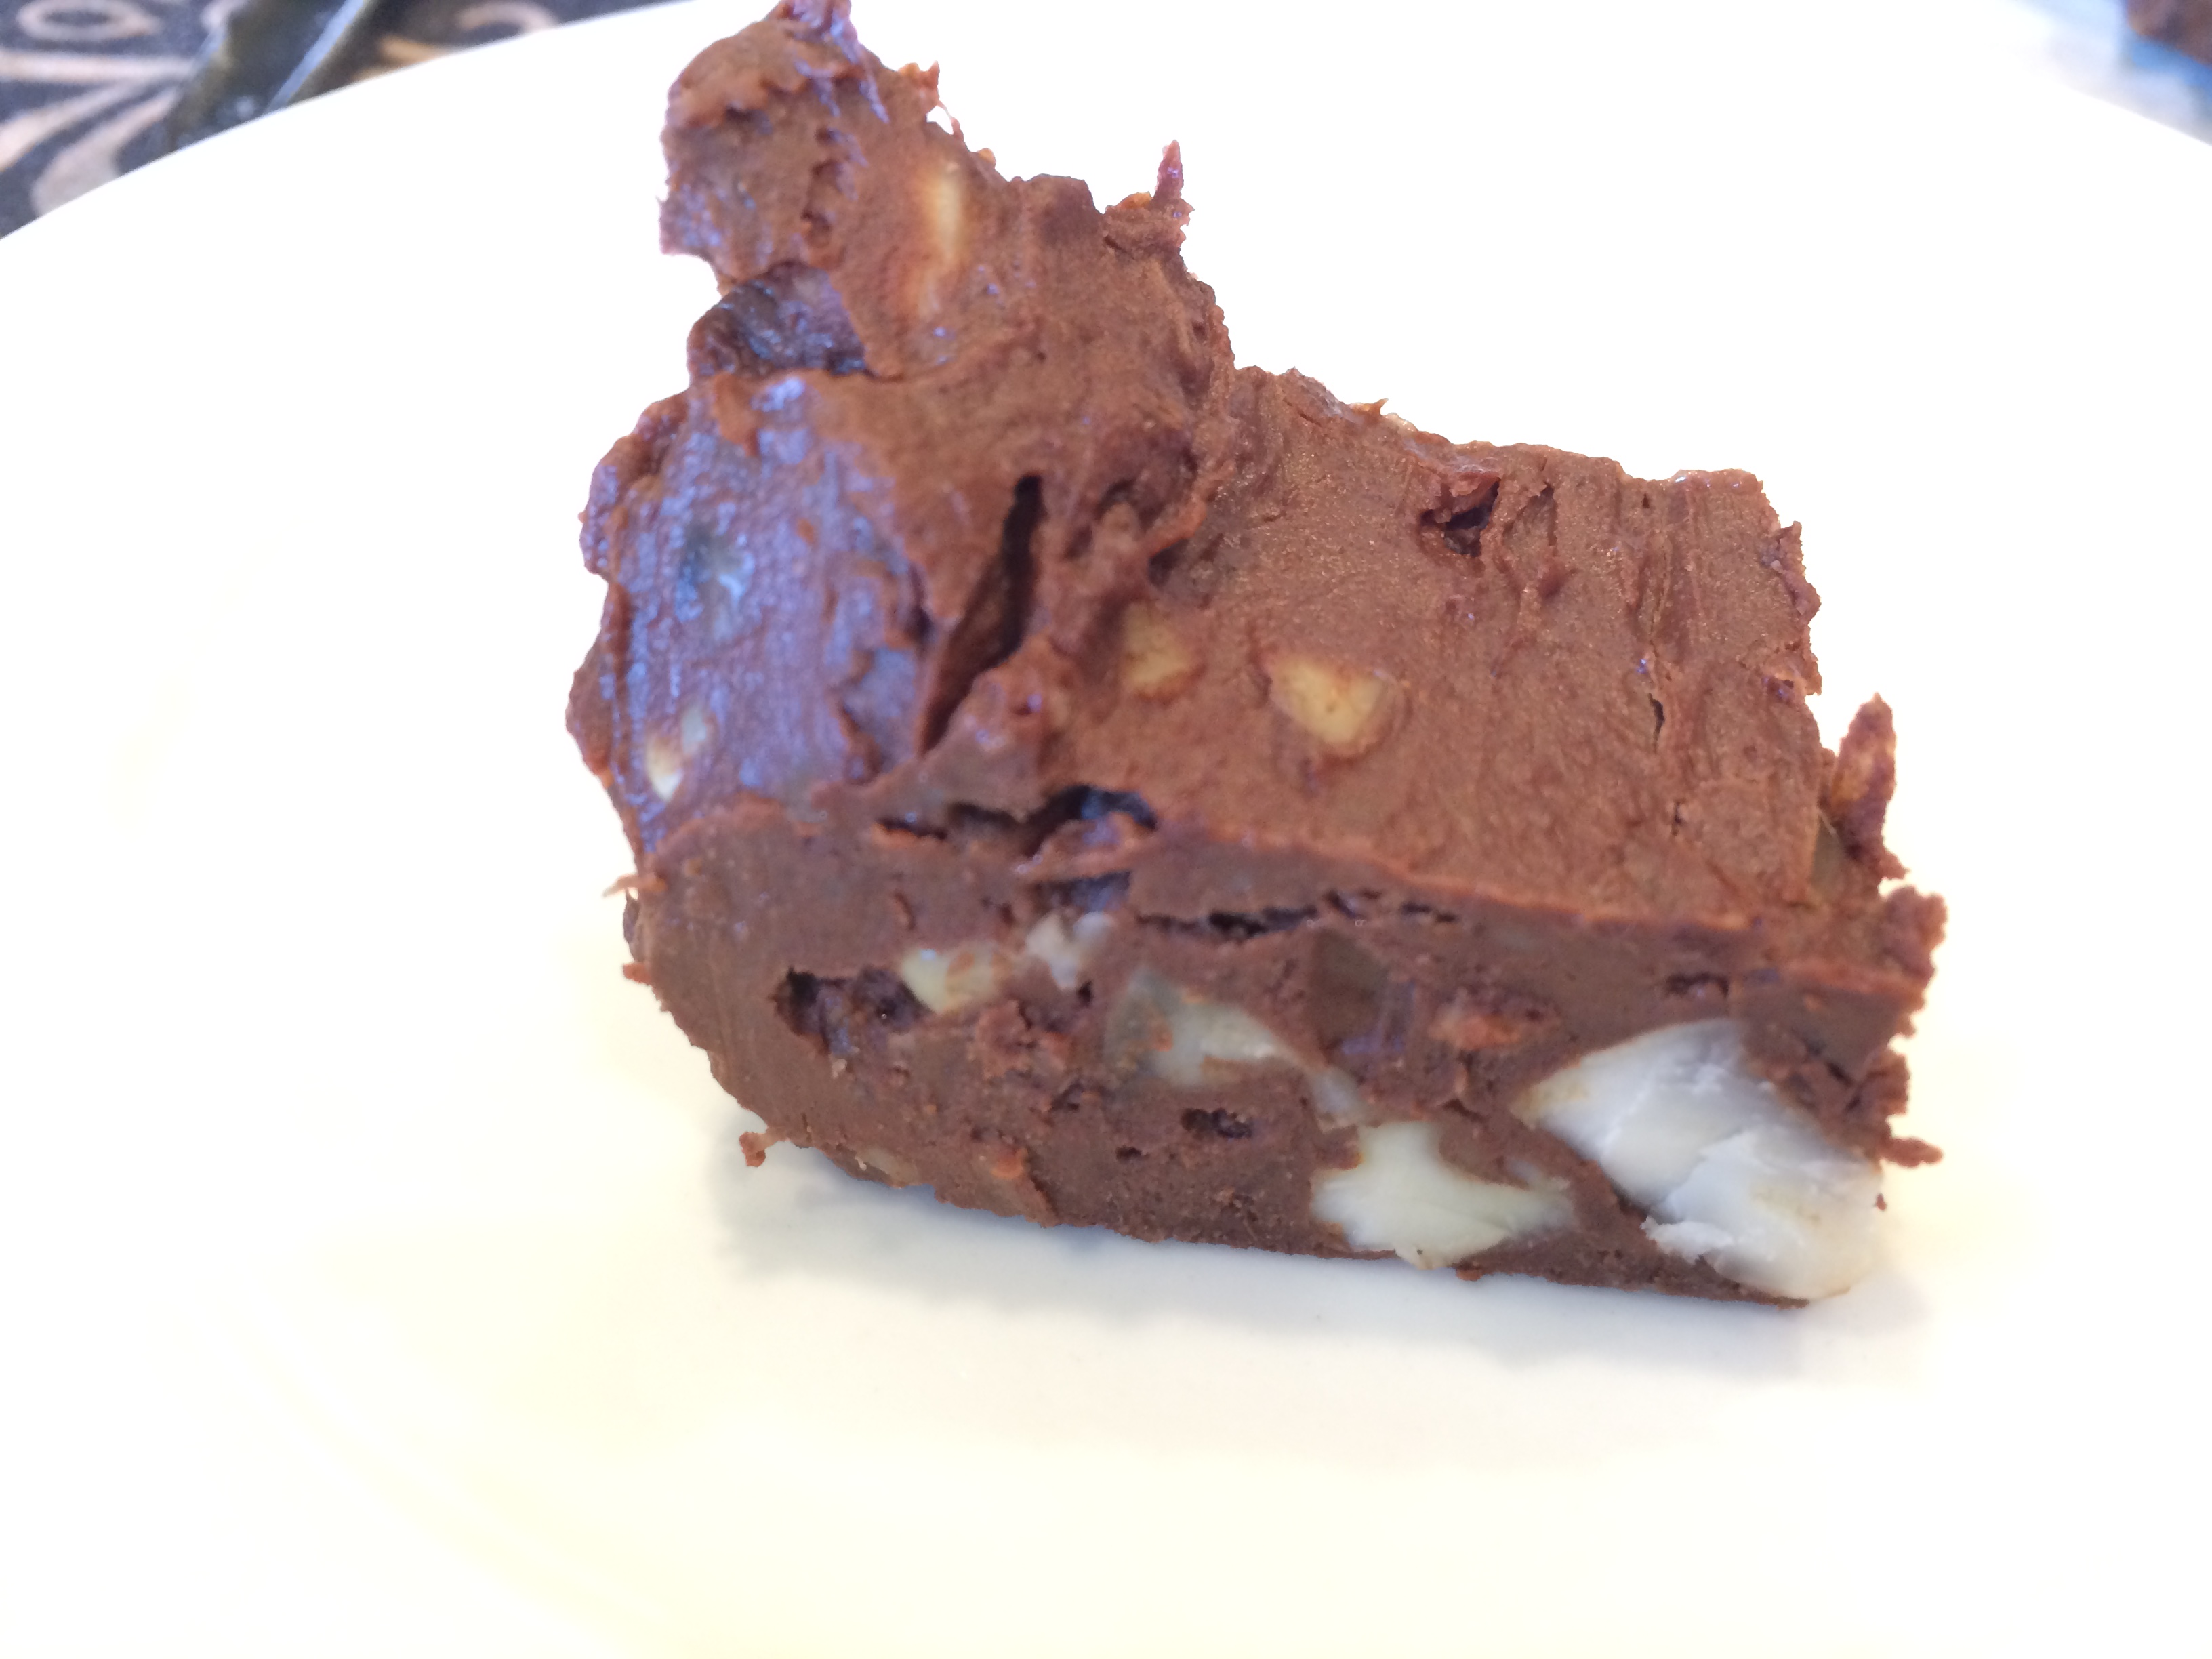
Here’s what you do, prepare a coconut mixture, which will go on the bottom and the top. Prepare the chocolate mixture for the center.

Coconut layer

  • 1/3 cup butter
  • 1/3 cup coconut oil
  • ¼ cup honey
  • 1 tablespoon molasses
  • ¼ tsp salt
  • 3 cups toasted coconut
  • 1 cup chopped walnuts (soak in water first – if you remember!)
  • ½ tsp vanilla

Melt butter and coconut oil gently, add honey, molasses and salt, stir until well combined. Add coconut and walnut and stir thoroughly. Put 2/3 of the mixture into a pan (line with parchment paper). Place in the refrigerator to harden.

Chocolate layer

  • ½ Cup coconut oil
  • ½ Cup peanut butter
  • ½ Cup raw cacao powder
  • ¼ Cup honey
  • ¼ tsp salt
  • ¼ Cup milk (almond, coconut, or dairy)

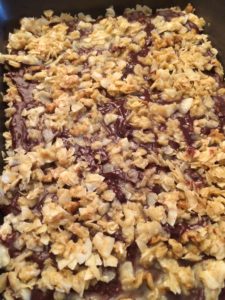
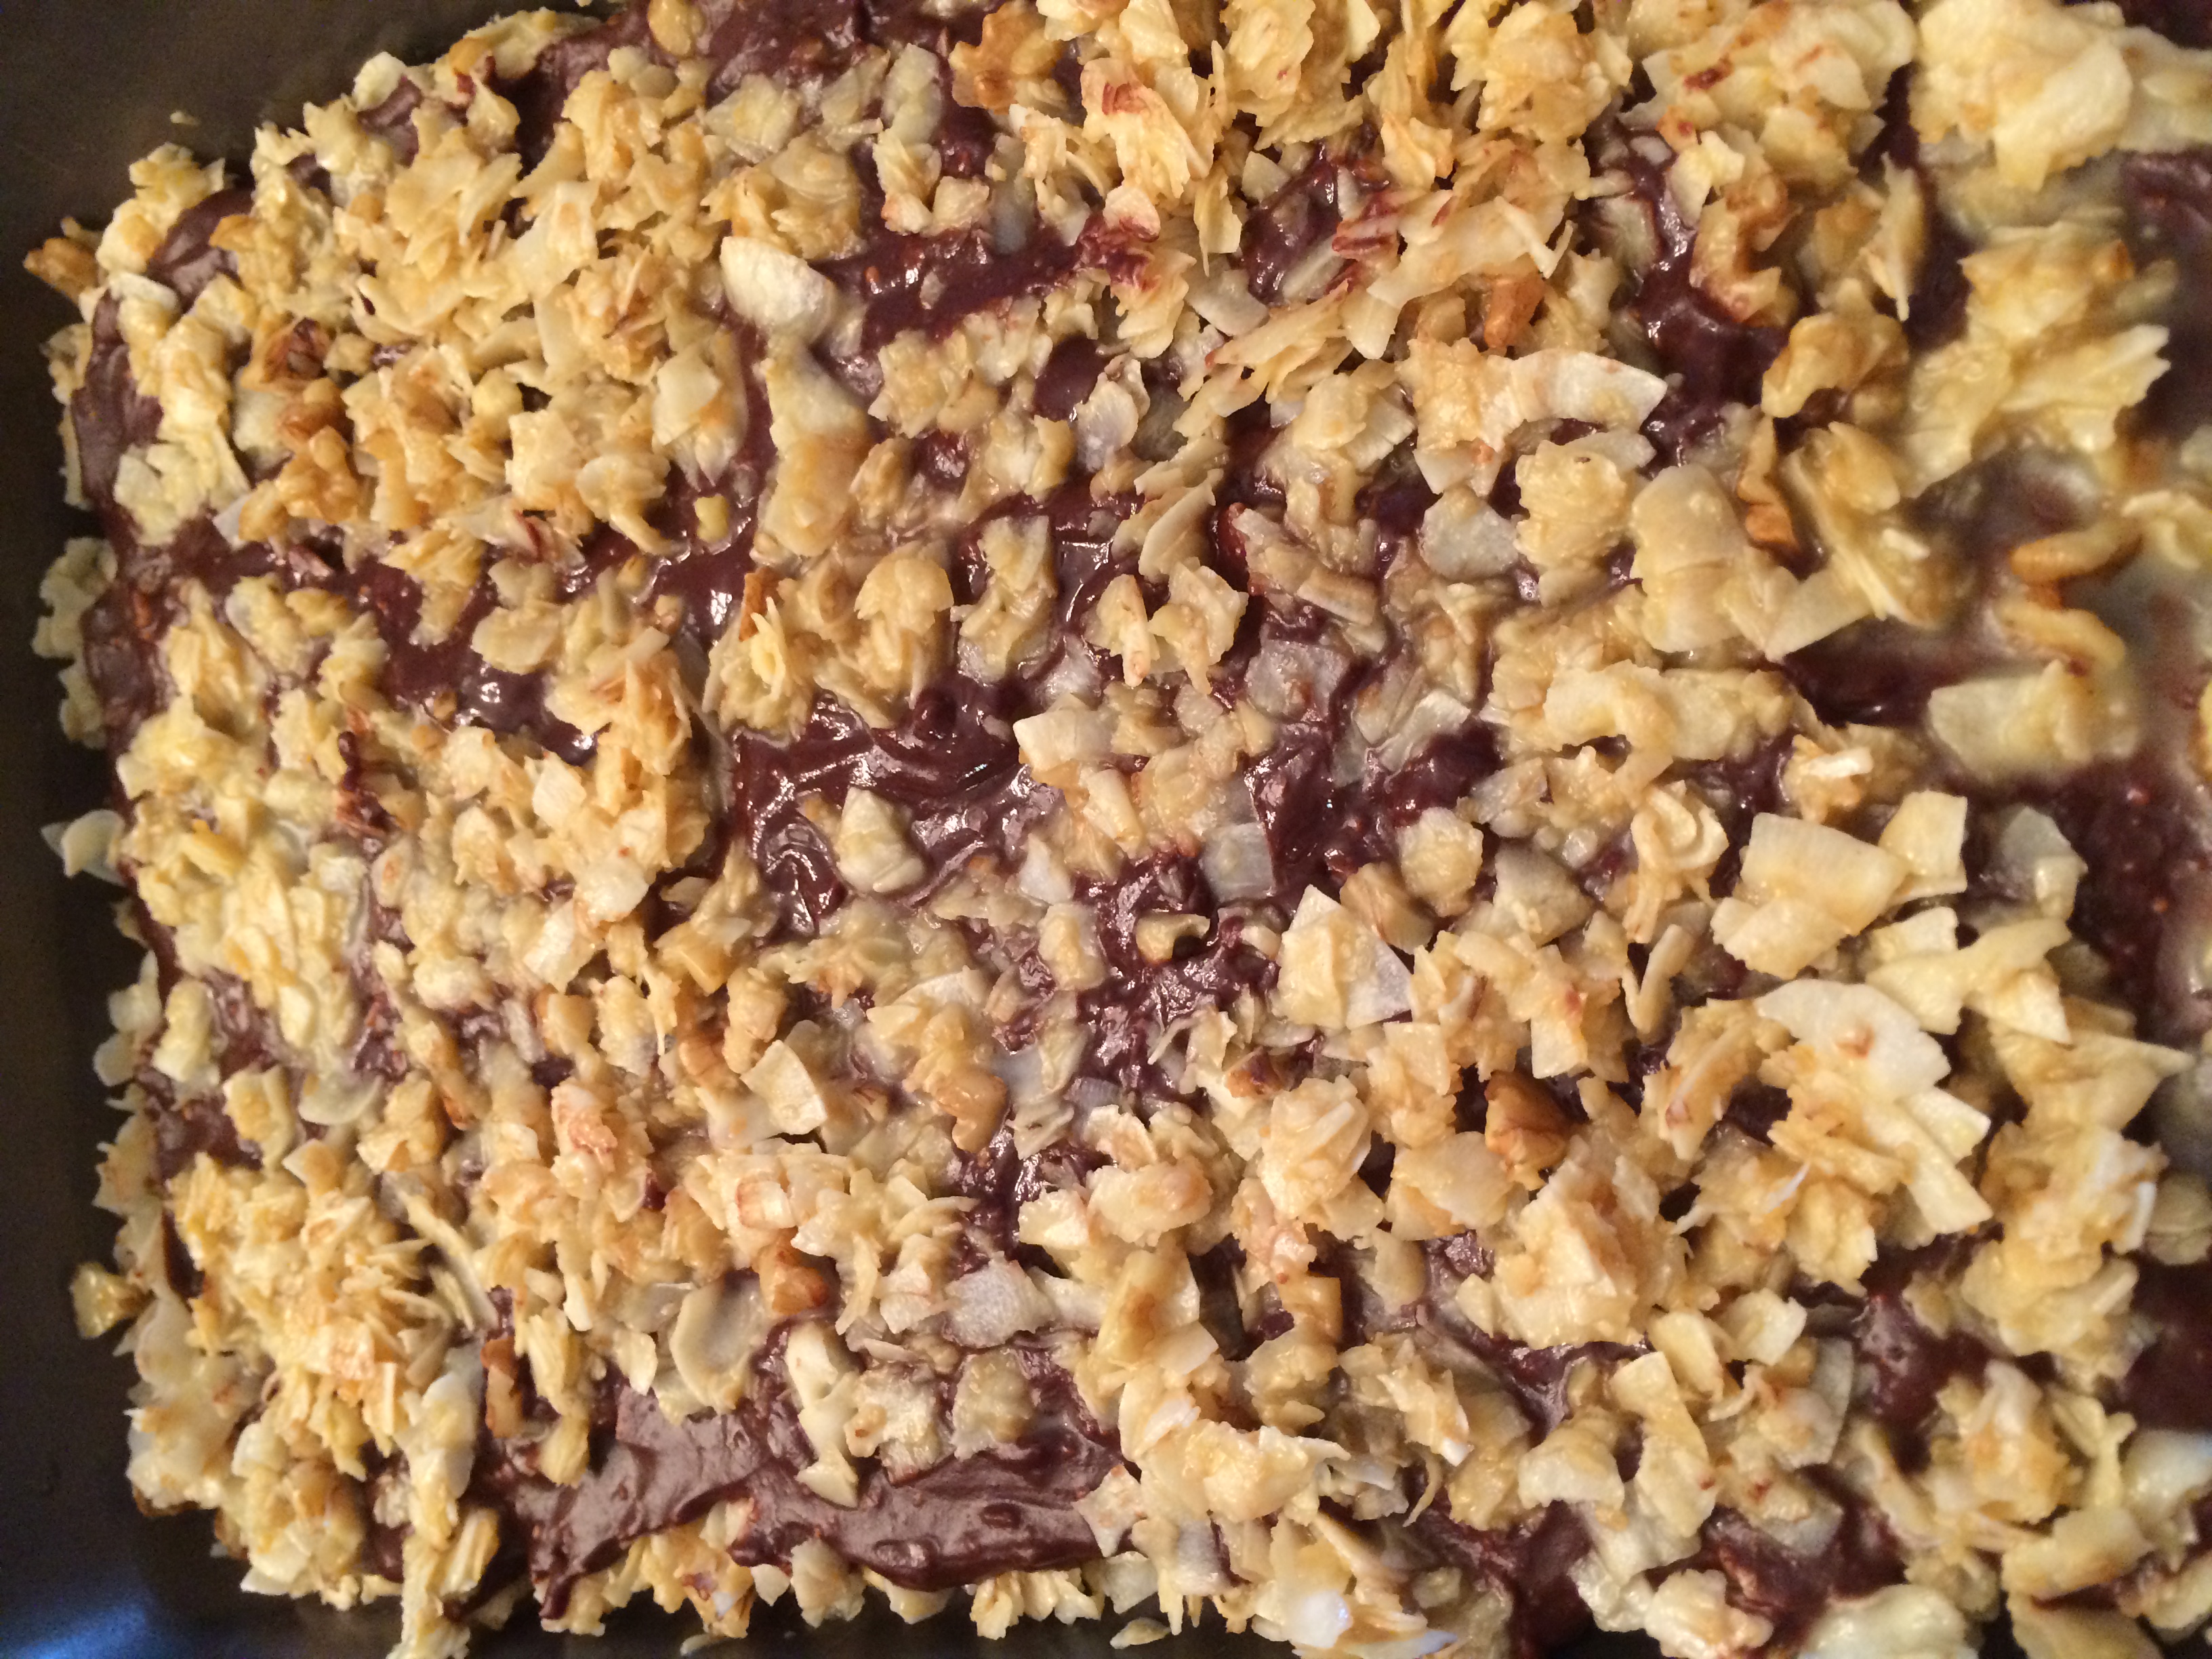
Melt coconut oil, peanut butter, and honey just enough to combine thoroughly. Add salt and milk and stir well. Pour over hardened coconut mixture and spread around gently. Sprinkle the remaining 1/3 coconut mixture on the top. Put in the refrigerator to harden.

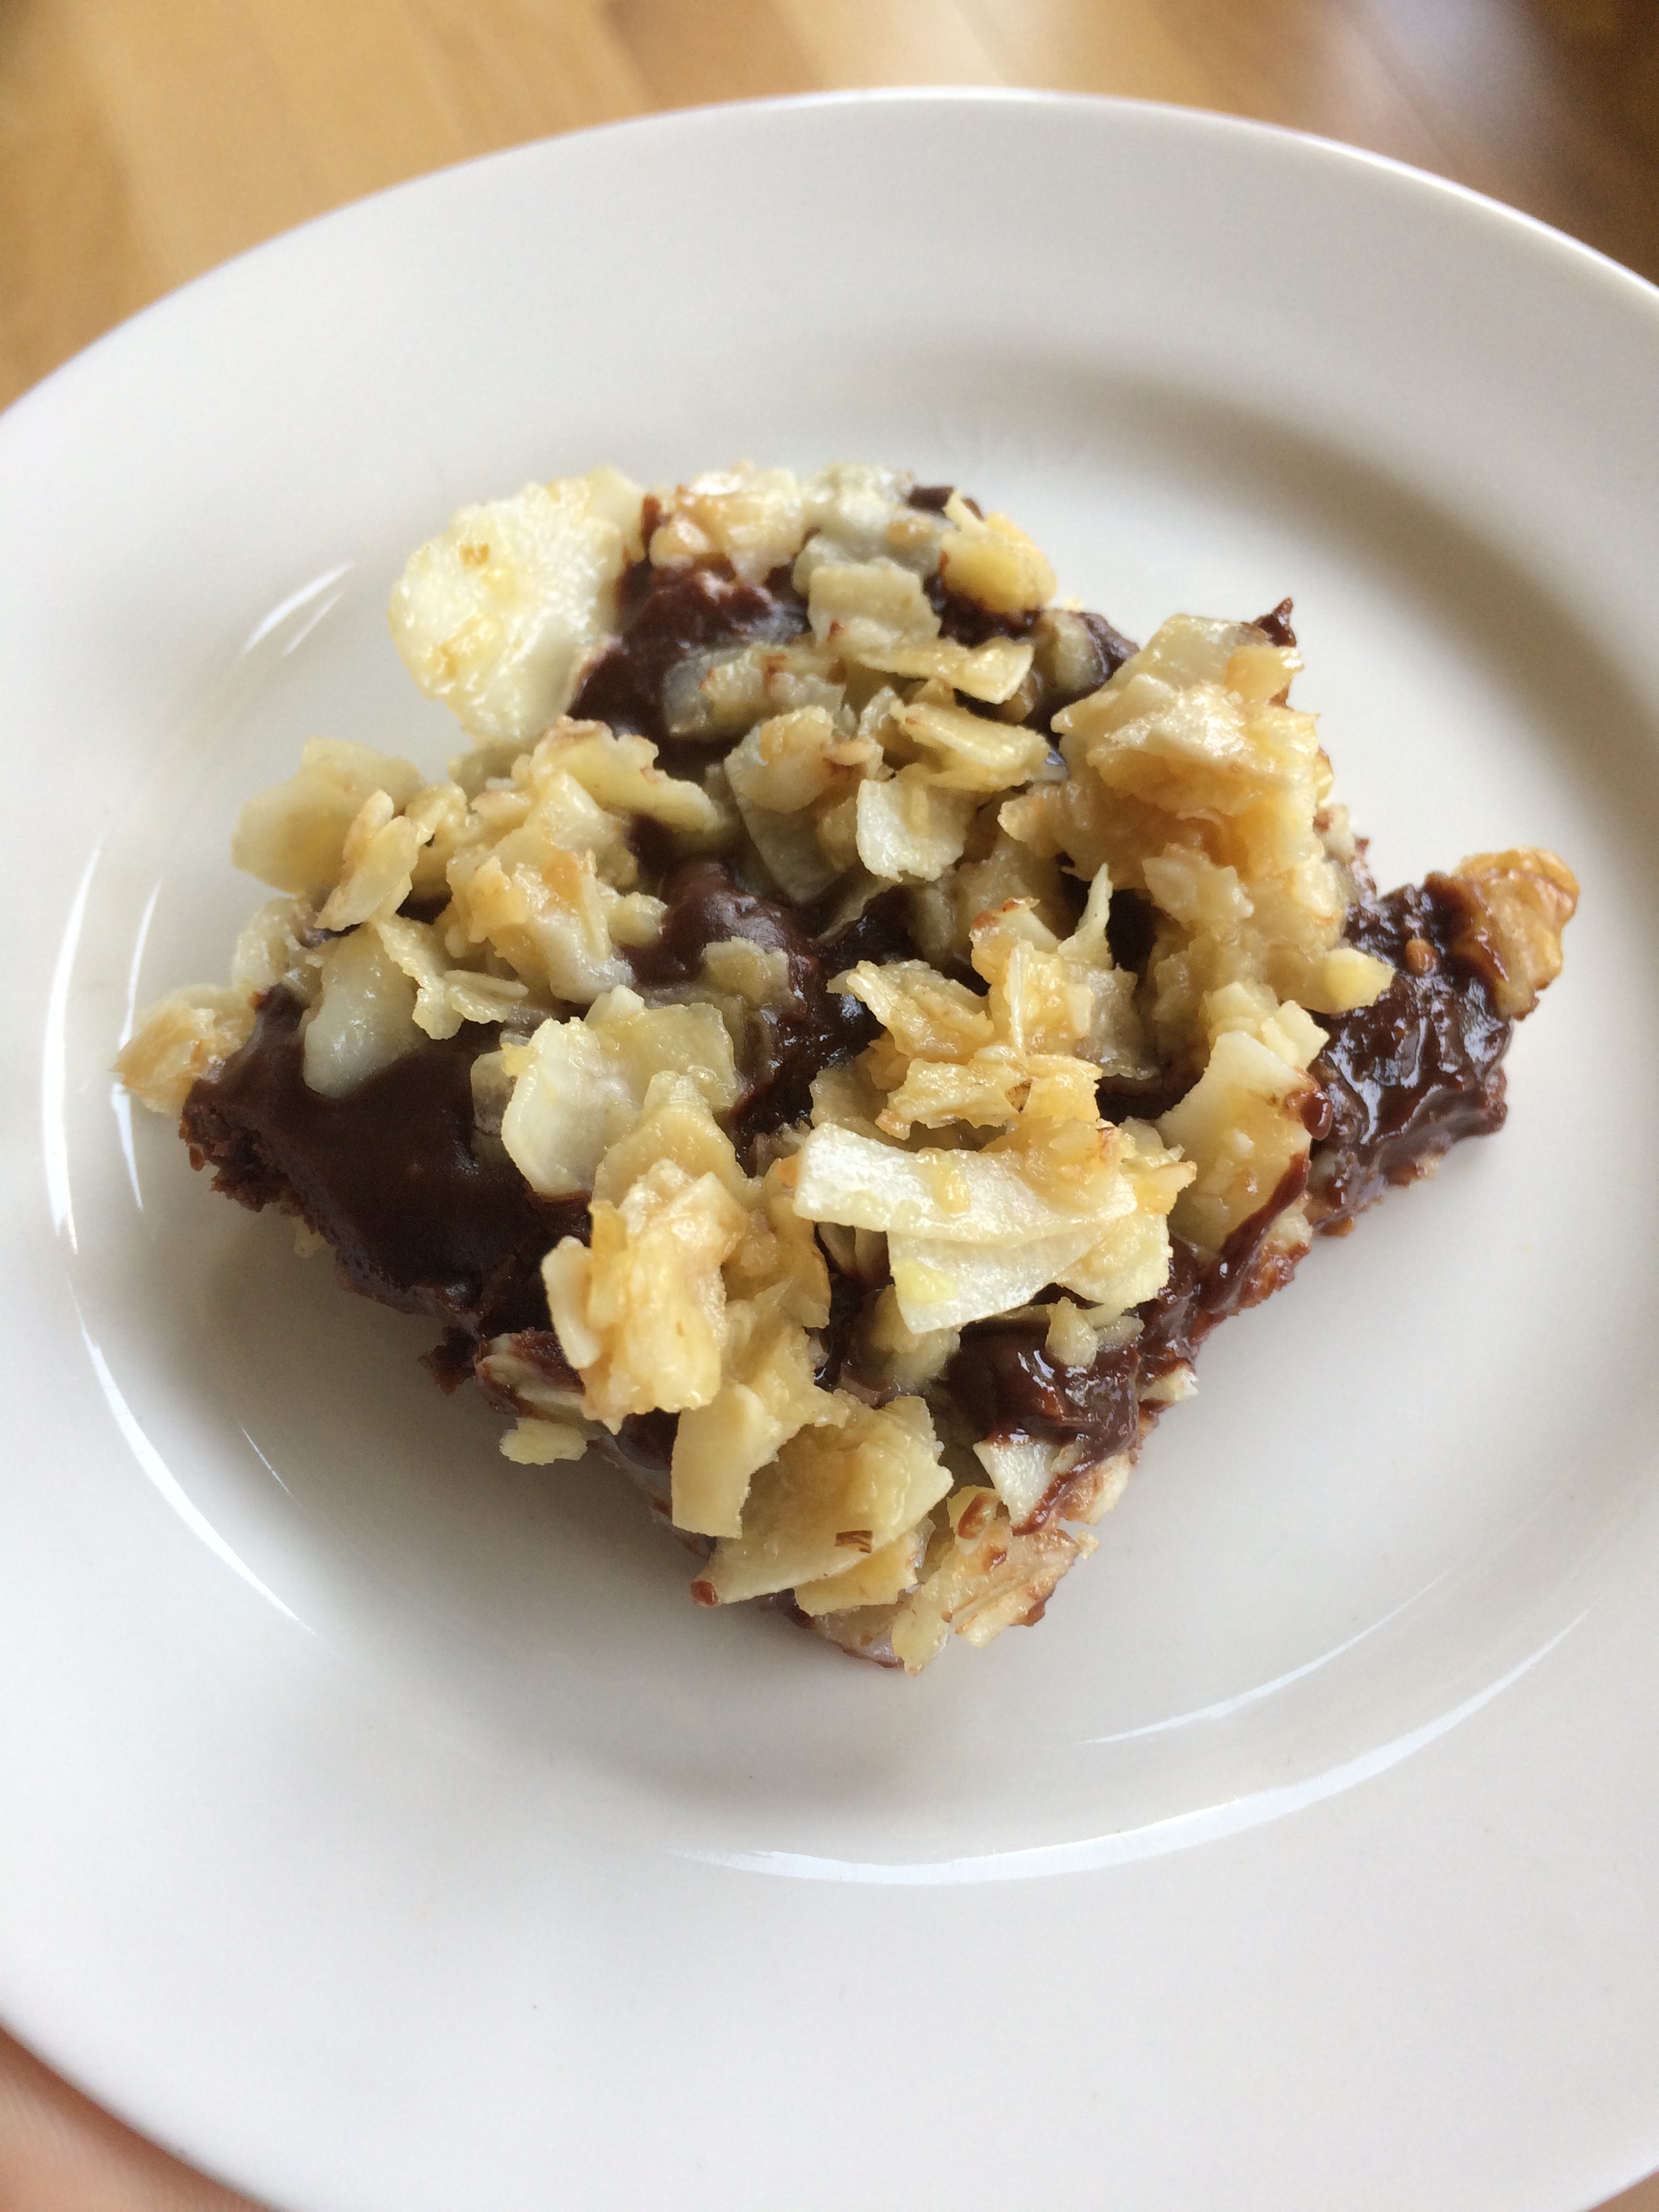
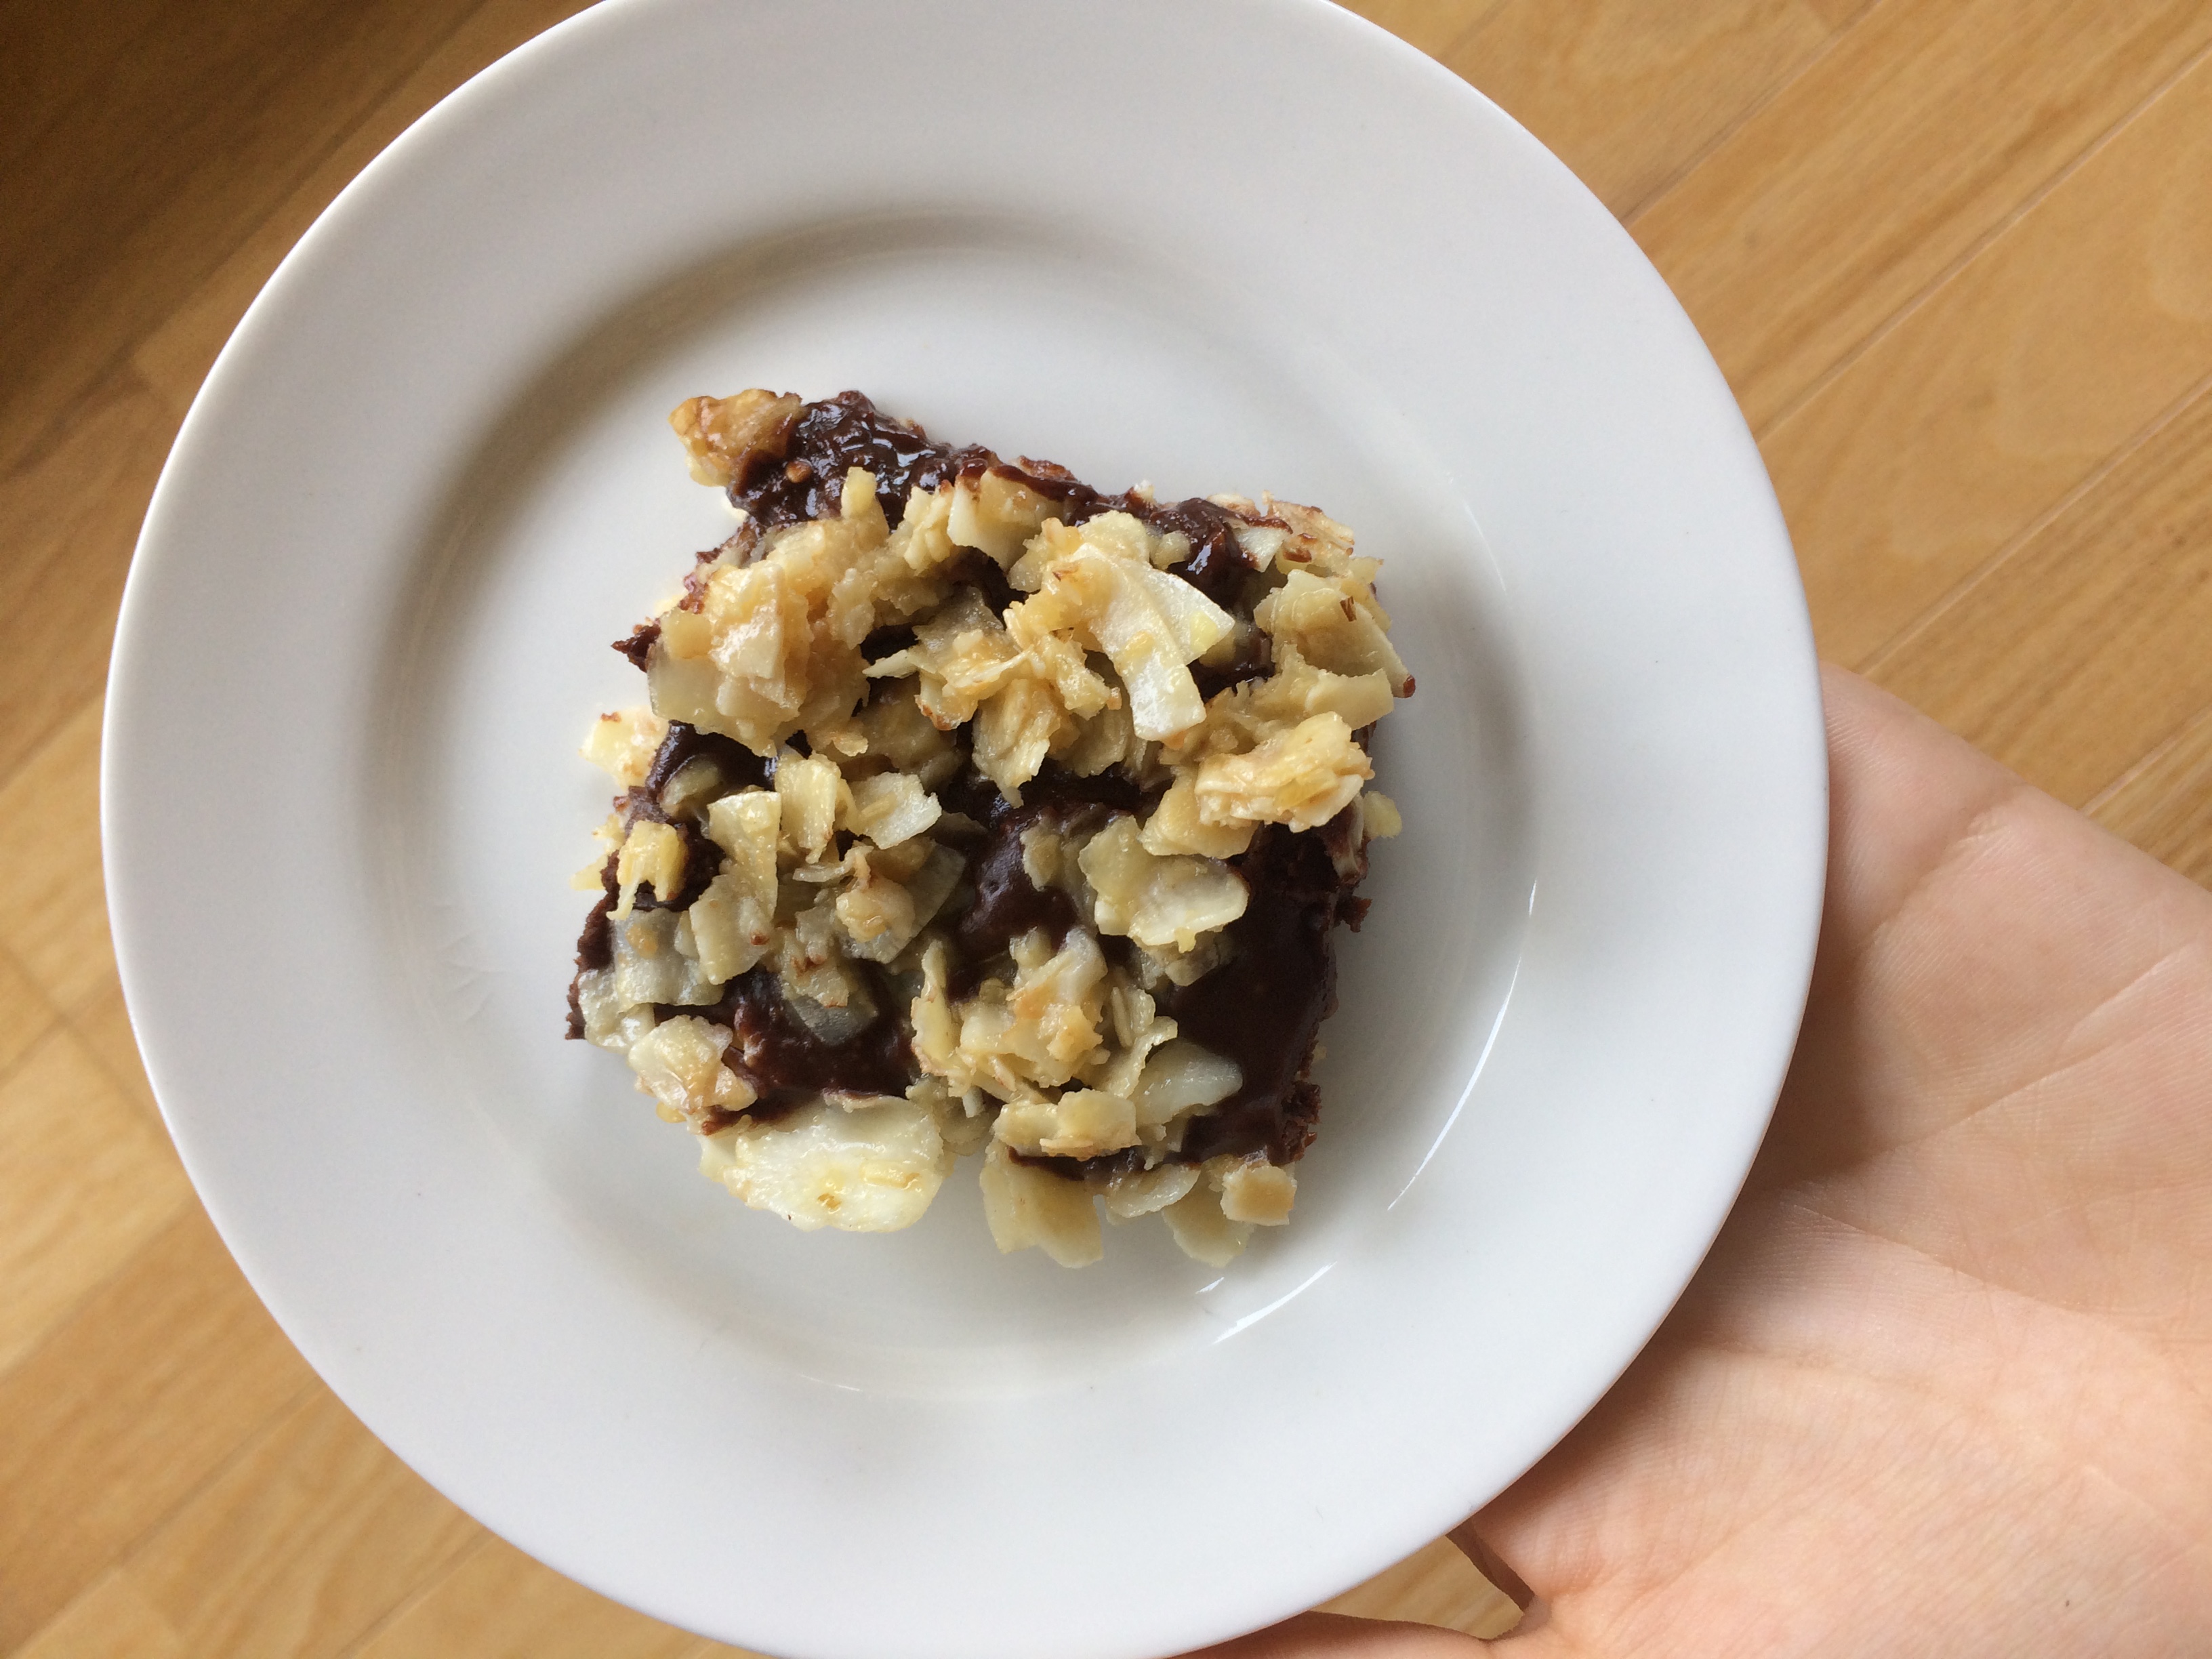
It doesn’t take too long to harden, then you can cut into squares and arrange on a tray or place into an air tight container and store in the refrigerator. The bars will melt if left out for too long, and they might be a little bit crumbly so be sure to eat with a plate or napkin underneath.

Enjoy – guilt free! Satisfying, delicious, nutritious!

Author: Becky Hastings, wife, mother, grandmother, and passionate follower of Jesus and truth. As a breastfeeding counselor for over 23 years Becky is devoted to helping parents make wise decisions for the long-term health and wellbeing of their babies. As a member of a Vaccine Safety Education Coalition, Becky writes and speaks on the topic of vaccine safety. From time to time Becky shares easy recipes that can help you have a healthier life!


Simply Delicious Raw Chocolate

There is no ‘wrong’ way to make raw chocolate. I encourage people to modify the ingredients and personalise this basic raw chocolate recipe according to your preferences. Here are the approximate quantities of a great batch of raw chocolate I made recently as part of a healthy snack demonstration for a group of ladies. It disappeared quickly and received many positive comments.

  • 1 cup organic raw cacao powder
  • 1 cup cold pressed virgin coconut oil at room temp, or warm.
  • 8 dates (soaked overnight and chopped, include water)
  • 1/2 cup brazil nuts & walnuts (soaked overnight and chopped)
  • 1/4 cup hemp seeds (optional)
  • ±2 tablespoons honey
  • 1/2 – 1 teaspoon turmeric
  • 1/2 – 1 teaspoon cinnamon
  • 1/4 – 1/2 teaspoon Himalayan crystal salt

Mix all the ingredients thoroughly in a bowl. If your coconut oil is hard, stand the container in hot water until it softens. Never microwave your ingredients! When thoroughly mixed, pour into a glass dish or a pan lined with parchment paper, spread around. Place in the refrigerator to harden – or the freezer if you are in  a hurry to eat some delicious raw chocolate!

Remove the parchment paper and cut on a chopping board. When the chocolate is too cold it may crumble. Be careful when serving because it may crumble. Store in the refrigerator.

In my raw chocolate demonstrations I like to discuss health, making more healthy food choices, adding more delicious and ‘good for us’ foods to our plates, and ORAC values. Most people are aware that eating chocolate, especially dark chocolate has specific health benefits. However, consuming raw cacao powder delivers a phenomenal array of mineral content and unique properties.

According to David Wolfe, Cacao is the best natural food source of antioxidants, Magnesium, Iron, Chromium, Manganese, Zinc, Copper, Vitamin C. Omega 6 Fatty Acids, Phenylethylamine (PEA) (Cacao is one of the great weight-loss foods because the minerals and the PEA molecule help shut off the appetite).The ORAC value of raw cacao powder is off the charts when compared to fruits we have come to think of as high in antioxidants. The ORAC Value for blueberries is 32, wild blueberries 61, compared to raw cacao powder with a value of 955. ORAC (Oxygen Radical Absorption Capacity assay is a standard measure of antioxidant concentration.[1]

I really liked the result of soaking the dates and the nuts overnight. There are benefits to soaking nuts (reduction of phytates) but they also enhance the delivery. Soaking also made the dates moist and mixable. I use walnuts because they are excellent for brain health and brazil nuts because they delivery selenium.

Sorry, I didn’t get a picture of the actual raw chocolate – it was so good and appreciated by so many, that it was eaten up fast! I need to make another batch and try to remember to take a picture! [Edit: I did it! Note the picture at the top. It was also delicious!]

Author: Becky Hastings is a wife, mother, grandmother, and passionate follower of Jesus and truth. As a breastfeeding counselor for over 23 years Becky is devoted to helping parents make wise decisions for the long-term health and wellbeing of their babies. As a member of a Vaccine Safety Education Coalition, Becky writes and speaks on the topic of vaccine safety. From time to time Becky shares easy recipes that can help you have a healthier life!

[1] David Wolfe, Superfoods, The Food and Medicine of the Future, 2009.

Make Your Own Easy Milk Kefir

I just made a quick video to show how easy it is to make your own milk kefir! I’ve been making my own milk kefir for around 3 years. When I started it was a bit of a daunting procedure, but I’ve figured out how to make it easy and delicious. In this under 3 minute video I share some great tips and insight I’ve discovered. This is the real me. Not too much make-up, and just a normal kitchen. My daughter helped me by recording, but we only had one take!

Adding probiotics to our diet has a lot of immune boosting benefits. Here are some of my recipes that contain kefir:

Chia Breakfast Salad
GF Waffles
The Best Curry You Ever Made
GF Banana Bread

If you’d like some dried kefir grains, I have a limited supply, but am happy to send them to you for the cost of postage.

Thanksgiving 2015

Author: Becky Hastings is a wife, mother, grandmother, and passionate follower of Jesus and truth. As a breastfeeding counselor for over 23 years Becky is devoted to helping parents make wise decisions for the long-term health and wellbeing of their babies. As a member of a Vaccine Safety Education Coalition, Becky writes and speaks on the topic of vaccine safety. From time to time Becky shares easy recipes that can help you have a healthier life!


Make Your Own Tomato Soup

Since we try to eat clean, organic, non-processed foods, there aren’t too many restaurants we frequent in our town that majors on the franchise model. But, I do have a confession: I love Panera Bread’s tomato soup. It’s a little expensive for a bowl, and I don’t eat the bread, but occasionally I indulge myself. Many times I considered trying to match their recipe, but last week, after having a significant molar pulled, I really needed some soup! So I finally attempted it, and was delighted with the result.

For the same price as a bowl of tomato soup from Panera, I can make a huge pot. Not only is it delicious and economical, it is also quick and easy. I encourage you to give it a try. As always with my cooking, I use a great deal of flexibility. I have made it two times and both times were different, but still great.

I added jalapeño and cayenne pepper just because I enjoy hot flavors and they are both really beneficial for healing and the immune system. You can leave them out to have a milder flavour. See notes at the end on optional ingredients to add.

  • 2 Tablespoons oil suitable for heating (avocado, coconut, or butter)
  • 1 chopped onion
  • 4 – 8 cloves garlic, chopped
  • 1/2 – 1 jalapeño, chopped (optional)
  • 28 oz can of diced tomatoes ( I used Simple Truth Organic)
  • Either one 25 oz jar of your favorite tomato pasta sauce (I used Simple Truth Organic Tomato Basil) OR another 28 oz can of diced tomatoes.
  • 1 cup chicken stock (the 2nd time I used beef stock)
  • 1 Tablespoon honey
  • 1 Tablespoon dried basil, or 5 leaves fresh
  • 1/2 Tablespoon dried oregano
  • 1 teaspoon salt
  • black pepper
  • cayenne (red) pepper (optional)
  • 1/2 cup (or more) half and half, cream, or milk

In a heavy bottomed saucepan, sauté the onion and garlic in your preferred oil until translucent. Add jalapeño, if you like the heat. Add the remaining ingredients, except for the half and half. Bring to a boil. Allow the pot to simmer on low with the top off for about 15 minutes, then add the half and half, milk or cream and allow to heat through. Use an immersion blender or transfer all (or part) to a regular blender. Serve with whatever you enjoy. It’s great plain, but it was also really good sprinkled with cheese!

Optional variations: For an additional nutrition boost, the second time I made it, I added 4 carrots to the above recipe. When it was put through the blender, there was no obvious indication of carrots, except that it may have been a little thicker – and the beta carotene content was boosted!

[Edit: I just made this again on 29 March 2017 and included about 1 1/2 cups of butternut squash cut into cubes, a handful of leafy green beet tops, 1 whole peeled fresh tomato (because it was very ripe and needed a place to be useful) and 3/4 inch of fresh turmeric root! I only added the turmeric at the blending stage, so it wasn’t cooked. Because the butternut is sweet, I omitted the honey. It was great!]

I’m sure it will be easy to freeze and reheat, but I didn’t have enough left over to try!

DSC_0062Becky Hastings, wife, mother, grandmother, passionate follower of Jesus, seeker of truth and health. Facing a world quite different from the one in which I grew up, I seek to research and understand the very real dangers threatening the health and freedom of today’s parents, providing information to navigate towards joyful family living!  Posted 31 January 2017


GF Banana Bread

img_3536In August 2012 I decided to do a 21 day sugar fast. I’d been doing various similar fasts for a couple of years. Sometimes I would fast from sugar AND coffee (tough). This time I added bread/wheat to my fast. It was remarkable how after about 2 days of eating no wheat products how much better I felt. I never thought I had a problem or any sensitivity to wheat, but cutting it out left my gut/digestion feeling so good and I had so much energy, that even after 21 days I decided I could live without wheat forever! If you had told me that I would make this decision, I wouldn’t have believed you because I really enjoy baked items. But that short fast cured my addiction and I no longer felt compelled to devour bread, doughnuts or cake!

I admit I have had the occasional cookie or cinnamon roll when my daughter has made them. But by and large I have avoided most wheat containing foods since August 2012. I didn’t immediately rush to find gluten-free flours and replacement recipes. I just stopped eating muffins, cake, bread, etc. I truly feel so much better that it is easy to find other food choices that satisfy.

However, recently I have been hankering for banana bread. Maybe it’s because of the Christmas season. Maybe because I had a lot of ripe bananas. So after nearly 4 1/2 years of gluten-free living I have experimented with baking my first GF banana bread!

I reduced the sugar to 1/3 of a cup, so it’s not exactly sugar-free – but it is LOW sugar! I usually write my recipes in steps so that it is really easy to follow – that is the way I wrote them for my children to learn to cook. I like to use Bob’s Red Mill because they have a great ethos and are employee owned, but other than the GF flour, you could probably substitute other brands. Also, if you don’t have the Arrowroot, you could just try  cups of Bob’s GF Flour.

GF Banana Bread

In a bowl combine together:

  • 1 and  ¾ cups Bob’s Red Mill GF Flour
  • ¼ cup Bob’s Red Mill Arrowroot Flour
  • 1/3 cup brown sugar (organic)
  • 1 tsp baking powder
  • ½ tsp baking soda (Bob’s)
  • ½ tsp Himalayan salt
  • 1 tsp cinnamon
  • ½-1 cup pecans from my friends Al & Mary at Pearson Farm (I used whole pecans, but it makes it challenging to cut into slices, so next time I will probably chop them).

I combined the following in my Vita-Mix, but if you don’t have a blender, or food processor, just use what you have to mash the bananas and mix with the other ‘wet’ ingredients.

  • 2 eggs (organic)
  • 3 very large ripe bananas (organic)
  • ½ cup butter melted (organic)
  • 3 Tbl milk kefir (or milk, or water)
  • 1 tsp vanilla

Pour the wet mixture into the dry mixture and stir until combined with a wooden spoon. Lightly grease a loaf pan with butter (I used glass), pour batter in. Bake at 350 degrees F for 50-55 minutes until a toothpick comes out clean. Allow to cool on a rack for 10 minutes then remove from the pan.

Seriously, I have probably made hundreds of regular banana breads in my 34+ career as a mother of five children. This GF loaf came out of the pan better than anything I’ve ever made. It was so good I had to take a picture of the bottom!

img_3535

This is my second GF recipe. My first is GF SF waffles. They are light and fluffy and really easy to make. I don’t indulge in them often, but enjoy making them for children and grandchildren.

Thanksgiving 2015

Author: Becky Hastings, wife, mother, grandmother, passionate follower of Jesus and truth. As a breastfeeding counsellor for over 23 years Becky is devoted to helping parents make wise decisions for the long-term health and wellbeing of their babies. As a member of a Vaccine Safety Education Coalition, Becky writes and speaks on the topic of vaccine safety. As a diversion, she sometimes posts recipes!